IM_208.CCF.20170508-EN
21
Setup and operating
5. Hold the Gimbal vertical, ideally supported on a
table.
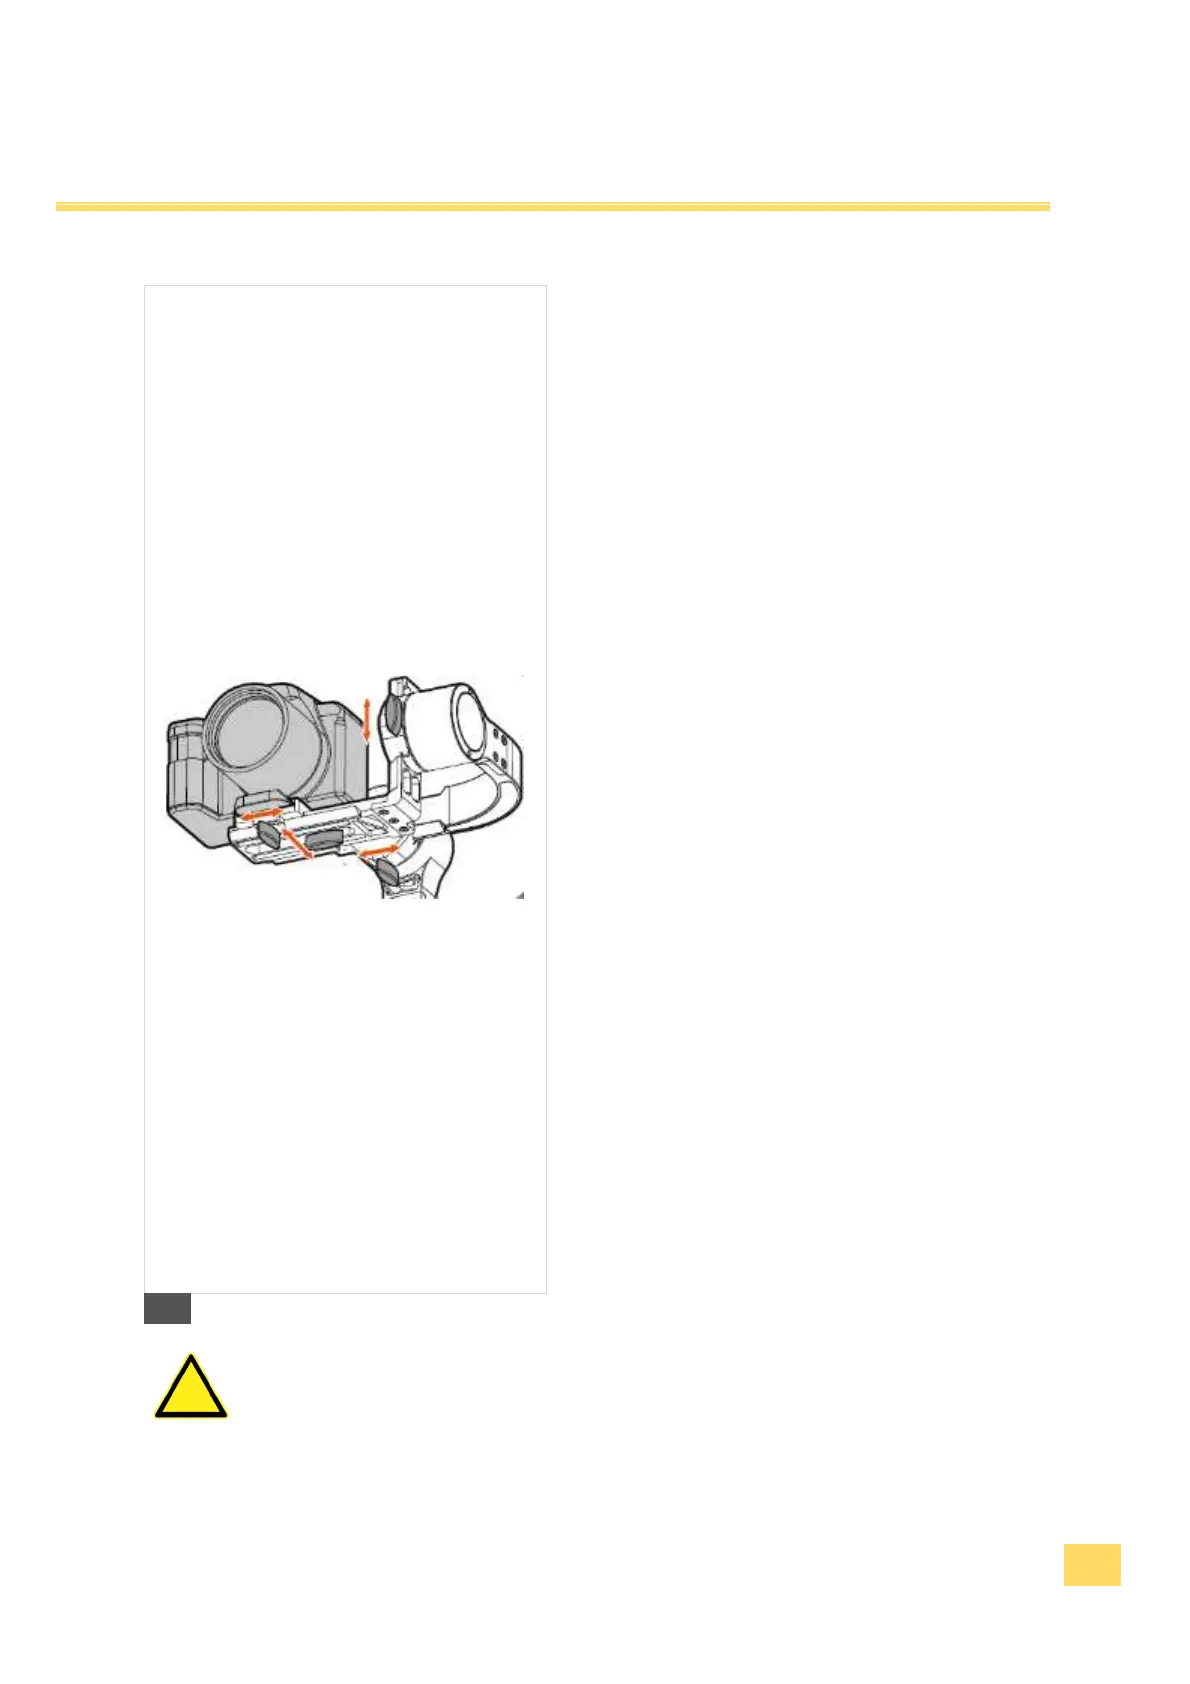
6. Balancing the camera with the assembly plate.
Loosen the locking screws of the assembly plate a
little bit and balance first roughly the camera
forwards and backwards as well as on to the right
and to the left side. A good balance is reached if the
camera keeps the position independent.
7. Tighten the locking screws again.
8. Balancing the pitch axis. Bend the camera
approx. 90 ° forwards or backwards. Loosen the
locking screw of the Pitch axis a little bit and push
the L-arm in its guidance forwards or backwards,
until the camera keeps the position independent
again.
9. Tighten the locking screw again.
10. Balancing the roll axis. Align the camera
forwards looking again. Now the camera should
keep independently its position and may not tip
forwards or backwards any more. Perhaps, you
must correct a little bit. Loosen the locking screw of
the roll axis a little bit and push the L-arm in its
guidance on to the left or on to the right, until the
camera keeps the position independent. Implicitly
do not unscrew the locking screw of the roll axis
completely!
11. Tighten the locking screw again.
8
Implicitly do not unscrew the locking screw of the roll
axis completely. Otherwise, the camera with L-arm to the pitch motor will
drop down and the wiring which is arranged behind will be damaged.