1 - Safety
Safety Information 2
Warning Labels and Cautions 4
2 - Product Overview
Product Overview 6
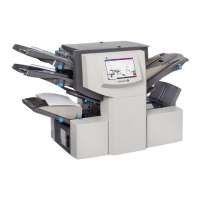
Relay Inserter - Component Overview 8
3 - Using the Touchscreen
Turning on the Touchscreen 12
Navigating the Touchscreen 13
Using the Touchscreen Keyboard 17
Changing the Touchscreen Display Language 18
Logging In 19
Managing Operator Usernames and
Passwords 20
Changing an Existing Job Name 22
4 - Product Overview
Programming a Scanning Job 25
Initiating Job Setup 26
Selecting a Job 27
Enabling Scanning (OMR or Barcode) 28
Setting the Fold Type 29
Setting the Main Scanning Sheet Feeder 30
Setting the Second (Supplementary) Sheet
Feeder 31
Setting the Insert Feeder 32
Setting the Sealer 33
Setting the Paper Length 34
Setting Fold A 35
Setting Fold B 36
Setting the Envelope Depth 37
Setting the Envelope Stop 38
Setting the Batch Counter 39
Confirming Job Setup 40
Running a Trial Piece 41
Programming a non-Scanning Job 43
Initiating Job Setup 44
Selecting a Job 45
Disabling Scanning 46
Setting the Fold Type 47
Setting Accumulation Options 49
Setting the Main Sheet Feeder 50
Setting the Second (Supplementary) Sheet
Feeder 52
Setting the Insert Feeder 53
Setting the Mode Type - Insertion or Fold Only 54
Setting the Sealer 55
Setting the Paper Length 56
Setting Fold A 57
Setting Fold B 58
Setting the Envelope Depth 59
Setting the Envelope Stop 60
Setting the Batch Counter 61
Confirming Job Setup 62
Running a Trial Piece 63
Modifying an Existing Job 65
Deleting a Job 66
Pitney Bowes Relay™ 2500, 3500, 4500 User Guide December, 2018 Page v of 7
 Loading...