www.pivotcycles.com info@pivotcycles.com 1.877.857.4868
1
Tire Pressure
NOTE: The E-Vault can accept a variety of tire sizes depending on the rider's desired riding terrain
• Tire pressure can greatly aect the ride quality. The table below oers recommended tire pressures for
intial set-up depending on tire size. Riders may want to adjust tire pressure for individual preferences.
TIRE SIZE RECOMMENDED PRESSURE
700 x 23-25 100-120 [psi] / 6.9-8.3 [bar]
700 x 28-32 80-100 [psi] / 5.5-6.9 [bar]
700 x 35-42 60-80 [psi] / 4.1-5.5 [bar]
700 x 45-47 40-60 [psi] / 2.8-4.1 [bar]
27.5" x 2.0" 30-40 [psi] / 2.1-2.8 [bar]
ISO-Flex Seat Post Insert
NOTE: The E-Vault can accept both a 30.9mm dropper post and 27.2mm rigid post.
• Each seat post size has a corresponding seat tube insert. The E-Vault comes equipped with the 27.2mm
insert. The 30.9mm insert can be purchased after market.
– 30.9mm ISO-Flex Insert Kit PN: BOM-SLV-FLXPST30.9-V1
• The procedure for swapping the ISO-Flex inserts can be found on the Pivot website at:
https://store.pivotcycles.com/en/le/download/65154?isPreview=True
ISO-FLEX
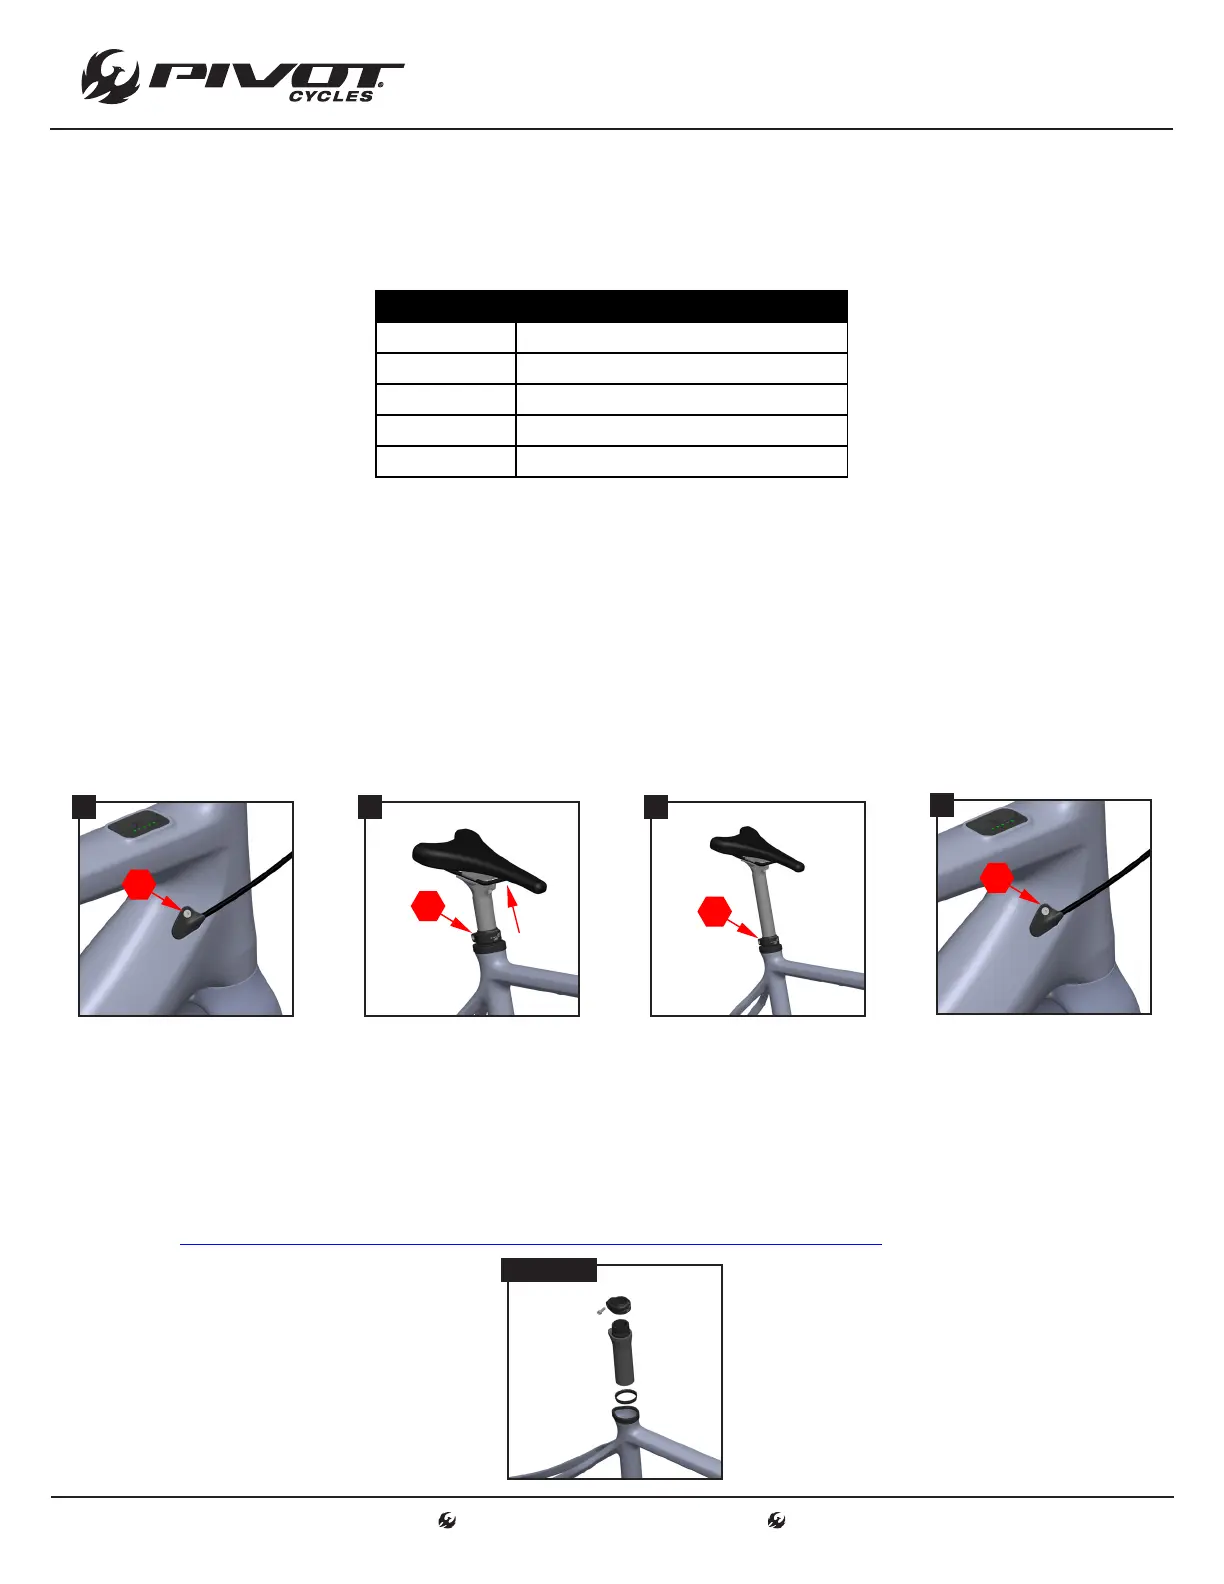
Adjusting Saddle Height
NOTE: The E-Vault can accept both a dropper post and rigid post. The following instructions detail adjusting the
saddle height when equipped with a dropper post. For an E-Vault equipped with a rigid post, please skip the
rst and last step.
1. If using a dropper post, use a 2mm hex wrench to loosen the driveside cable port cap securing the dropper
post housing.
2. Using a 4mm hex wrench, loosen the seat post clamp bolt and raise/lower the saddle to the preferred
height.
3. Using a 4mm hex wrench, tighten the seat post clamp bolt to 5 [Nm].
4. If using a dropper, use a 2mm hex wrench, tighten the driveside cable port cap.
1
2
4
2
4
2 3
4
BIKE SET-UP