11
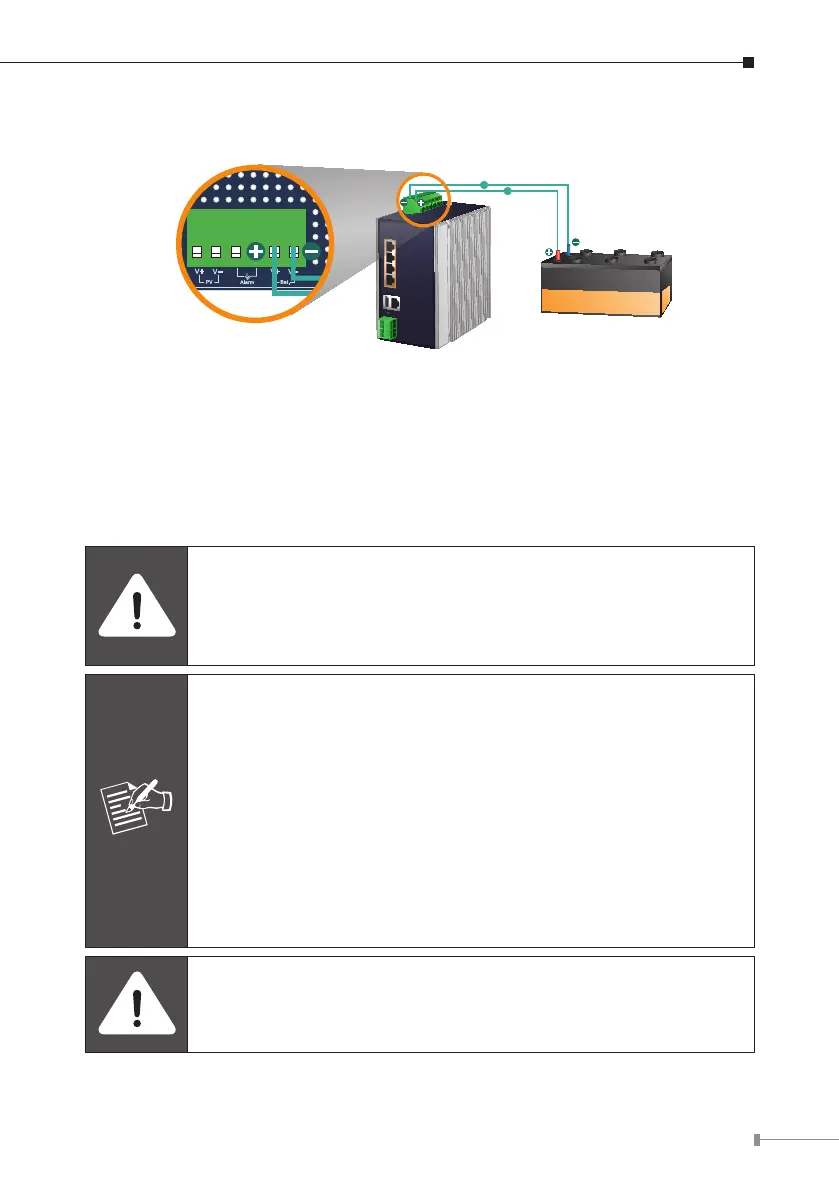
Step 2. Installing battery
Battery
DC
DC
Battery DC Input: 24V , 10A
PV DC Input: 24-45V , 8.8A max.
Max. A larm Loading: 24V, 1A
1 2 3 4 5 6
Bat.In/Out
1. Connect the negative electrode of the battery to the terminal for the nega-
tive electrode of the battery on the BSP-360. By default, the lithium battery
is in use.
2. Connect the positive electrode of the battery to the terminal for the positive
electrode of the battery on the BSP-360.
3. After the battery is well connected to the BSP-360, the PWR LED will be ON
and System LED will slowly blink, and Alarm LED will slowly blink.
The BSP-360 accepts the 24V DC battery system. Please pay
attention to the battery characteristics and also refer to the section
-- Recommended Settings for Different Batteries in the Quick
Installation Guide.
Note
Be noted for the thickness of electric wire and please refer to the
section -- Recommended Use of the Connected Wires in the
Quick Installation Guide.
Before the first installation
The lead-acid battery default LVD (Low Voltage Disconnec-
tion) is set at 22.2V DC; we suggest charging the voltage of
battery to 23.5V DC or above for the BSP-360.
The lithium battery default LVD (Low Voltage Disconnec-
tion) is set at 21.3V DC; we suggest charging the voltage of
battery to 24V DC or above for the BSP-360.
Check the total power consumption of your connected network
device before installation. Improper battery capacity could shorten
the battery life or make your network device lack of power supply.