MB502 6” Deluxe Jointer
10
3. Using the supplied wrench, fasten the jointer to the top of stand using the three lock
washers and special studs. Two of the special studs for the infeed end of the machine,
and one special for the outfeed end of machine.
4. Once the jointer is completely secured to stand, push downward on the top of jointer
until the stand adjusts to the floor surface. Then using the supplied wrench, tighten all
stand hardware.
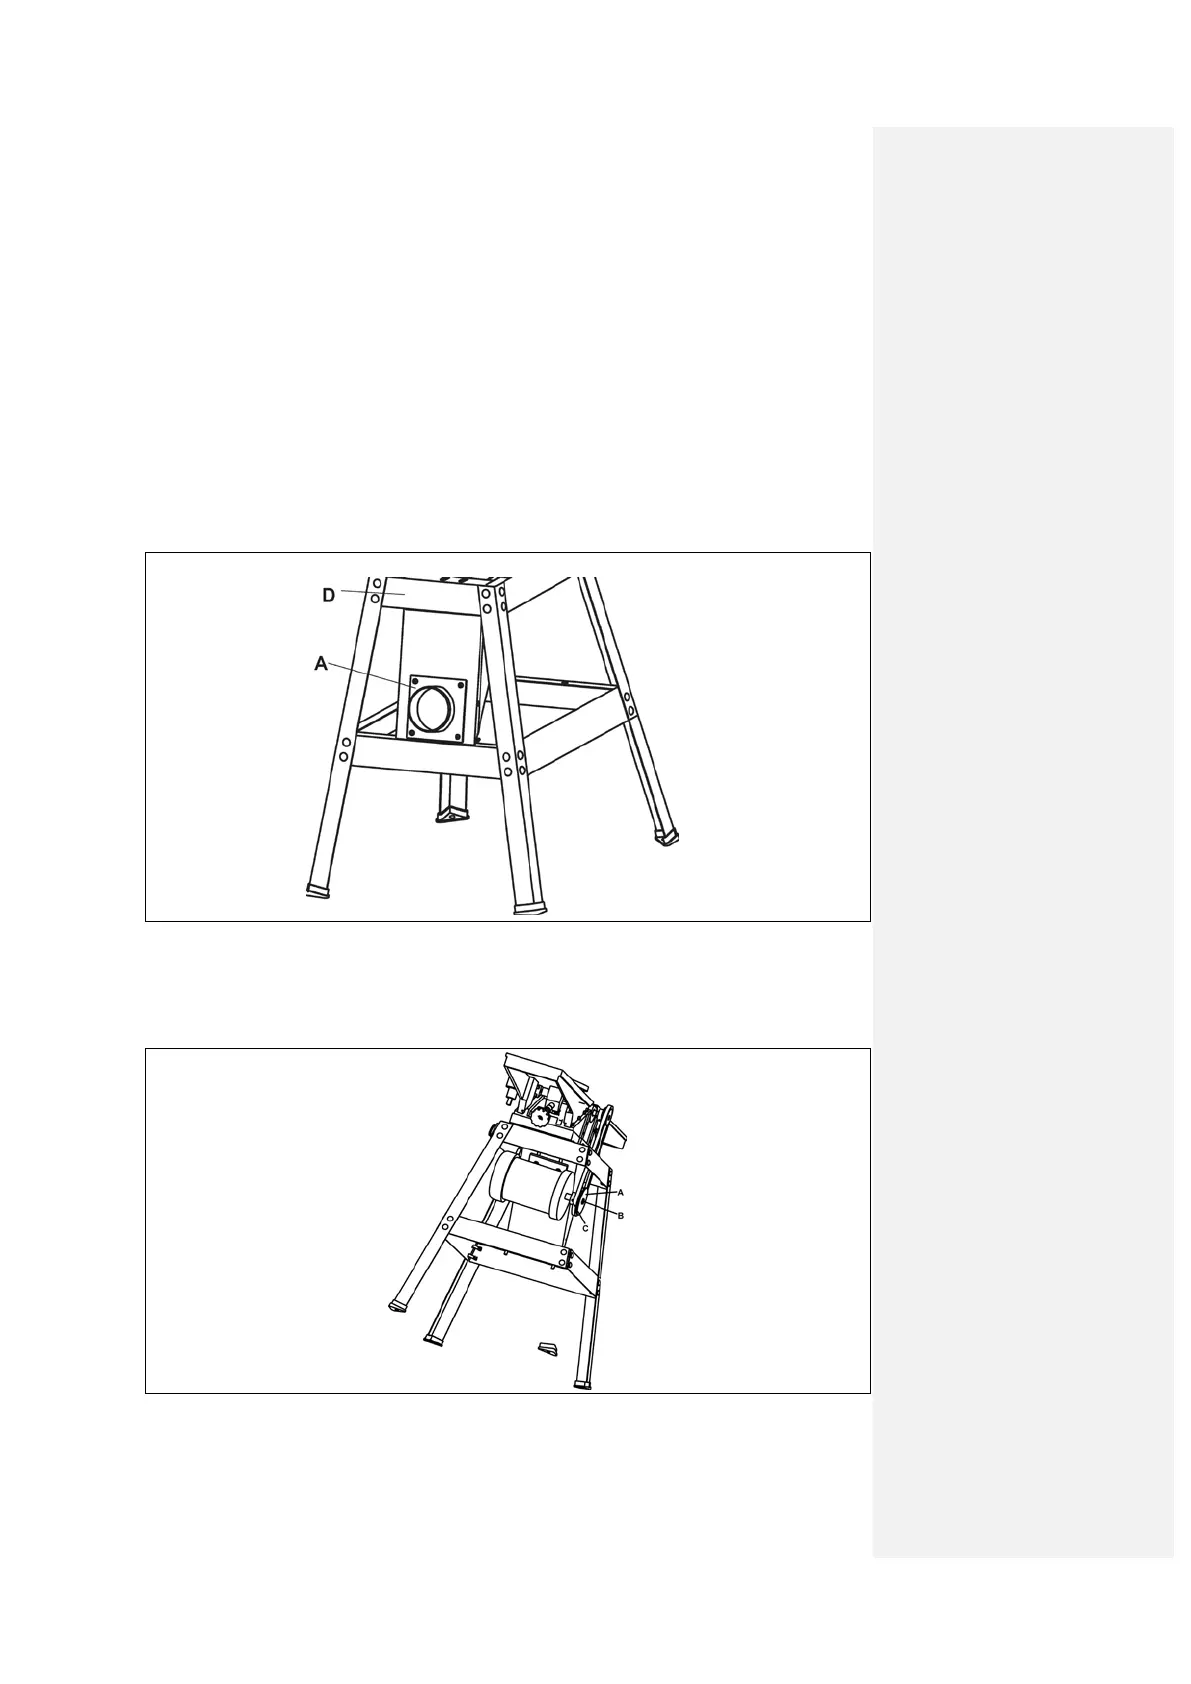
ASSEMBLING DUST CHUTE COVER W/ DUST COLLECTOR ADAPTER
Assemble dust chute cover with dust collector adapter (A) Fig.10 to jointer stand using
screws. IMPORTANT: Top of dust chute cover with dust collector adapter (A) must be
inside top end brace (D) of stand and should completely cover the top of the dust chute.
WARNING: During operation, the dust chute cover with dust collector adapter (A) must
always be assembled as shown and should only be removed for cleaning.
Fig. 10
ASSEMBLING MOTOR PULLEY
Assemble motor pulley (A) Fig. 11 to motor shaft with the hub of the pulley in the outer
position as shown. Make sure key (B) in inserted in the keyway of the motor pulley and
shaft.
Fig. 11