Instr 9927474 Rev 01 2017-02 Page 5 of 14
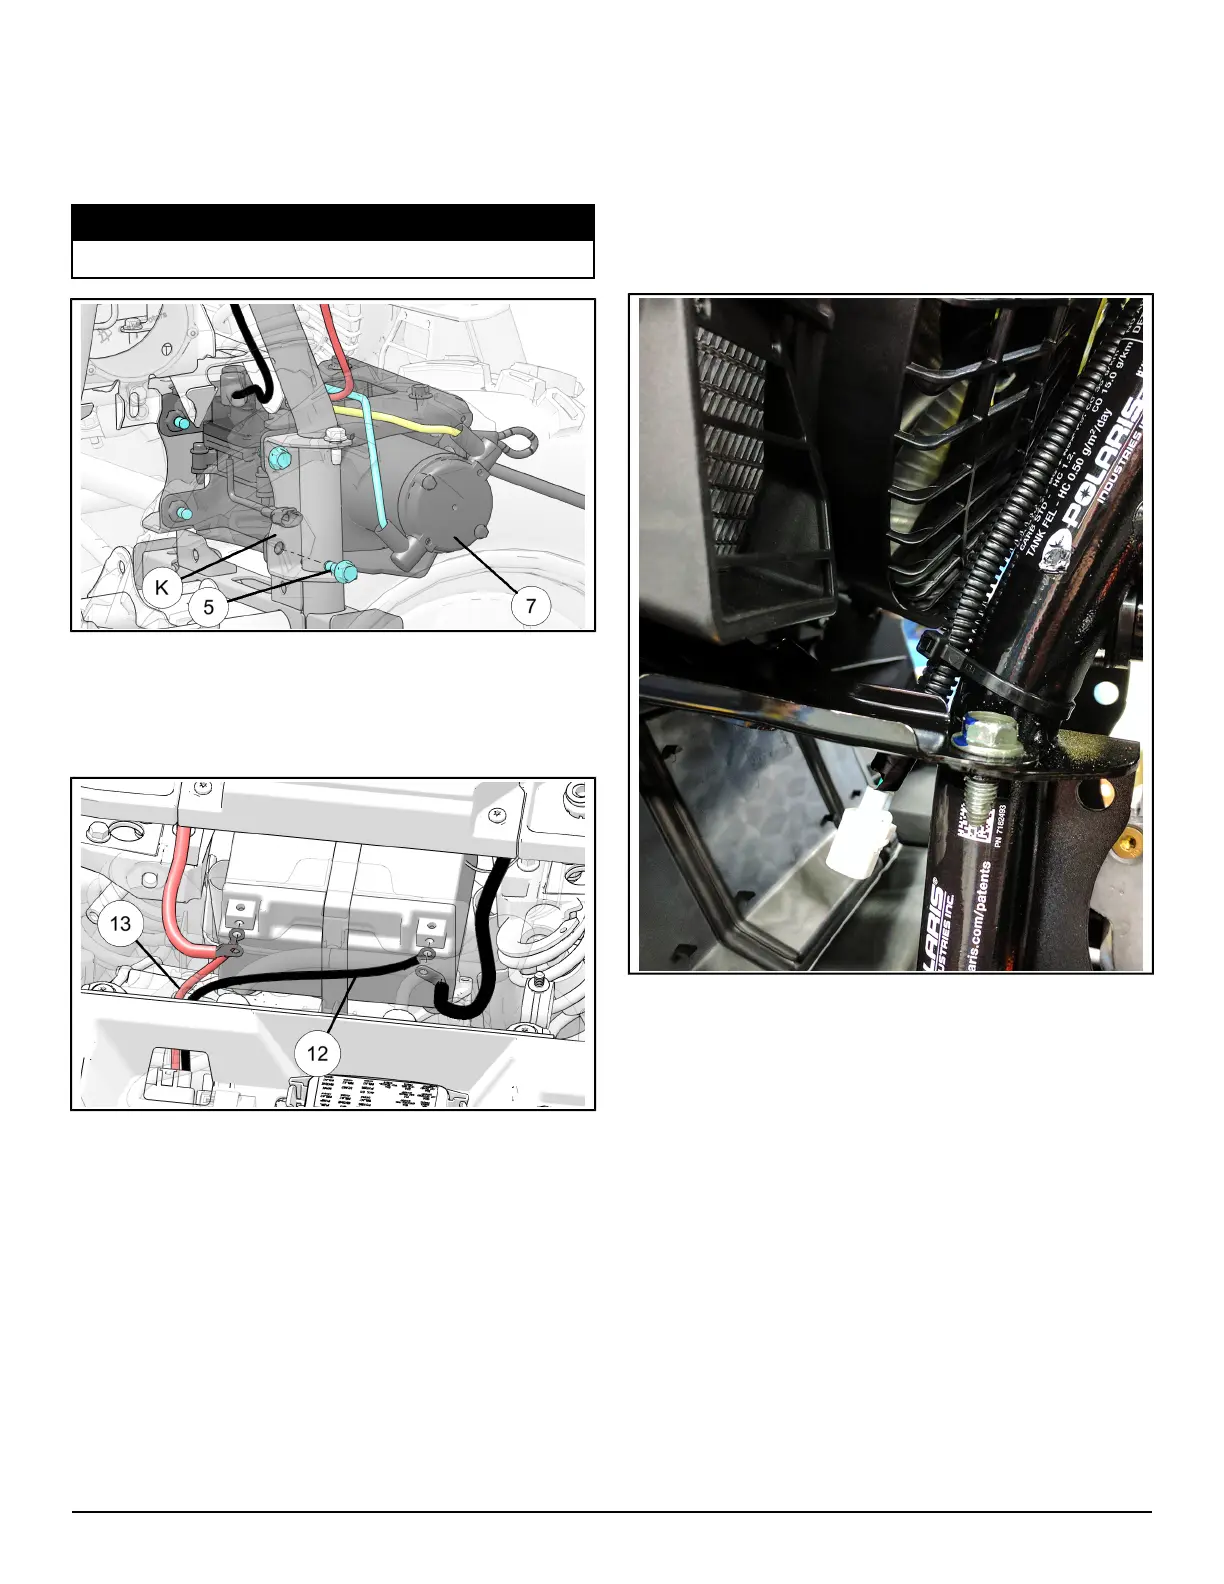
2. Install winch assembly
u
to chassis frame
K
using four screws
t
as shown. Check that all
wires are free to move and not pinched between
the vehicle chassis and the winch assembly.
Torque screws to specification.
TORQUE
20 ft. lbs. (27.1 Nm)
3. Route red (positive)
f
and black (negative)
d
winch cables to the battery as shown. Attach
cables to chassis frame at required locations using
cable ties. DO NOT CONNECT TO BATTERY AT
THIS TIME.
4. Locate the vehicles main harness winch contactor
connection on the frame tube of the vehicle behind
the front left tire as seen in the photo below.
Remove cap from main harness connector and
connect the wire harness splitter
e
that came with
your kit to the white contactor connection as
shown in the top photo of the Electrical
connections Reference Guide. Do not connect any
other connections at this time.
 Loading...