Instr 9927474 Rev 01 2017-02 Page 8 of 14
REINSTALLATION
1. Reinstall the front bumper cover
F
on vehicle
using retained screws
G
.
2. Reinstall accessory front brushguard (if equipped).
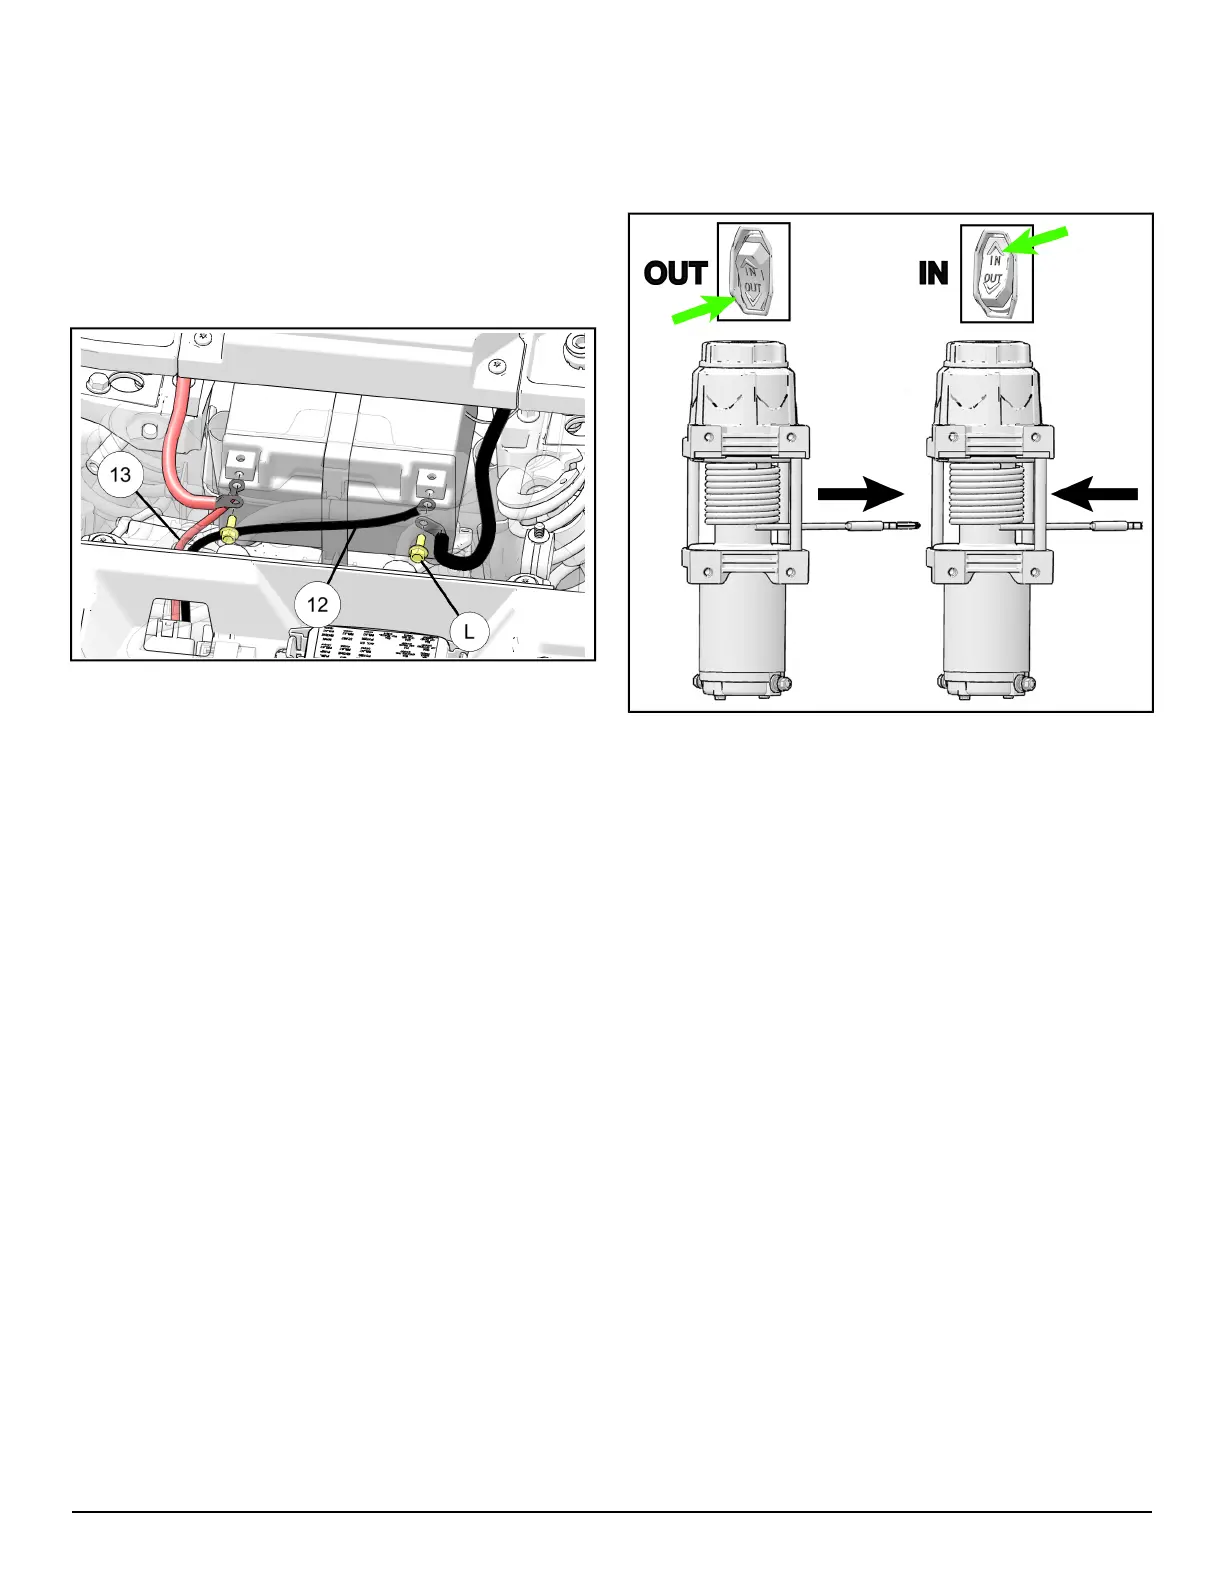
3. Reinstall red
D
and black
E
cables to battery
terminals along with winch power cables
f d
using screws
L
. Also, connect black wires on
remote box
e
and control box
w
to battery
negative (ground) terminal.
4. Reinstall storage tray
C
on the vehicle.
5. Close the front rack
B
and secure in place using
rubber latches
A
.
6. With the vehicle key in the “ON” position, check
winch for proper operation.
Test function of Autostop feature. When reeling in
the winch rope, confirm that the winch will turn off
automatically when the rubber puck reaches the
aluminum fairlead. The winch should not allow the
rope to be reeled in once the rubber puck has
come within a close proximity (typically 1” or less)
or made contact to the fairlead. If the Autostop is
not functioning properly, see troubleshooting
information at the end of the instructions.
HANDLEBAR SWITCH OPERATION
• When properly installed, the handlebar switch
allows you to operate the winch while seated on the
vehicle. See the illustration below for proper switch
operation.
 Loading...