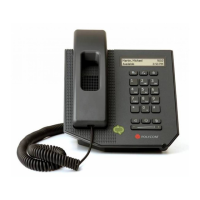
Polycom CX300 R2 Desktop Phone User Guide
Polycom, Inc. 7
5 Headset button Enables you to place and receive calls through a connected headset
(optional accessory).
6 Mute button Mutes the local microphone during calls so that others cannot hear you.
7 Volume buttons Adjusts the volume of the handset, speakerphone, headset speaker, and phone
ringer.
8 Microphone Transmits audio during calls.
9 Speakerphone button Enables hands-free communication during calls.
10 Speaker Provides audio output for the ringer and speakerphone.
11 Hookswitch Secures the handset in the cradle and ends a call.
12 Redial button Dials the most recently dialed contact.
Before You Use Your Phone
Before using your Polycom CX300 R2 desktop phone, ensure the following hardware and software are
available on your computer:
● Windows
®
Vista, Windows 7, Windows 8 or Windows 8.1
● Microsoft Lync 2010 or 2013 client
● A USB port.
Install Microsoft Lync Client
Before you connect the Polycom CX300 R2 desktop phone to your computer, make sure you have Microsoft
Lync 2010 or 2013 client installed and running on your computer. If you do not have Lync client installed on
your computer, the message “Sign in to Microsoft Lync” displays on the phone. In this state, you can use
the phone as an audio device only, and you cannot place any calls.
Connect the Polycom CX300 R2 to Your Computer
After you install and run Lync client on your computer, you can connect the phone to your computer. You
must connect the USB cable from your CX300 R2 phone directly to the USB port on your computer. The
phone will not work when connected to a bus-powered USB hub.