22
)LJ:
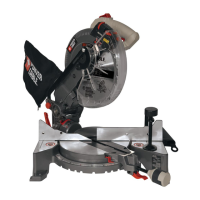
TURNING LASER GUIDE ON (FIG. X)
1. To turn laser on, press on/off rocker
switch (1) to “ON” position.
2. To turn laser off, press on/off rocker
switch to “OFF” position.
)LJ;
ALIGNING THE LASER GUIDE
The laser line must always be correctly
aligned with the blade to ensure straight,
even cutting. The laser line will enable you
to preview the saw blade path on the stock
to be cut before starting the miter saw. This
laser guide is powered by the transformed
alternating current supply directly through the
power lead. 7KHVDZPXVWEHFRQQHFWHG
WRWKHSRZHUVRXUFHDQGWKHODVHURQRII
VZLWFKPXVWEHWXUQHGRQIRUWKHODVHUOLQH
WRVKRZ
Ɣ 7RSUHYHQWVHULRXVLQMXU\LQVHUWD
SDGORFNQRWSURYLGHGRUFKDLQZLWK
SDGORFNWKURXJKWKHKROHLQWKH
ON/OFF7ULJJHU6ZLWFKSULRUWR
PDNLQJDQ\ODVHUDGMXVWPHQW
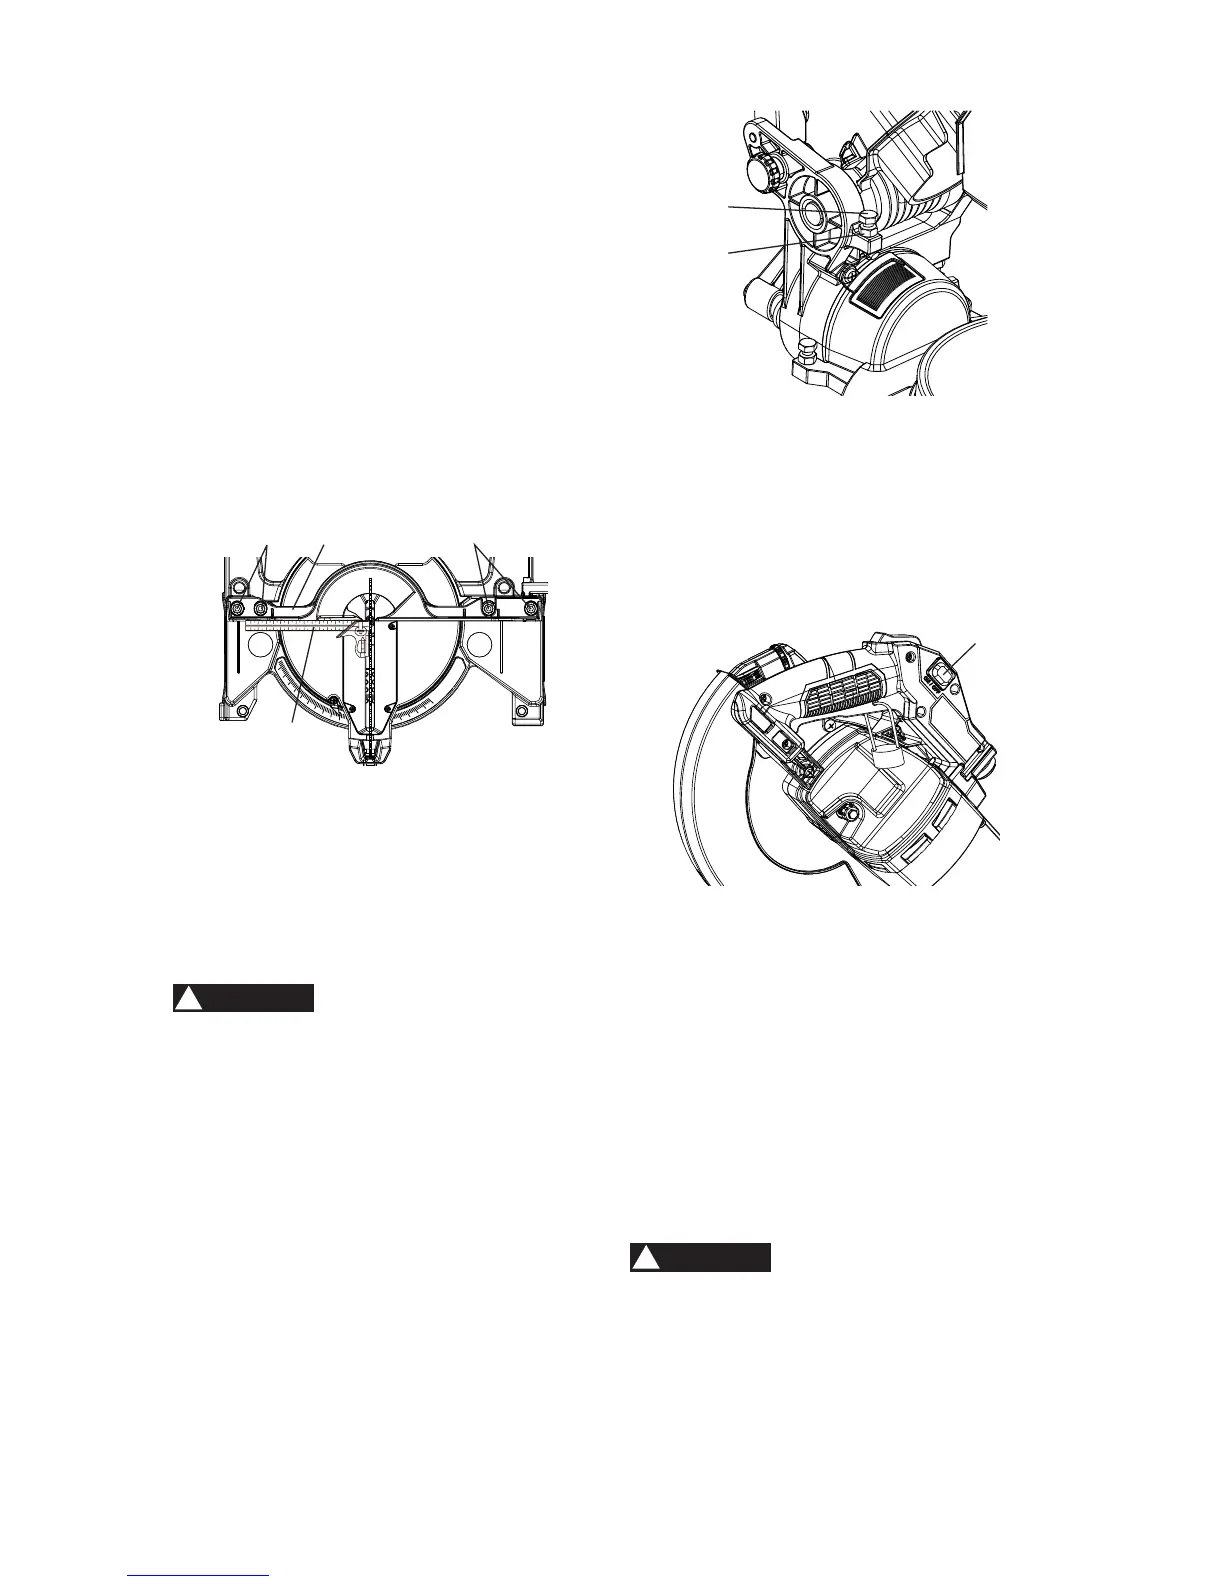
ADJUSTING FENCE SQUARENESS (FIG. V)
1. Loosen the four fence locking bolts (1).
2. Lower the cutting arm and lock in position.
3. 8VLQJDVTXDUHOD\WKHKHHORIWKH
VTXDUHDJDLQVWWKHEODGHDQGWKHUXOHU
against the fence (2) as shown.
4. Adjust the fence 90° to the blade and
tighten the four fence locking bolts (1).
NOTE: If the saw has not been used
UHFHQWO\UHFKHFNEODGHVTXDUHQHVVWRWKH
fence and readjust if needed.
5. After fence has been aligned, using a
scrap piece of wood, make a cut at 90°
WKHQFKHFNVTXDUHQHVVRQWKHSLHFH
Readjust if necessary.
)LJ9
CUTTING HEAD DOWNWARD TRAVEL
ADJUSTMENT (FIG. W)
Before each cutting operation, check the
position of the blade to make sure it does not
contact any metal surface. If it contacts any
metal surface, the depth of movement must
be adjusted.
7RDYRLGLQMXU\IURPXQH[SHFWHGVWDUWLQJ
RUHOHFWULFDOVKRFNPDNHVXUHWKHWULJJHU
VZLWFKLVGLVHQJDJHGDQGUHPRYHWKH
SRZHUFRUGIURPWKHSRZHUVRXUFH
1. Lower the blade as far as possible.
2.
Loosen lock nut (1) using an adjustable
wrench.
3. Turn the adjustment bolt (2) out
(counterclockwise) to decrease the cutting
depth or in (clockwise) to increase the
cutting depth.
4. Rotate the blade by hand to check that it
does not contact any metal.
5. Repeat steps until adjusted properly,
and tighten the lock nut (1) to secure the
adjustment bolt (2) into position.
112
3
WARNING
!
1
2
1
WARNING
!