23
Ɣ 'RQRWUHPRYHWKHORFNIURPWKH
ON/OFF 7ULJJHU6ZLWFKGXULQJDQ\
ODVHUDGMXVWPHQW
AVOID DIRECT EYE CONTACT WITH
LASER (FIG. X, Y)
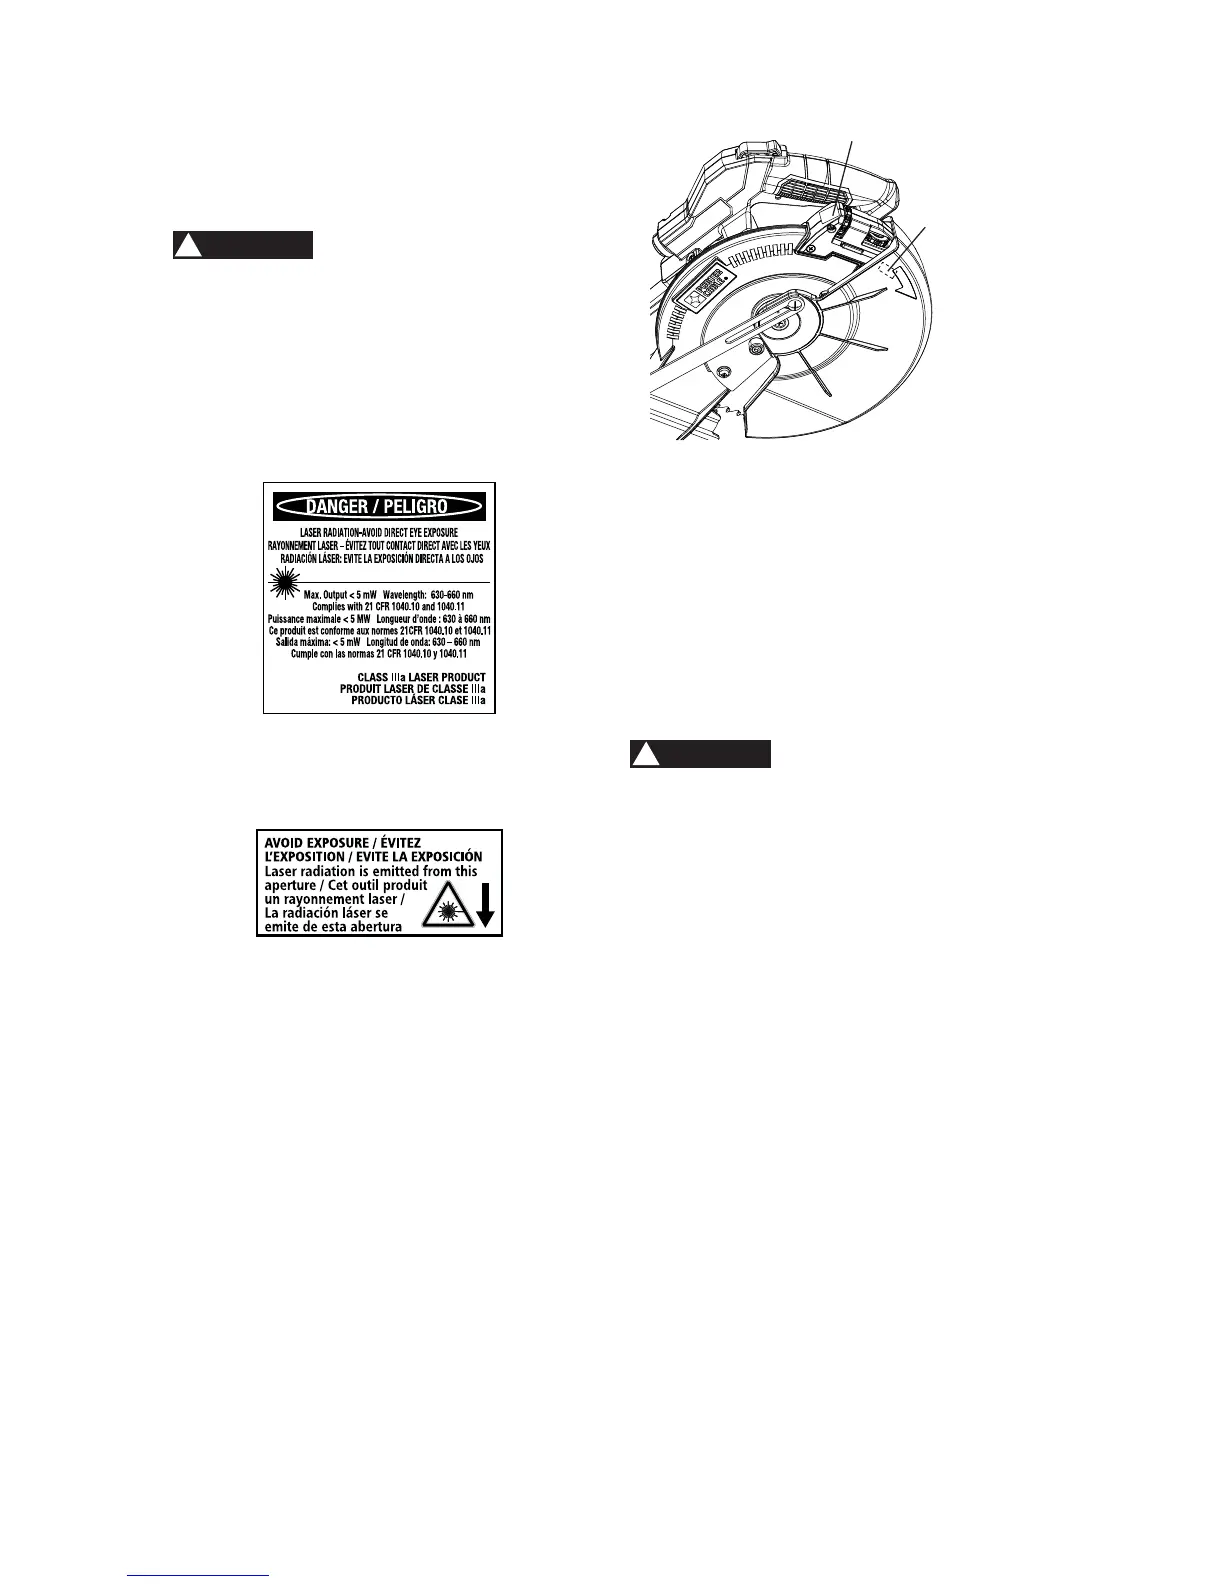
Ɣ $ODVHUOLQHUDGLDWHVIURPWKHODVHU
DSHUWXUHZKHQWKHODVHUJXLGHLVWXUQHG
RQ$YRLGGLUHFWH\HFRQWDFW)LJ;
Ɣ /DVHU:DUQLQJ/DEHO
0D[2XWSXWP::DYHOHQJWK
QP&RPSOLHVZLWK&)5
1040.10 and 1040.11. Class IIIa Laser
3URGXFW)LJ<
ŏ /DVHU$SHUWXUH/DEHO$92,'
EXPOSURE: Laser radiation is emitted
IURPWKLVDSHUWXUH)LJ<
Ɣ 127($OOWKHDGMXVWPHQWVIRUWKH
RSHUDWLRQRIWKLVPDFKLQHKDYHEHHQ
FRPSOHWHGDWWKHIDFWRU\'XHWR
QRUPDOZHDUDQGXVHVRPHRFFDVLRQDO
UHDGMXVWPHQWVPD\EHQHFHVVDU\
Ɣ &$87,218VHRIFRQWUROVRU
DGMXVWPHQWVRUSHUIRUPDQFHRI
SURFHGXUHVRWKHUWKDQWKRVHVSHFL¿HG
KHUHLQPD\UHVXOWLQKD]DUGRXV
UDGLDWLRQH[SRVXUH
Ɣ &$87,217KHXVHRIRSWLFDO
LQVWUXPHQWVZLWKWKLVSURGXFWZLOO
LQFUHDVHH\HKD]DUG
Ɣ :$51,1*'RQRWDWWHPSWWRUHSDLURU
GLVDVVHPEOHWKHODVHU,IXQTXDOL¿HG
SHUVRQVDWWHPSWWRUHSDLUWKLVODVHU
SURGXFWVHULRXVLQMXU\PD\UHVXOW$Q\
UHSDLUUHTXLUHGRQWKLVODVHUSURGXFW
VKRXOGEHSHUIRUPHGE\DTXDOL¿HG
service dealer.
WARNING
!
)LJ<
NOTE: If laser labels are missing, damaged
or not clear, contact with the Porter-Cable
Customer Care Center for replacement.
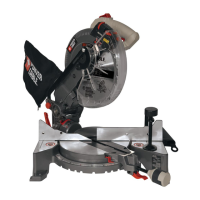
LASER GUIDE ADJUSTMENT
(FIG. Z, AA, BB, CC)
NOTE: All the adjustments for the operation
of this machine have been completed at the
factory. Due to normal wear and use, some
occasional readjustments may be necessary.
7RSUHYHQWVHULRXVLQMXU\LQVHUWD
SDGORFNQRWSURYLGHGRUFKDLQZLWK
SDGORFNWKURXJKWKHKROHLQWKH212))
7ULJJHU6ZLWFKSULRUWRPDNLQJDQ\ODVHU
DGMXVWPHQW'2127UHPRYHWKHORFNIURP
WKH212))7ULJJHU6ZLWFKGXULQJDQ\
ODVHUDGMXVWPHQW
A. &KHFNLQJ/DVHU/LQH$OLJQPHQW
)LJ=%%
1. Set the saw to a 0° miter and 0° bevel
setting.
8VHDFRPELQDWLRQVTXDUHWRPDUND
angle running across the top and down
the front of a board. This line will serve
as the pattern line (Fig. BB) to adjust the
laser. Place the board on the saw table.
3. Carefully lower the saw head down to
align the saw blade with the pattern
line. Position the saw blade to the left,
center or right side of the “pattern line”
depending on your preference for the
laser line location. Lock board in place
with hold-down clamp.
4. With the saw plugged in, turn on the laser
guide. Your saw has been preset with the
laser line to the left side of the blade.
Laser
warning label
Laser
aperture label
WARNING
!