EasyManua.ls Logo

POSIFLEX PP-7900 - Page 10

POSIFLEX PP-7900
16 pages
Print Icon
To Next Page IconTo Next Page
To Previous Page IconTo Previous Page
Loading...
10
2. Connect the power adapter and the
other I/O cables to the I/O ports of the
printer.
3. Fix the wall mount bracket onto the
rear side of the printer with two M2.5-
4.5L screws.
4. Stick the four rubbers to the four
corners of the printer.
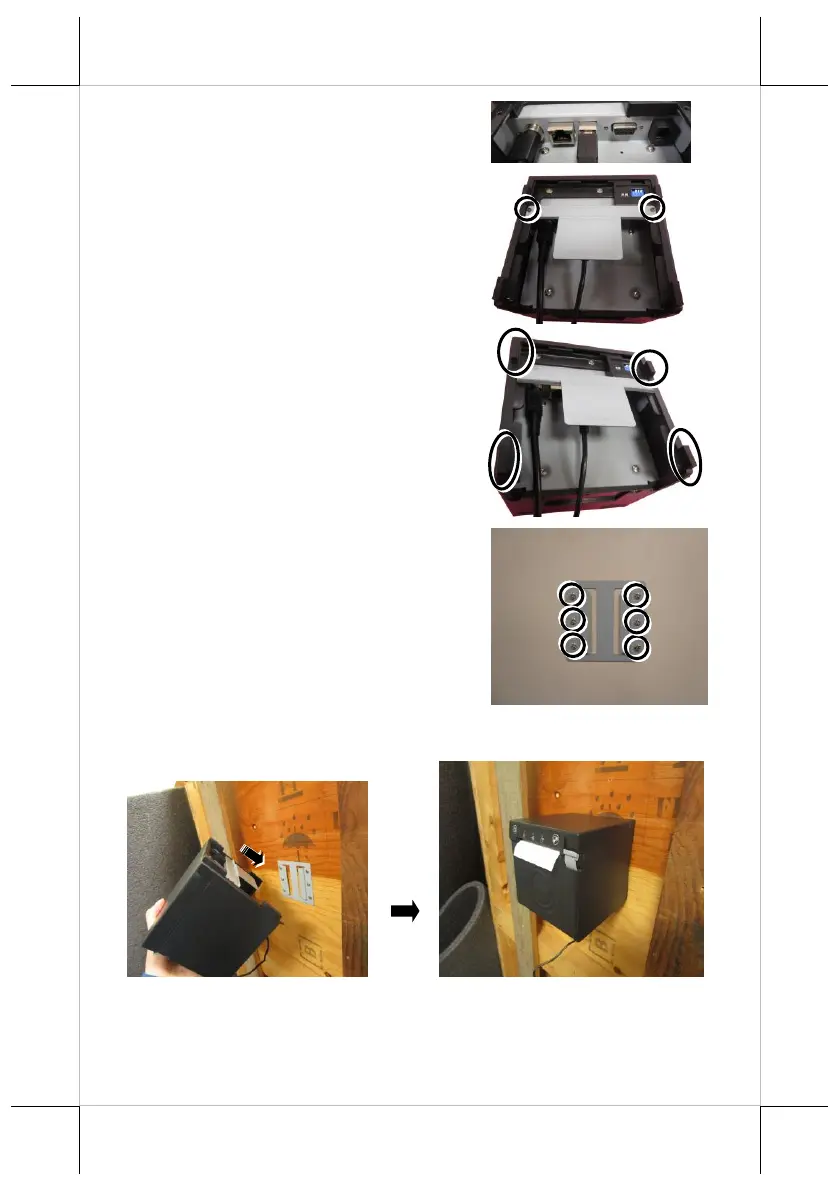
5. For cement wall, to apply the plastic
cotters, please drill 6 holes on the wall.
Hole diameter should be 1/4” or 6.35
mm each. Hole depth should be at least
1 and 3/8” or 35 mm. Apply the 6
plastic cotters into the drilled holes.
6. Fix the wall side mount bracket onto
the wall with six self-tapping Ø3.5-25L
screws.
7. Hook the wall mount bracket to the wall side mount bracket.