21
BL
Y
BK
WH
Not Used
N
OTE: TWIST LEADS APPROX.
6 TURNS PER FOOT
R
EVERSING LOOP CONNECTION
TO
DRIVEWAY
LOOP
BR
GYGR
V
OR
R
P
BK
BL
Y
WH
V
OR
Not Used
TO
DRIVEWAY
LOOP
N
OTE: TWIST LEADS APPROX.
6 TURNS PER FOOT
EXIT
LOOP CONNECTION
R
BR
GY
GR
P
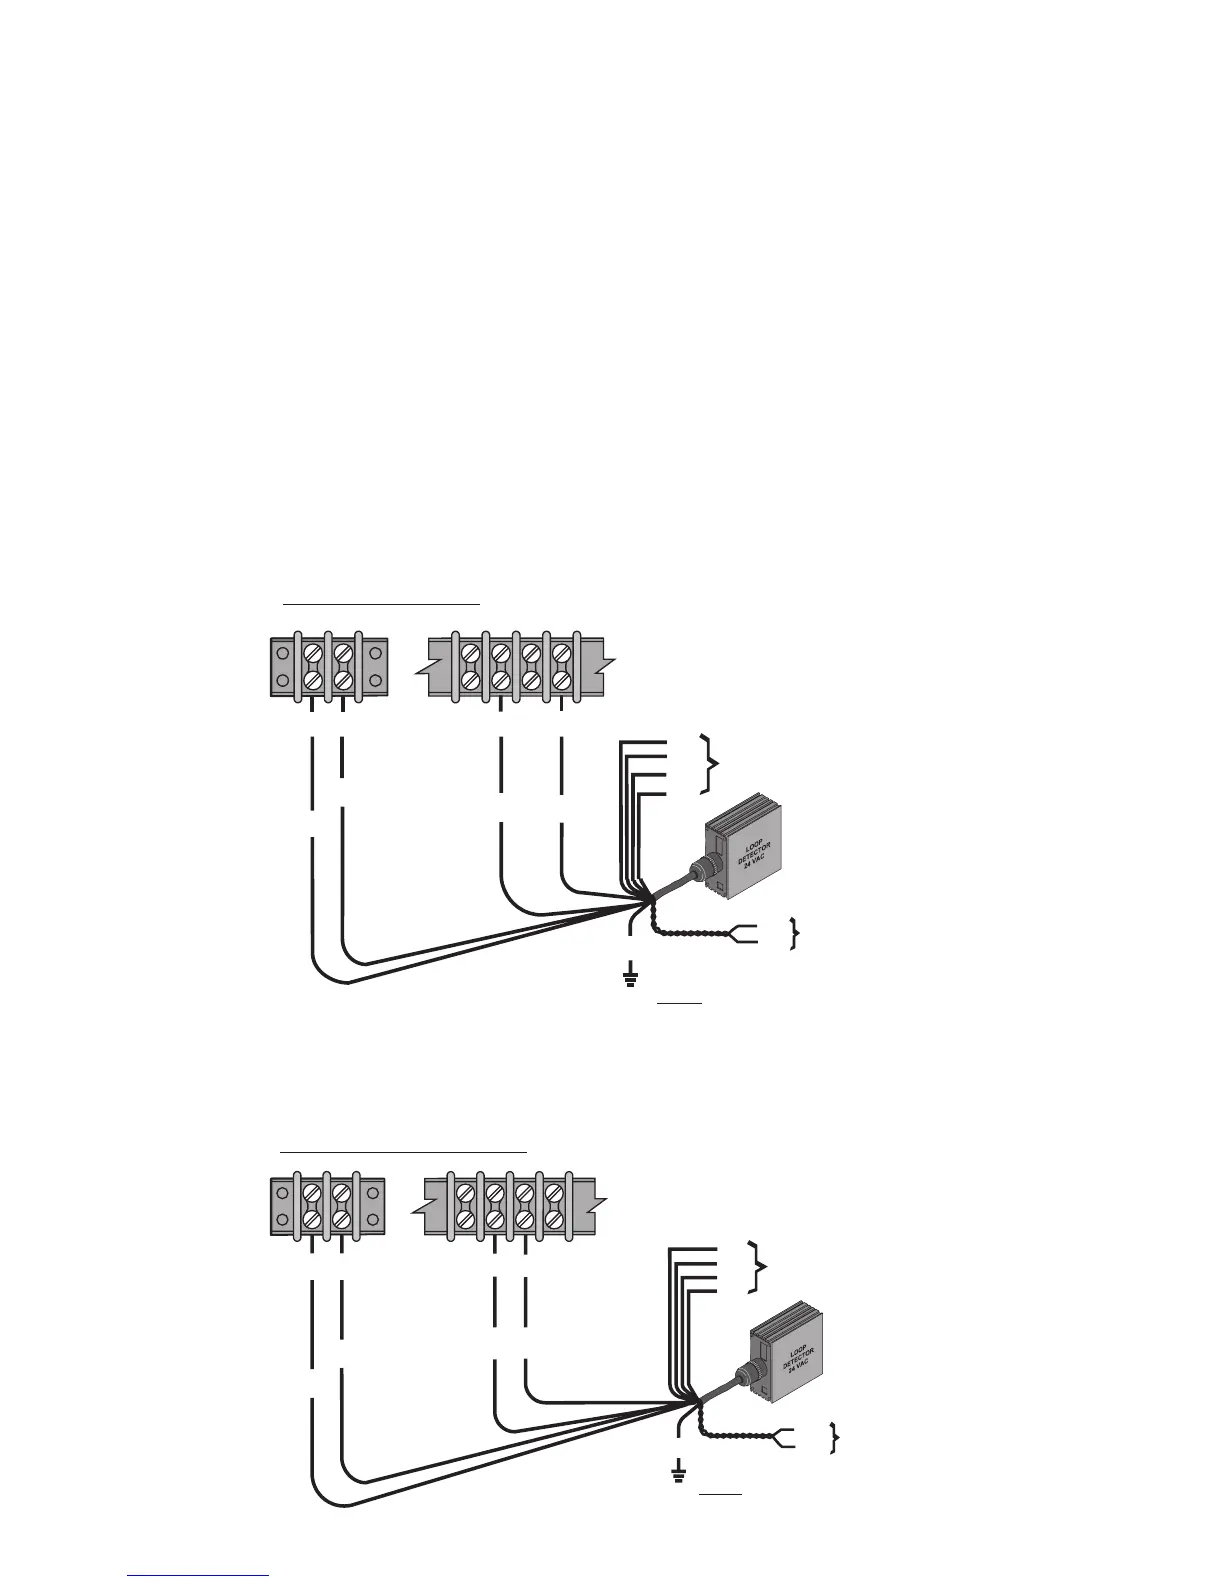
3. Leaving enough wire for the lead-in, insert the specied number of turns of wire in the
cut grooves (See chart).
CAUTION: Be careful not to damage the wire insulation during installation.
4. After completing the required number of loop turns, twist the ends together at the rate
of 6 turns per foot to form the lead-in.
5. Seal the lead-in wire in the conduit to prevent moisture seepage into the conduit.
6. Fill over the loop wires in the groove with a recommended loop sealant. Contact your
distributor for available sealants.
7. Mount the loop detector in the operator and connect the wire loop.
8. Connect loop detector to the control board as shown in the following diagrams:
A 7 8 9 10B
A 2 3 4 5B