Do you have a question about the powersoft Digam K8 and is the answer not in the manual?
Essential guidelines for safe operation, handling, and maintenance of the apparatus.
Advice on preventing loudspeaker damage from high power output and proper gain usage.
Details on compliance with electrical and EMC standards for various K Series models.
Precautions regarding installation location, temperature, and humidity to avoid malfunction.
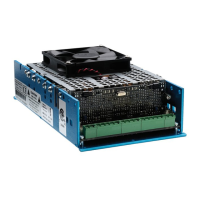
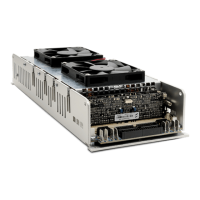
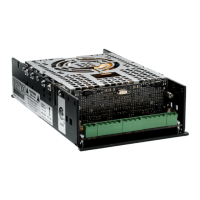
Instructions for proper rack mounting, heat dissipation, and ensuring adequate airflow.
Critical safety rules for mains connection, grounding, and avoiding electrical hazards.
Warning about hazardous output voltages and the importance of not touching exposed speaker wiring.
Overview of Powersoft's high efficiency, reliability, and audio performance advantages.
Highlights of digital control, adjustable parameters, and long-term reliability of the K Series.
Procedure for carefully opening the shipping carton and checking for any visible damage.
Guidelines for standard 19" rack mounting and the forced-air cooling system operation.
Details on connecting the amplifier to the AC mains, including power factor correction and grounding.
Connecting analog inputs via XLR or 1/4" jacks, including balanced and unbalanced configurations.
Procedure for connecting loudspeakers using Neutrik Speakon connectors in stereo or bridge mode.
Guide to connecting the amplifier for remote control via RS485 data cable and ID selection.
Using auxiliary inputs for emergency signals when 24V DC is applied via AUX COMMAND.
Details on using the AES/EBU digital input and its interaction with analog inputs.
Overview of front panel controls and LCD display for amplifier management.
Description of the amplifier's main operating screen, status indicators, and error codes.
Explanation of the menu tree and how to navigate through settings and options.
How to adjust output attenuation levels for channels CH1, CH2, or both.
Adjusting gain and sensitivity levels for channels, with corresponding input voltage values.
Choosing between Analog, Digital AS3, and Ethernet input modes.
Setting the maximum output peak voltage for CH1, CH2, or both.
Setting the maximum mains current limit to protect against overcurrent conditions.
Muting amplifier channels individually based on input signal amplitude thresholds.
Configuring LED bars to function as output voltage or output current meters.
Viewing output signal values, impedance, and output power for CH1 and CH2.
Viewing historic temperature diagrams and current temperature values.
Monitoring voltage and current from the mains power source.
Storing and recalling amplifier configurations as local presets.
Viewing serial number, hardware identifiers, and version numbers of amplifier components.
Monitoring system parameters like power supply voltages and auxiliary voltages.
Setting the contrast level for the LCD display.
Setting a numeric code to unlock amplifier settings and menus.
Configuring different levels of menu access restriction for user safety and control.
Storing and recalling amplifier presets using a settings smartcard.
Amplifier outputs are muted for a short period during power on/off cycles.
System safeguards output transistors against short circuits and other stressful loads.
Automatic fan speed adjustment and power muting to prevent overheating.
Instructions for cleaning the amplifier's faceplate and chassis using a soft cloth.
Guidance on removing dust from front side filters using compressed air.
Description of error codes displayed on the main screen and their meanings.
Details on warranty coverage, exclusions, and limitations for Powersoft amplifiers.
Information on obtaining support from local distributors or Powersoft technical service.
Technical drawings showing the physical dimensions of the K Series amplifiers.
Schematic representation of the amplifier's output stage signal flow.
Schematic representation of the amplifier's power supply system and its components.
Details on power supply, power factor, operating temperature, weight, and external dimensions.
Technical data for bandwidth, damping factor, slew rate, S/N ratio, and distortion.
Power ratings for stereo and bridged mono modes across different impedances and models.
Table showing output voltage settings for maximum output power limitation.
Listing of maximum RMS output current ratings for different K Series models.