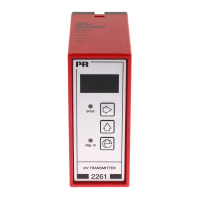
2261V103-UK 11
1.3 InO - Setting of overrange
The analog output follows the set input span on a linear basis {1.1 - InL and 1.2 - InH} with a limit at 20.5 mA
(normally approx. 103% input span).
When the input signal is < or > the set input span, the display will track this and show -xx or xxx% until the input
begins to limit.
The overrange is set in % of the input span and guaran tees that the input does not begin to limit within the
percentage overrange, neither below nor above the set input span, provided that the input span ± overrange is
within the signal range -40 to 100 mV.
Setting the overrange does not affect the analog output.
If the overrange measure ment is to be included in the analog output signal, the output signal for the set input span
must be selected to provide room for the overrange within the signal range of the output (0...20 mA / 0...10 VDC).
Example:
A signal of 5...15 mV corresponds to a weight of 0...1000 kilo.
It must be possible to detect a 50% overrange of the scale on the analog output of the mV transmitter at the same
time as the display shows 150%.
The following settings will result in the requested function with an output signal of 4...19.9 mA:
Input: InL = 5.0, InH = 15.0, InO = 50.0
Output: OL = 4.0, OH = 14.6, UI = 002
Please note that the output span has been set to (14.6 mA - 4.0 mA) = 10.6 mA which, with an addition of 50%, will
result in a span of (10.6 + (10.6 * 50/100)) = 15.9 mA.
3.0 CAL - Setting of calibration values
The calibration function is a relative calibration, i.e. the percentage input value for the low calibration must be entered in
submenu 3.1{CLO - Calibration Low}, and the percentage input value for the high calibration must be entered in submenu
3.2 {CHI - Calibration High}. The entered percen tages are used for calculating the actual input span.
When {CHI - Calibration High} is activated, the calculation is made using the percentages in {CLO} and {CHI}.
3.1 CLO - Setting of low calibration value
Key 2. Enter the calibration value by the 3 and 1 keys.
Connect the low calibration signal to the input. Activate the 3 and 1 keys simultaneously.
3.2 CHI - Setting of high calibration value
Key 2. Enter the calibration value by the 3 and 1 keys.
Connect the high calibration signal to the input. Activate the 3 and 1 keys simultaneously.
The input span is now calcu lated using the entered calibration values. The mV values are read from the submenus
{1.1 - InL and 1.2 - InH}.
4.0 OUt - Setting of analog output
4.1 OL - Low - 0% setting of analog output
Valid selections are current in the range 0.0...20.0 mA or voltage in the range 0.0...10.0 VDC.
4.2 OH - High - 100% setting of analog output
Valid selections are current in the range 0.0...20.0 mA or voltage in the range 0.0...10.0 VDC.
4.3 UI - Selection of current or voltage output
See the hardware programming for correct jumper setting. Possible selections are:
001 = Current output in the range 0...10 mA
002 = Current output in the range 0...20 mA
003 = Voltage output in the range 0...500 mV
004 = Voltage output in the range 0...1000 mV
005 = Voltage output in the range 0...5 V
006 = Voltage output in the range 0...10 V
4.4 rEP - Setting of response time
Valid selections are 0.0...999 s. If the set response time is < 0.06 s, the response time will be 0.06 s.