9
Your water dispenser comes fully assembled.
If you purchased the optional bottle shelving unit they will need to be installed.
Introduction
To ensure that installation of your water dispenser can be completed as quickly as
possible, it is best to have all of the electrical supplies and plumbing fittings installed before
your station arrives. All connections should be located so when your water dispenser arrives,
all you have to do is assemble it, slide it against the wall, and connect the electrical and
plumbing with a minimum amount of labour.
The water dispenser should be installed according to local electrical and plumbing
codes. If you are unable to install the station according to code, then have a plumber and
electrician complete all connections for you.
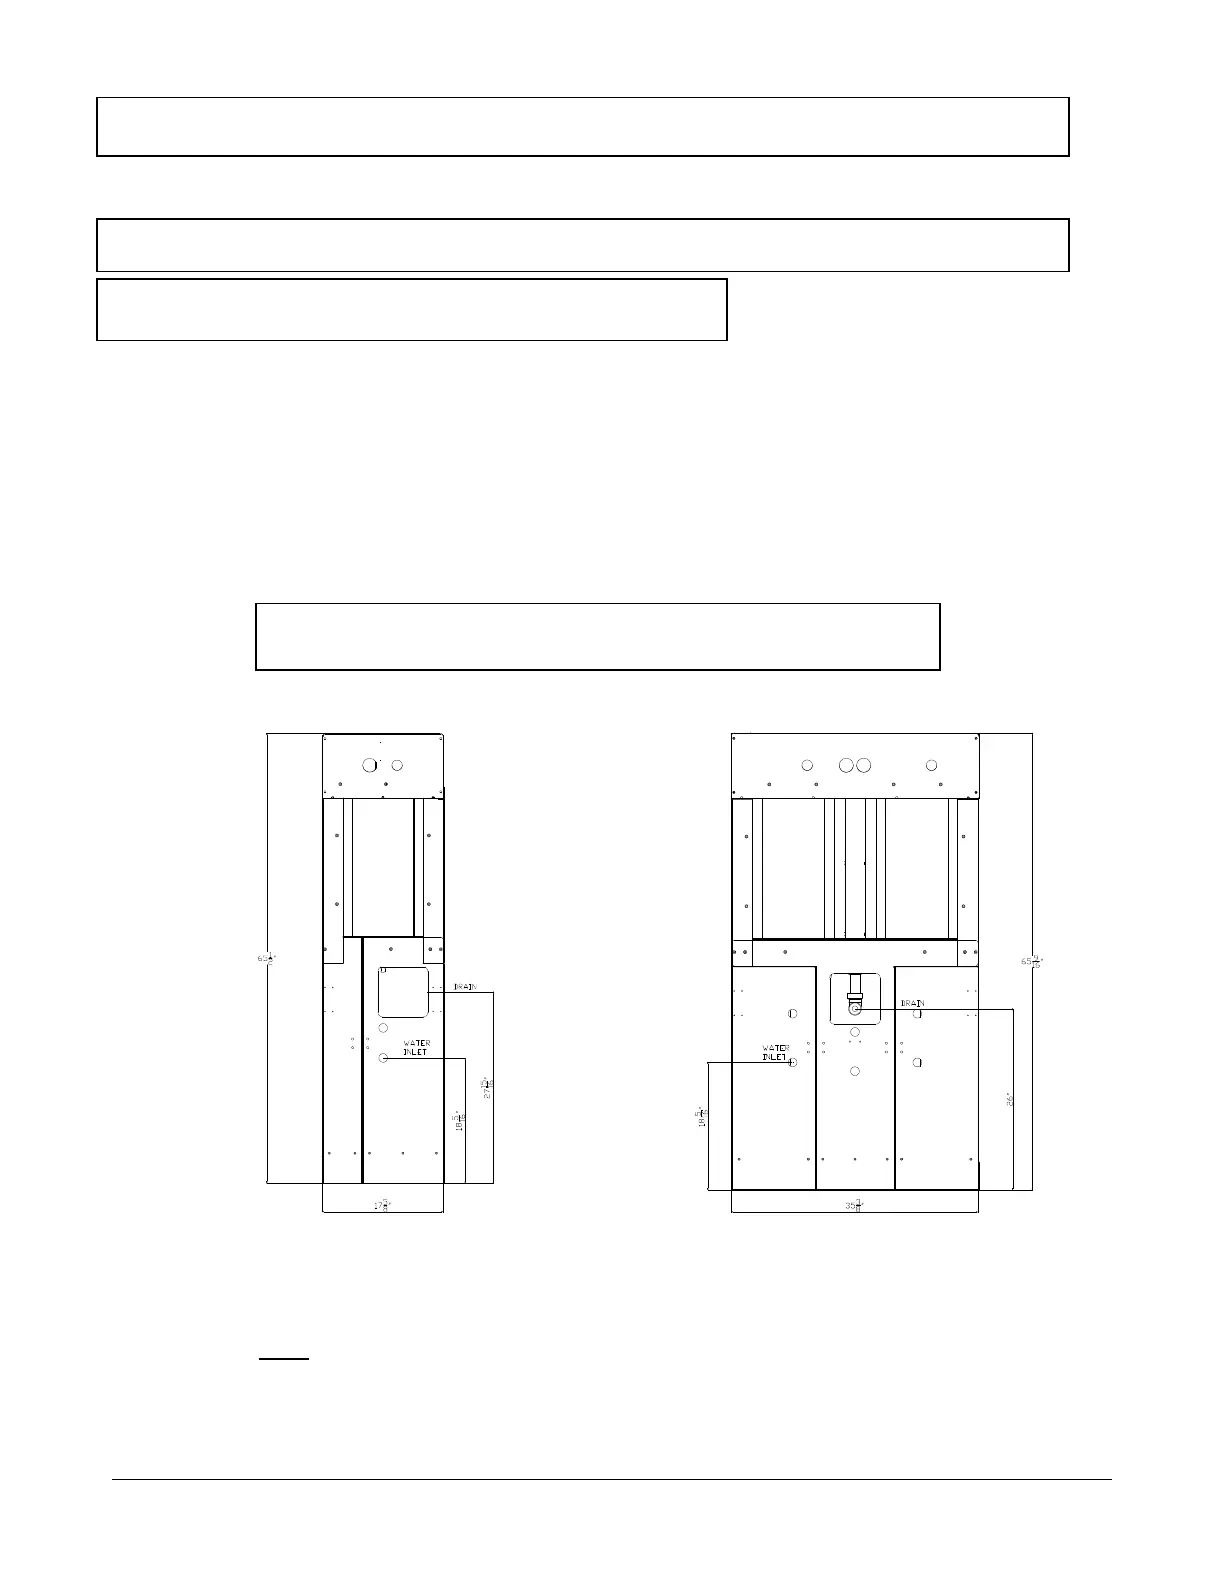
One water supply and one drain connection are required on single station water dispensers
and 2 water supply** and one drain connection are required for double dispensers.
The Water Dispenser Plumbing Diagram below shows the dimensions for the
location of all water supply and drain connections.
The Water dispenser Plumbing Diagram above shows the dimensions for the location of
the drain connections. Be sure to install according to appropriate local building codes.
NOTE:
ALL DIMENSIONS ARE ACCURATE AT TIME OF PRINTING
BUT ARE SUBJECT TO CHANGE WITHOUT NOTICE.
**Note: Double dispensers should have 2 individual pure water lines connected to 2 independent pumps.
All pure water lines should be 1/2” ID min. and pumps should be 2-5 gallons per minute.