FTS Glide Assembly and Maintenance Guide
page 10
1 2 3 4 5 6
Note: You may need a step ladder to install the
Pull-up Bar.
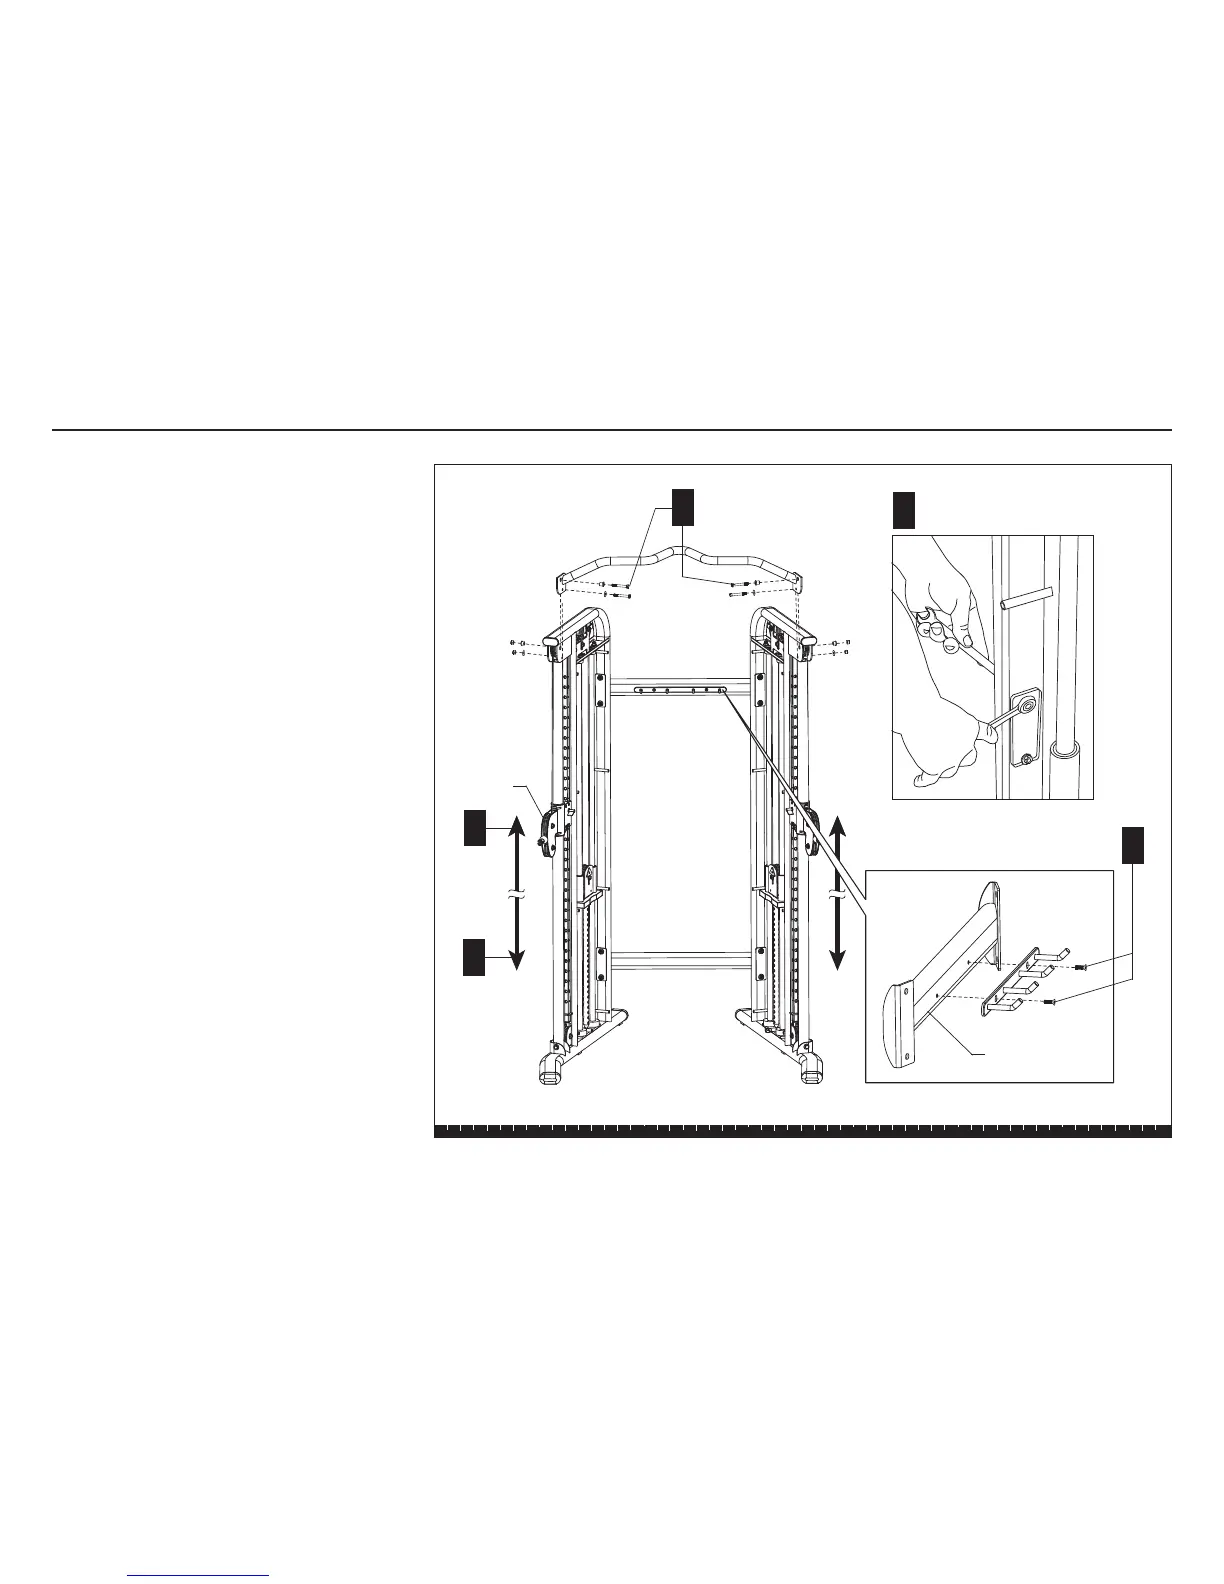
D. Slide both Pulley Assemblies to the base of the
Main Uprights. Lift the Blue Handle up so it
disengages from the track, and then lower the
Pulley Assembly. Let go of the Blue Handle to lock
the Pulley Assembly into position.
CAUTION: The top fasteners secure a 3½-inch
pulley to each Main Upright. When you remove
the fasteners, the pulleys will fall out of the
upper bracket and may cause injury to you or
damage to the equipment. Make sure you have
an assistant hold the pulley while you remove
the fasteners.
E. Ask your assistant to hold each pulley as you
remove the fasteners on the Main Uprights. Set the
pulleys and fasteners aside.
F. Have your assistant align the Pull-up Bar with the
Main Uprights and hold it in place while you reinsert
the fasteners, spacers, and pulleys. Finger tighten
the four locknuts.
Important: Make sure you secure the top of the
Main Uprights with the lower two fasteners.
G. Move both Pulley Assemblies to the top of the Main
Uprights.
H. Use two ⁹⁄₁₆-inch wrenches to tighten the fasteners
on the Lower and Upper Cross Braces. Then, tighten
the fasteners on the Pull-up Bar.
J. Attach the accessory rack by removing two silver
fasteners from the blister pack.
K. Align the rack and insert the two fasteners. Wrench
tighten.
L. Set aside any accessories and handles found in
Box 1.
Step 1. Assemble Main Structure, continued
H
J
Tighten the eight Cross Brace
fasteners.
Pulley
Assembly
2 -bolts
4 - shoulder spacers
4 - washers
2 - locknuts
F
Accessory rack
G
D