Aggregating Devices
Windows
Quantum 2626
Owner’sManual
25 -3 2 48 kH z 17 -2 4 19 -2 6 4 8k Hz 1 1- 18
OUT IN
21-24 96kH z 17-2 0 15-18 96kHz 11-1 4
Line Outputs TRS Balanced
Mic/Line Inputs
Quantum #2(Secondary)
25 -3 2 48 kH z 17 -2 4 19 -2 6 48 kH z 11 -1 8
21-24 96kH z 17-2 0 15-18 96kHz 11-1 4
Line Outputs TRS Balanced
25 -3 2 48 kH z 17 -2 4 19 -2 6 4 8k Hz 1 1- 18
OUT IN
21-24 96kH z 17-2 0 15-18 96kHz 11-1 4
Line Outputs TRS Balanced
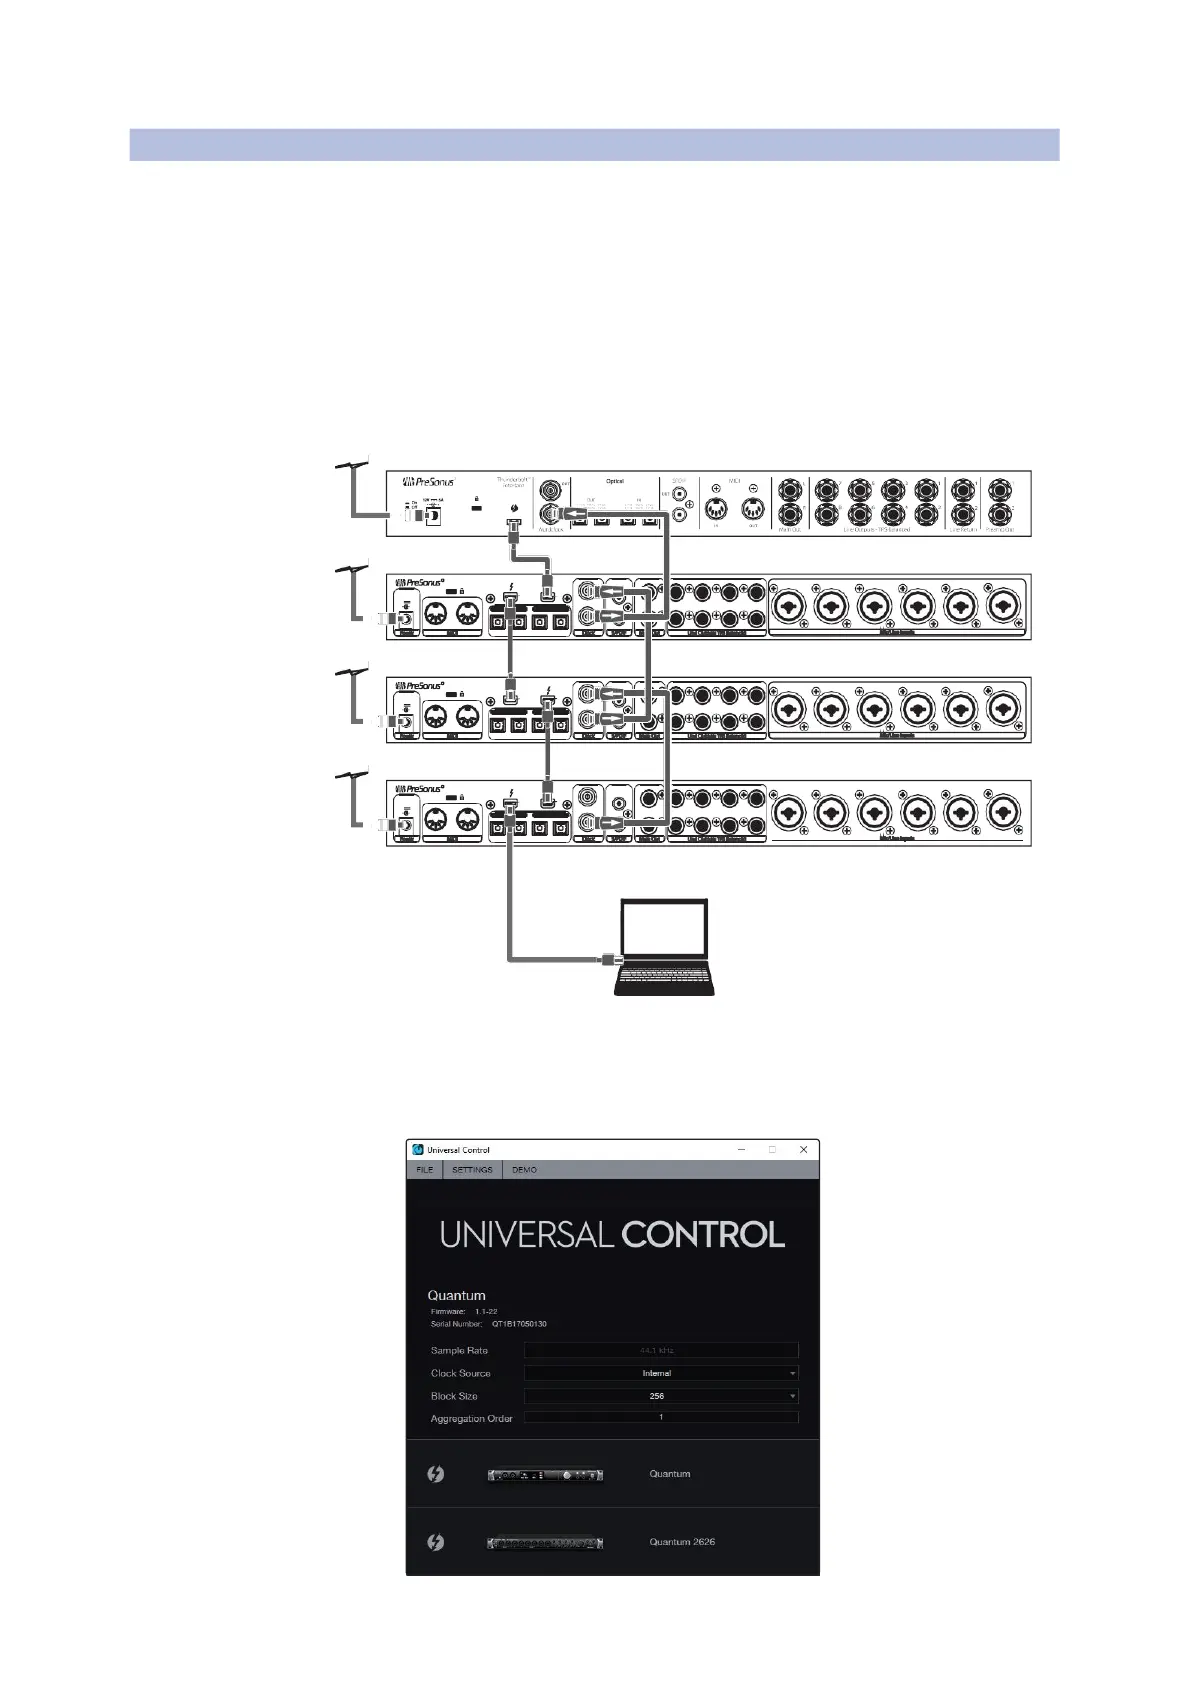
1.
Connect your Quantum interfaces to your
computer and launch Universal Control.
将你的
Quantum
接口连接到您的电脑,并启动
通用控制。
Please Note:
YourQuantum interfaces must be clocked to each other via
BNC and one unit must be designated as the Primary,by selecting Internal
Clock Source in Universal Control.
请注意:
你的
Quantum
接口,需要通过
BNC
相互时钟连接,并且必须
在
Universal Control
中选择内部时钟源,指定一个设备为主设备。
Computer
2.
Selectthe Quantum interface you would like to use as the first bank of channels
and set the Aggregation Order to“1,”and the Clock Source to Internal.
选择你想用作第一组通道的
Quantum
接口,并将聚合顺序设置为
"1"
,
将
”Clock Source”
设置为
“ Internal”
内部。