Do you have a question about the Prevue Hendryx F030 and is the answer not in the manual?
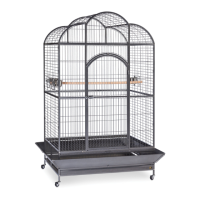
Align the extended center wire on the back panel with the hole on the side panel frame leg.
Attach panels together with a long hex screw at the bottom, leaving the top screw out.
Complete the base assembly by attaching panels only at the bottom.
Carefully tip the cage on its side to access the base of the frame legs.
Fully insert the post of the casters into the holes in the base of all four frame legs.
Slide the side panels onto the frame posts.
Align the extended wires on the back panel with the holes on the side panel frame rails.
Attach the back panel with long hex screws at the top and bottom corners.
It's a good time to add the perches before adding the top front panel.
Align front panel wires with side frames and attach with screws in top and bottom corners.
Check and tighten all screws over the entire cage to ensure a safe and stable home.
Hook the cups onto the horizontal wire under the doors on the side panels.
Slide the grille into the top channel and the tray into the bottom channel.
Lay the V-shaped roof beam centered, then lay the roof mesh centered on top.
Secure the roof with short screw and washer pairs in eight places along the roof frame.
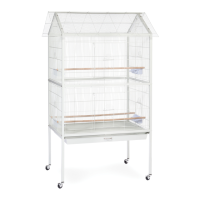
| Product Type | Bird Cage |
|---|---|
| Brand | Prevue Hendryx |
| Model Number | F030 |
| Color | White |
| Material | Metal |
| Included Accessories | 2 Wood Perches |
| Animal | Bird |
| Type | Bird Cage |