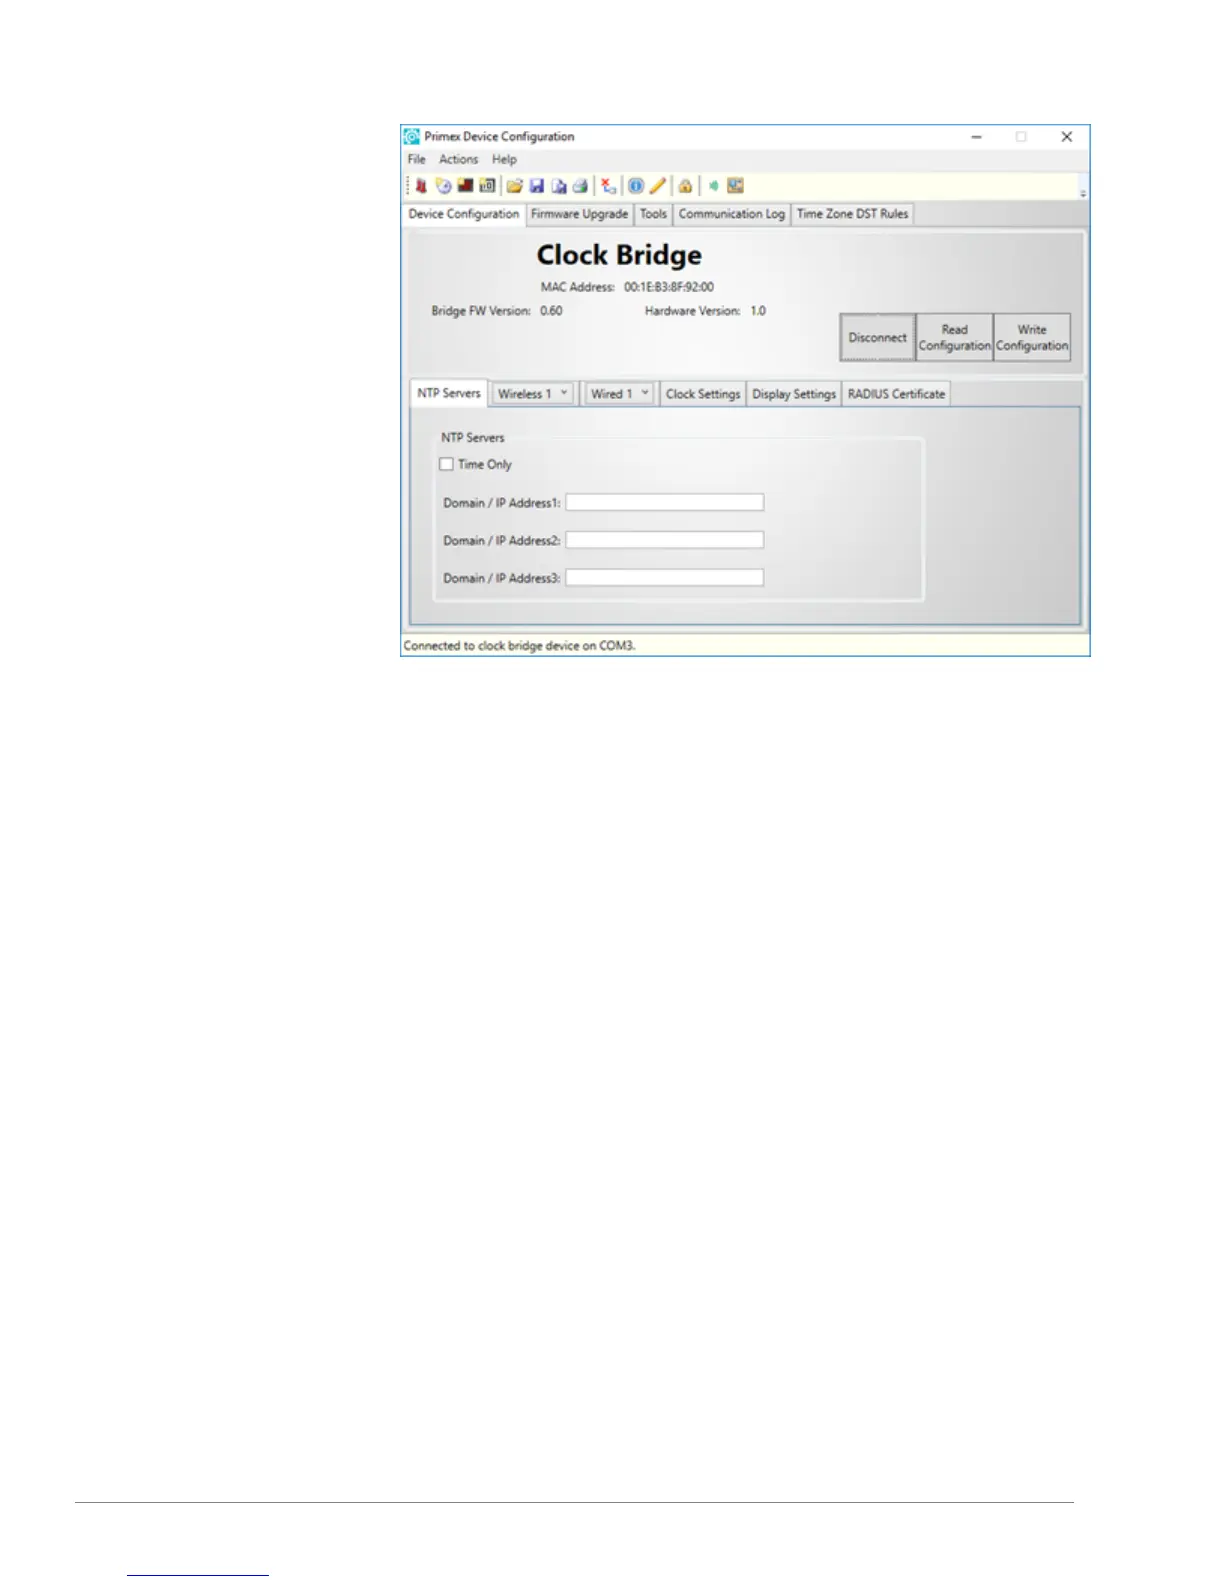
6.
Select Connect. A connection
between your computer and the
bridge is established.
7.
Verify the notification area
located in the lower-left of the
screen, displays Connected to
clock bridge device on COMx,
which indicates the connection
is established.
8.
Select Read Configuration.
9.
Select Write Configuration.
From the Confirmation Needed
window, select Yes
10.
Select Disconnect. The
connection between the
software and device is ended.
11.
Remove the USB connection
between the bridge and your
computer.
You can now begin installing the
Smart-Sync Clocks.
13
Smart-Sync™ Bridge Install Guide