8
• To hire an authorized service technician to
assemble the treadmill, call 1-800-445-2480.
• Assembly requires two persons.
• Place all parts in a cleared area and remove the
packing materials. Do not dispose of the packing
materials until you fi nish all assembly steps.
• After shipping, there may be an oily substance
on the exterior of the treadmill. This is normal. If
there is an oily substance on the treadmill, wipe
it off with a soft cloth and a mild, non-abrasive
cleaner.
• Left parts are marked “L” or “Left” and right parts
are marked “R” or “Right.”
• To identify small parts, see page 7.
• Assembly requires the following tools:
the included hex keys
one Phillips screwdriver
To avoid damaging parts, do not use power tools.
ASSEMBLY
2
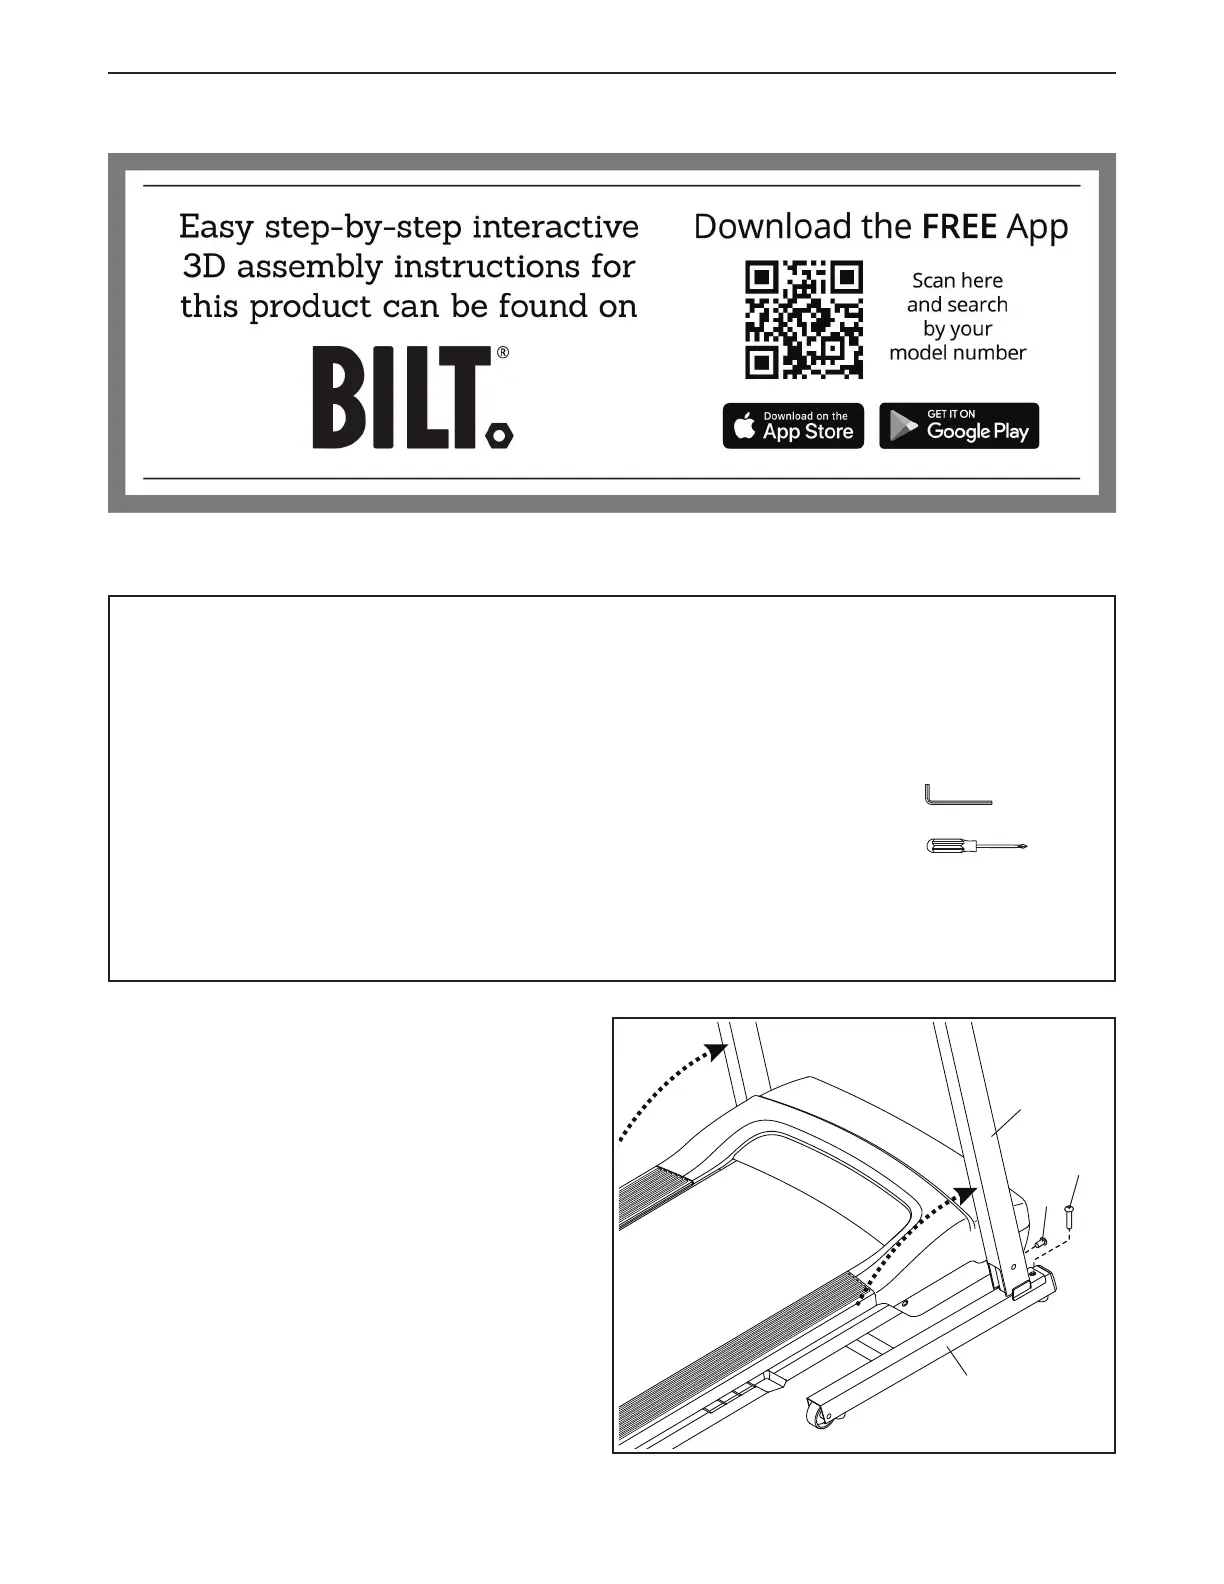
2. Make sure that the power cord is unplugged.
With the help of a second person, carefully raise
the Uprights (76) to the vertical position.
Next, tighten a 3/8" x 2 1/4" Screw (1) and a
3/8" x 3/4" Screw (24) into the right Upright
(76) and the Base (85) as shown; do not fully
tighten the Screws yet.
Repeat this step on the left side of the tread-
mill (not shown).
Then, tighten all four Screws (1, 24).
24
85
76
1
1. To use the assembly steps in this manual, first see the helpful tips below.
 Loading...