15
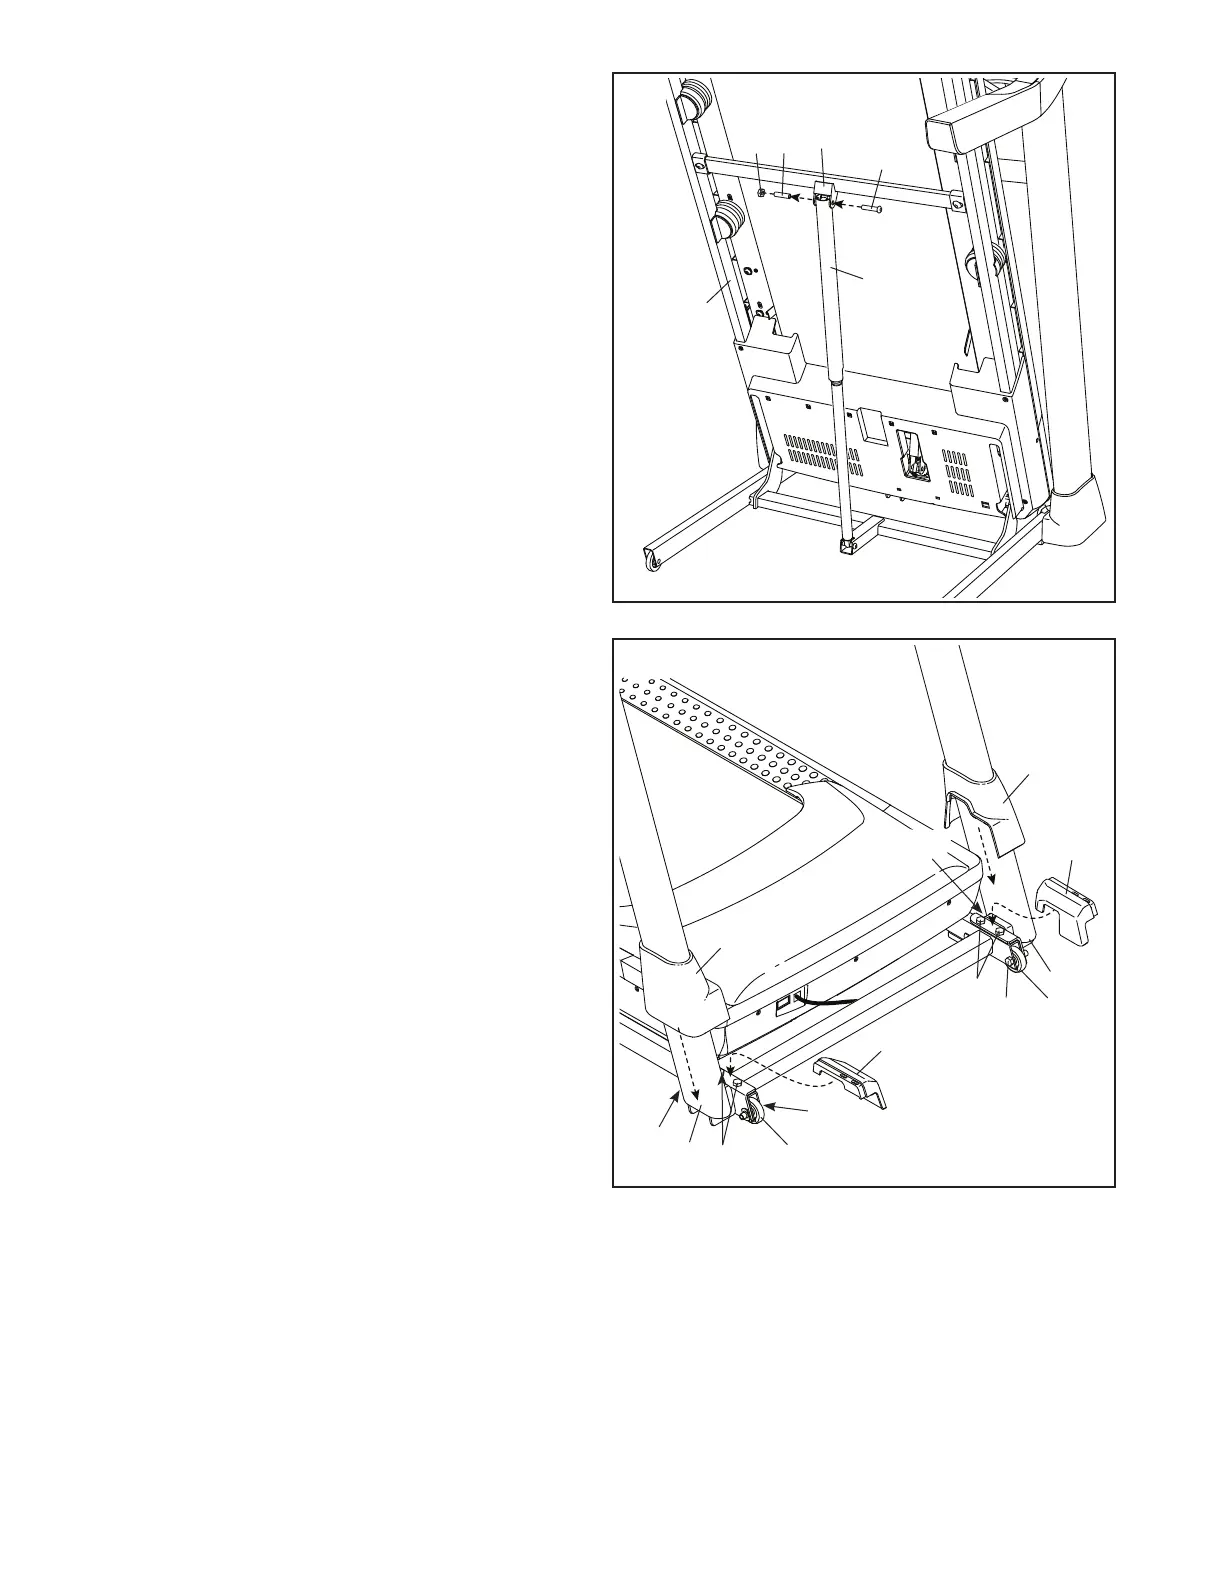
15. Remove the 5/16" Nut (12) and the
5/16" x 2 1/4" Bolt (3) from the bracket
on the Latch Crossbar (38).
Align the upper end of the Storage Latch (53)
with the bracket on the Latch Crossbar (38),
and insert the 5/16" x 2 1/4" Bolt (3) through the
bracket and the Storage Latch. This will push a
spacer (L) out of the Storage Latch; discard
the spacer.
Next, tighten the 5/16" Nut (12) onto the
5/16" x 2 1/4" Bolt (3). Do not overtighten the
Nut; the Storage Latch (53) must be able to
pivot.
Then, lower the Frame (56) (see HOW TO
LOWER THE TREADMILL FOR USE on
page 25).
38
3
56
12
L
53
15
16. Firmly tighten the four 3/8" x 2 3/8" Screws
(7) and the two 3/8" x 1 1/4" Screws (63).
Next, tighten the two 3/8" x 1 3/4" Screws
(62); the Wheels (97) must turn freely.
Next, set the Left Inner Base Cover (50) onto the
lower end of the Left Upright (89). Slide the Left
Base Cover (82) downward until the two Covers
press together.
Then, set the Right Inner Base Cover (96) onto
the lower end of the Right Upright (90). Slide the
Right Base Cover (83) downward until the two
Covers press together.
50
83
82
62
89
7
7
63
62
96
63
16
90
97
97
 Loading...