10
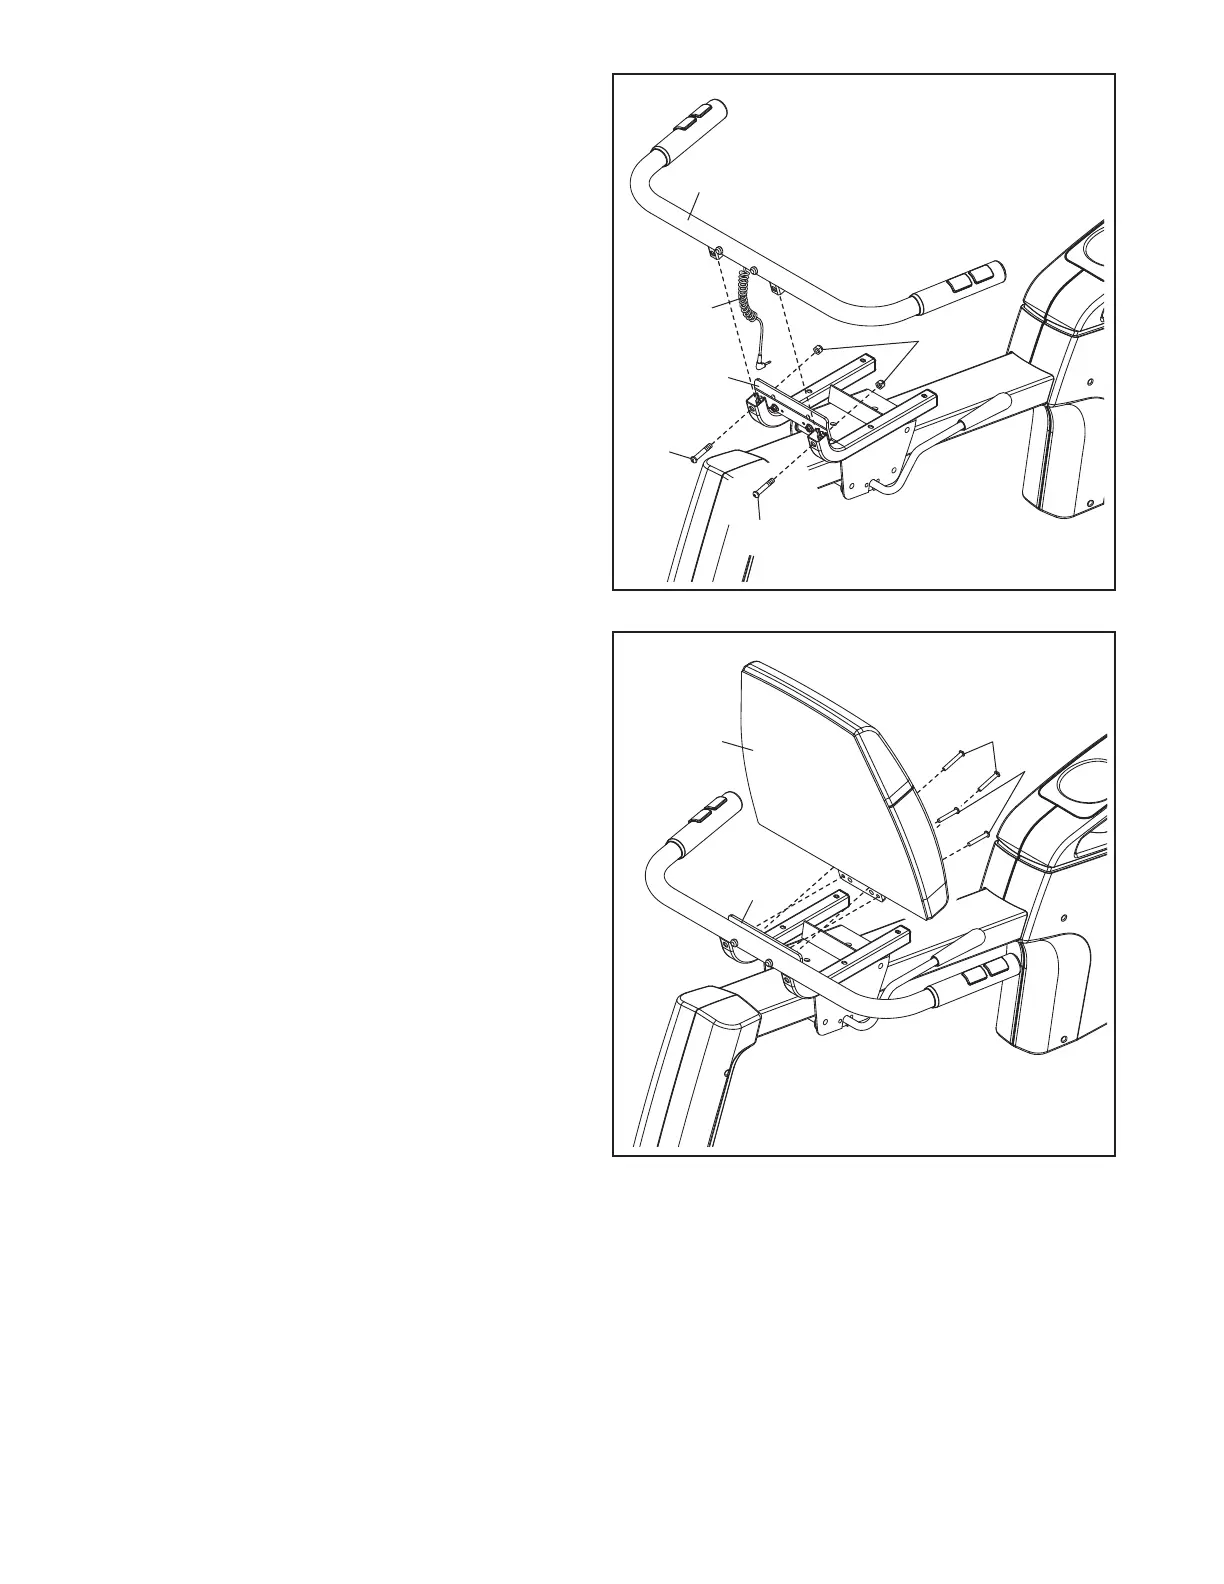
9. Tip: Avoid pinching the Pulse Wire (38)
during this step.
Orient the Pulse Bar (7) as shown. Attach the
Pulse Bar to the Seat Carriage (6) with two M10
x 36mm Screws (57) and two M10 Locknuts
(
58). Do not tighten the Screws yet.
9
10. Tip: Avoid pinching the Pulse Wire (not
shown) during this step.
Attach the Backrest (8) to the Seat Carriage (6)
with two M6 x 18mm Patch Screws (59) and
two M6 x 42mm Patch Screws (60).
See step 9. Tighten the M10 x 36mm Screws
(57).
10
7
38
57
59
60
58
6
8
6
57
Avoid pinching the
Pulse Wire (38)
Avoid pinching the
Pulse Wire (not shown)
 Loading...