©2022 Pro-Vision Solutions, LLC. Page 25 of 56
4. Using the female end of the camera connection or
extension cable, verify there is enough clearance
for the connector to fit through the hole and route
toward the recording unit. If needed, drill the 1/2"
hole out to 3/4" to allow the connector to route into
the vehicle body.
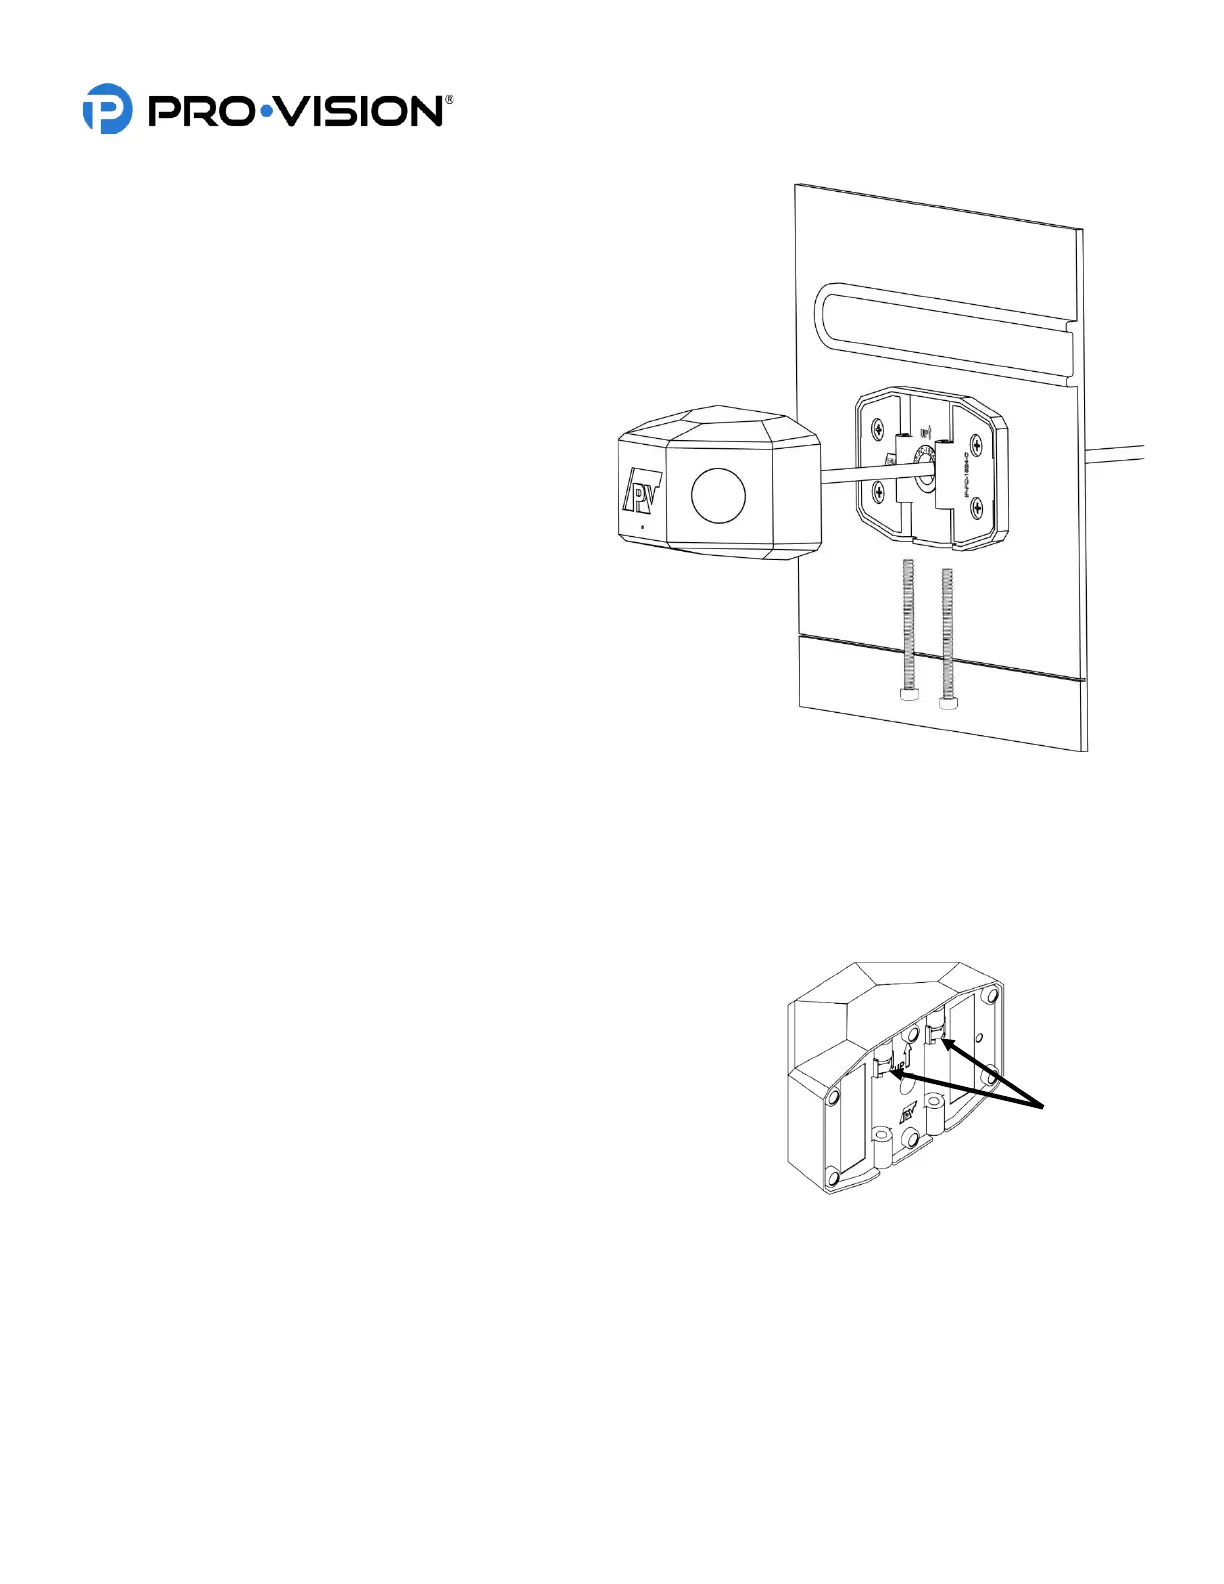
5. If certain of the camera’s mounting location and
that the correct hole for the cable has been drilled,
place the mounting base assembly so that the four
(4) ORANGE marks completed in Step 1 are
showing. Orient the mounting base assembly so
that the bolt cutouts in the base and gasket point
toward the ground and the “UP“ arrow points
toward the roof of the bus. Use the four (4) self-
drilling screws provided to attach the base and
gasket to the side of the bus.
6. After the base and gasket are securely attached to
the bus, route the camera cable through the drilled
center cable hole and place the camera in the
mounting base assembly. Orient the camera so
that the bolt cutouts in the housing are pointed
toward the ground and the “UP“ arrow points
toward the roof of the bus as shown to right.
7. Slide the two (2) 4 mm bolts into the bottom of the camera connecting the camera housing to the mounting base
assembly. Using the provided 3 mm ball end Allen wrench, tighten the bolts into the Nyloc nuts that are attached
to the bottom of the housing. The bolts should be nearly flush with the rubber gasket when fully tightened.
8. Connect the camera cable to the extension cable running to the DVR, and then connect the extension cable to the
“Camera 7” port on the DVR unit for the camera to be recognized.
IMPORTANT! The Nyloc nuts used for mounting the camera experience
reduced holding performance after each removal and
reinstallation. If the camera is removed and reinstalled
multiple times, it is recommended to apply a medium-strength
liquid thread locker (such as Permatex® Threadlocker Blue)
to the end of the bolt threads or inside of Nyloc nuts before
reassembly.
Stop-Arm Camera Triggering:
The stop-arm camera contains an automatic detection function to automatically detect cars passing and generate small
video clips that are easy to locate and find for violations. The detection function relies on an external trigger to the DVR
unit to tell it when the stop-arm is open to begin detecting vehicles. To use this function, a 12V constant signal from the
vehicle when the stop-arm is open must be connected to one of the trigger inputs of the DVR and then configured in the
DVR web interface. See Settings > Stop-Arm Camera.
 Loading...