©2022 Pro-Vision Solutions, LLC. Page 34 of 56
Connecting to the DVR
The DVR can be connected with an Ethernet (LAN) cable to a laptop, or it can also be accessed wirelessly using a Wi-Fi
connected laptop, tablet, or smartphone device.
1. Connect to the DVR:
a. LAN:
Connect a cable from the LAN port on the DVR unit to a LAN port on the laptop using a standard (Non-
crossover) LAN cable. Your computer must have a static IP address set on the LAN adapter to connect to the
DVR. To set the computer to a static IP, see step 2.
b. Wi-Fi:
On a Wi-Fi-enabled device (laptop, smartphone, or tablet) go to the Wi-Fi settings and connect to the Wi-Fi with
the name "PV_RANGER_xxxxxx". The Wi-Fi has a default password of “doesitall”. If the unit has already been
configured, the Wi-Fi may be disabled or renamed, "xxxxxx" represents the last 6 unique characters of the
devices MAC address. The front of the DVR has a LED indicator for Wi-Fi to show the status of the Wi-Fi
connection. If the Wi-Fi light on DVR goes on and then back off again, the Wi-Fi is rebooting. Any time Wi-Fi
settings are changed, the Wi-Fi must reboot for the changes to take effect. The light for Wi-Fi will also go off
when the DVR is rebooting.
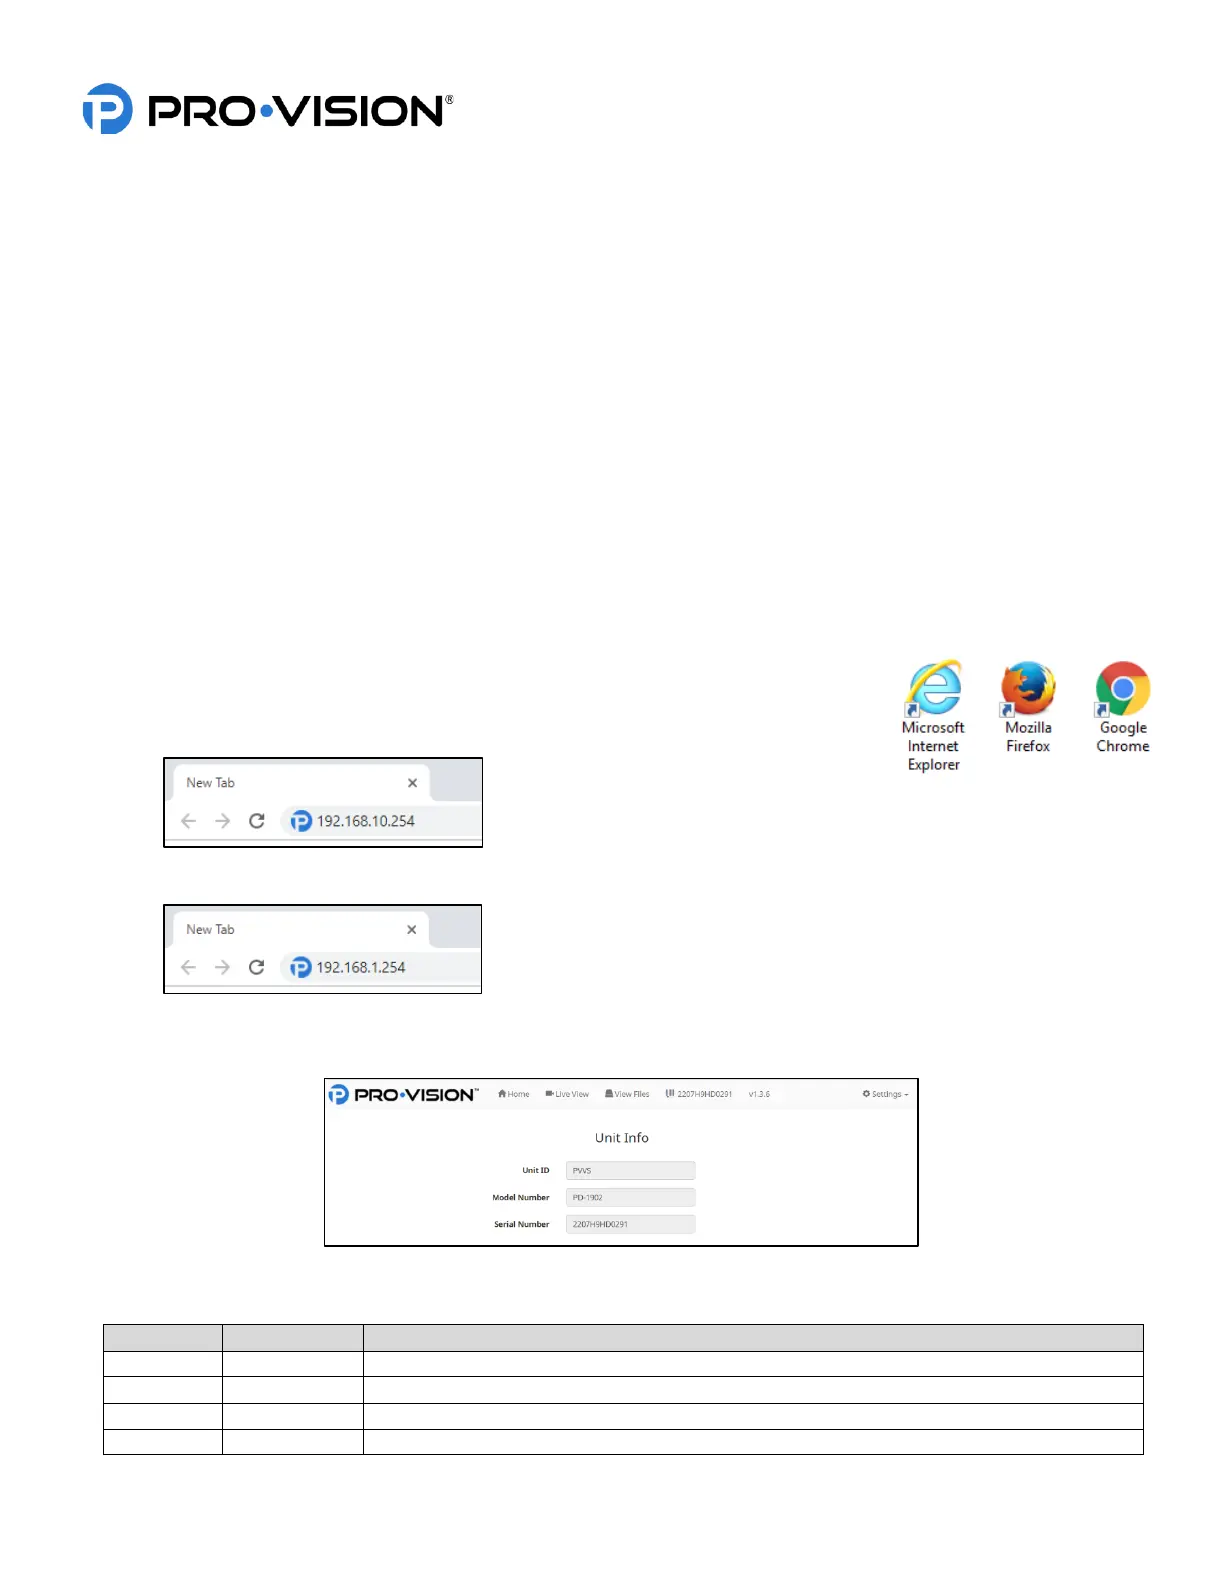
2. Open a web browser software application such as Microsoft® Internet Explorer®,
Mozilla® Firefox®, or Google® Chrome® browser.
a. LAN: Type “192.168.10.254” in the browser address bar and press enter.
b. Wi-Fi: Type “192.168.1.254” in the browser address bar and press enter.
3. You will now be on “PRO-VISION” web interface for the DVR unit. You will see current Unit ID (Default: “PVVS” if
not yet configured), the model number (PD-1902), and the device’s serial number.
4. You can now navigate to the desired page; Live Video, View Files, or Settings. When you click on the desired page
a password prompt will appear, enter the appropriate username/password. The default accounts are listed below.
 Loading...