©2022 Pro-Vision Solutions, LLC. Page 45 of 56
To test the stop-arm camera functionality, ensure the page status displays as Ready, turn on the trigger for the stop-arm
by activating the red lights, and then physically move hand across from one camera lens to the other, the status should
change to Detected.
The DVR unit will create a “Stop-Arm” folder in the root directory of the primary recording disk. Then a folder will be
created with the date/time of the event. This folder will contain video files from both cameras for 5 seconds before and 5
seconds after the test event:
SD/StopArm/20200101/20200101_10/7_201200101_102511_PVVS.avi Rear Facing Camera View
SD/StopArm/20200101/20200101_10/7_201200101_102511_PVVS.avi Front Facing Camera View
Admin
Users
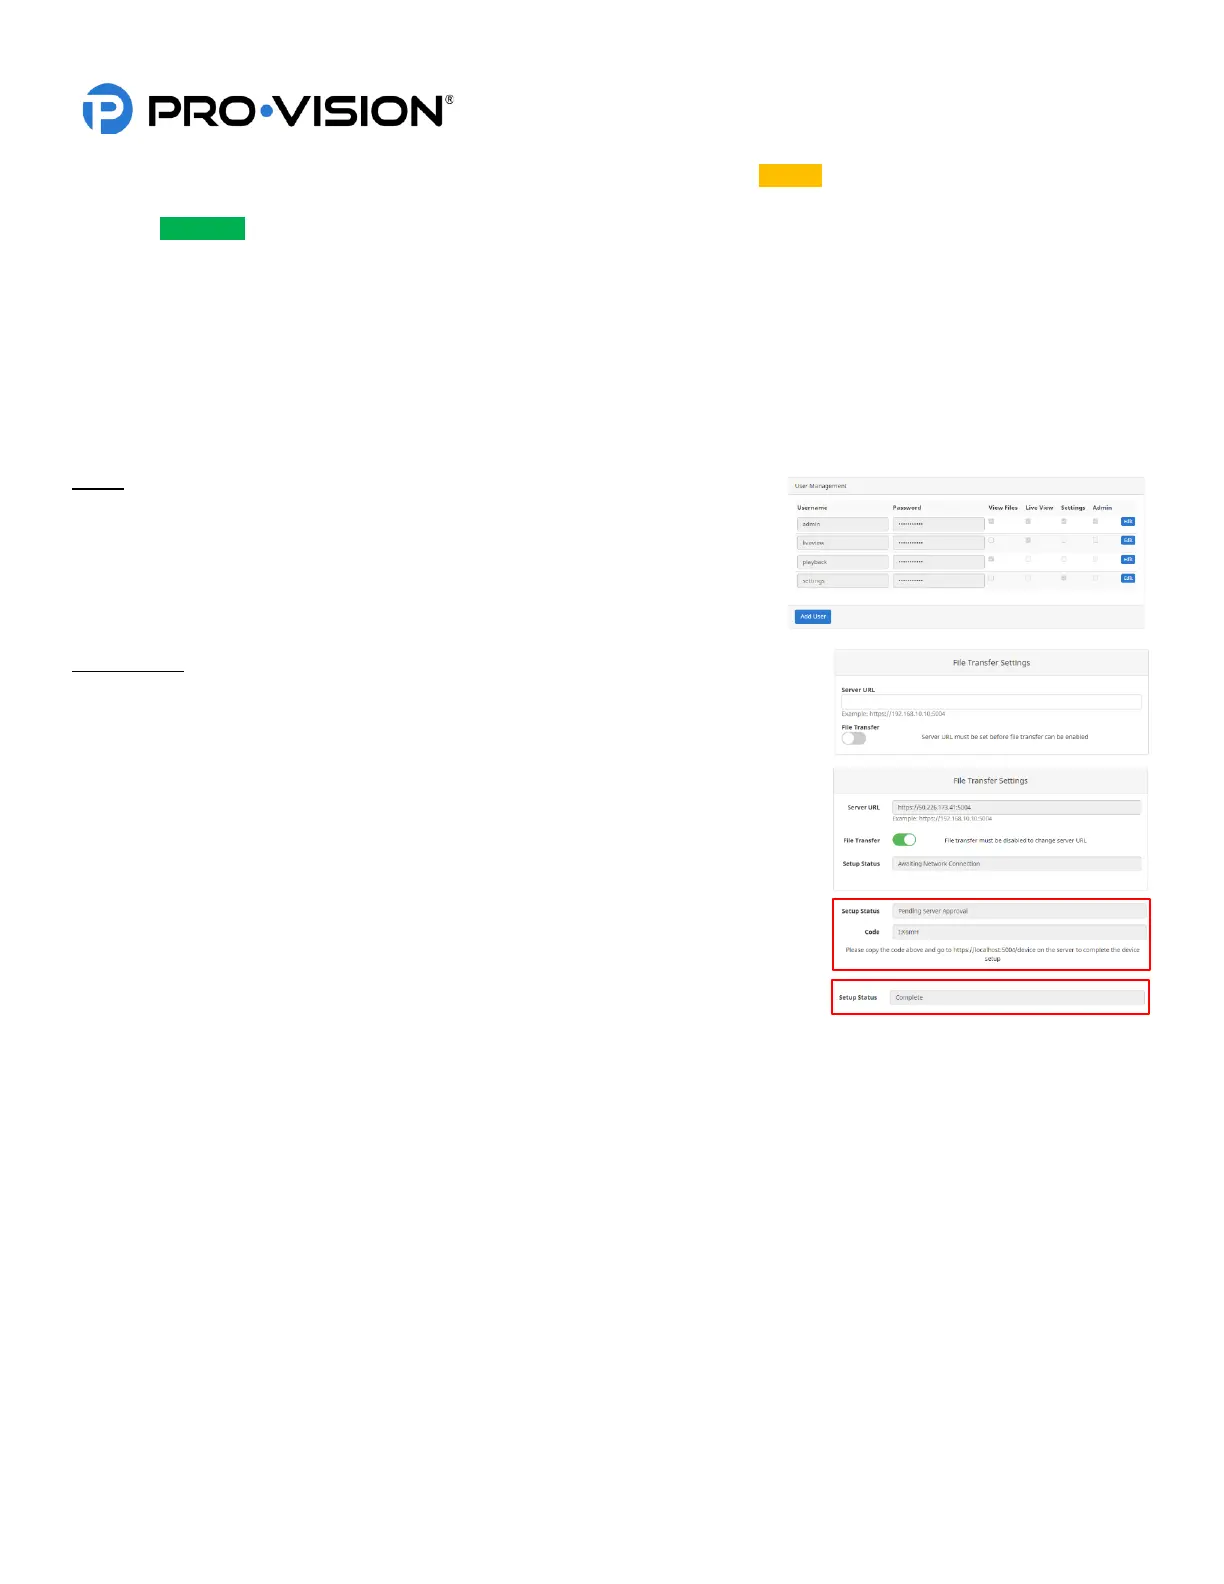
The “User Management” page is only accessible to an “Admin” user account.
This page allows the customization, addition, and changing of passwords and
permissions for user accounts. There are four user accounts created by
default with various permission levels. To modify or delete the accounts, use
the “EDIT” and “DELETE” buttons to the right.
File Transfer
The transfer page is where the software is configured to link to file transfer
software. If using Connect (Formerly ECB), CloudConnect, or SecuraMax software,
this must be configured for use.
Server URL: This is the address of the server that is used with the connectivity
software. To find the specific Server URL, open the software and locate the “Add
Device” page. After entering Server URL, click the selector switch to enable File
Transfer. The switch will change to green color and show “Awaiting Network
Connection” in the status box. Once properly set up and linked to the server, the
“Setup Status” box will display “Complete”.