www.usaprocom.com
11200049-02A
INSTALLATION
Follow steps 1 through 4 under Attaching
To Wall Anchor Method, page 10. If install-
ing bottom mounting screw into wall stud,
drill holes at marked locations using 9/64"
drill bit.
5. Replace heater onto mounting bracket.
6. Place spacers between bottom mounting
holes and wall anchor or drilled hole.
7. Hold spacer in place with one hand. With
other hand, insert mounting screw though
bottom mounting hole and spacer. Place
tip of screw in opening of wall anchor or
drilled hole.
8. Tighten both screws until heater is rmly
secured to wall. Do not over tighten.
Note: Do not replace front panel at this time.
Replace front panel after making gas connec-
tions and checking for leaks.
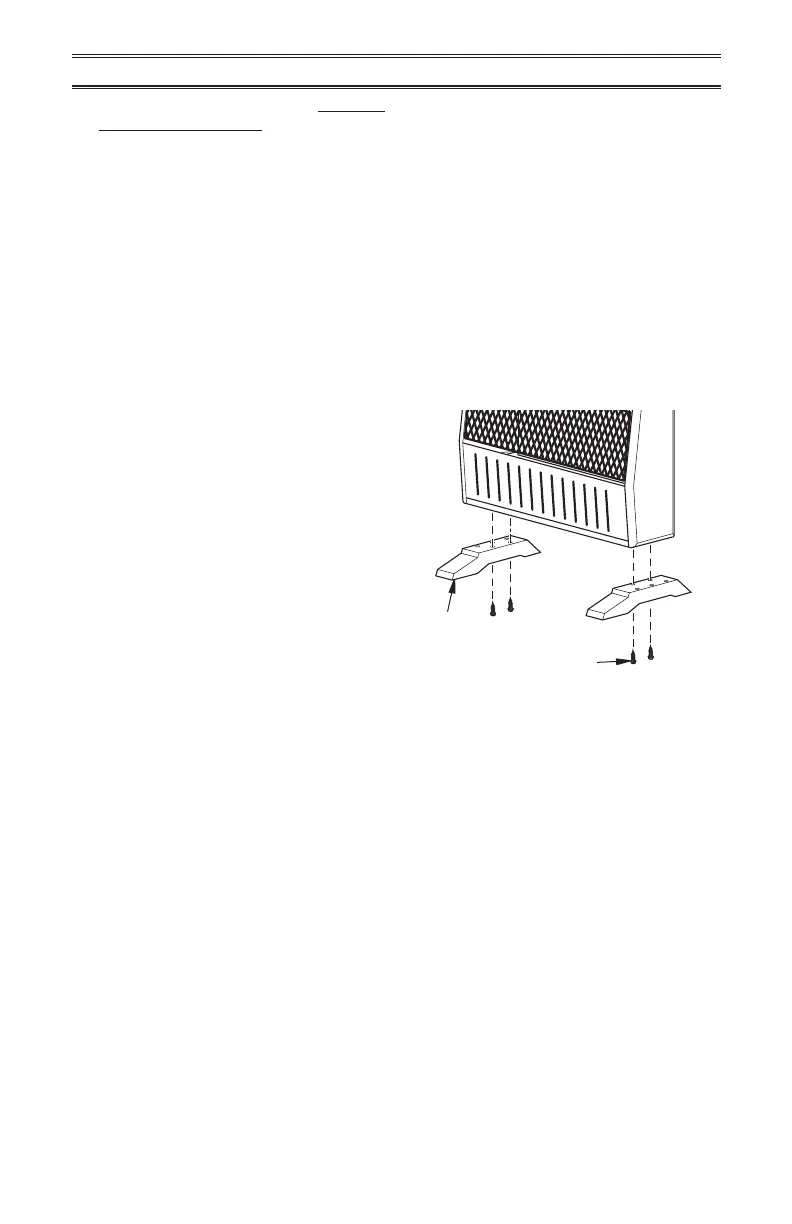
Figure 11 - Installing Base Feet
INSTALLATION OF BASE STAND
(If Used)
Base Feet
Sheet Metal Screws
Before installing heater to base, please make
sure you have a hardware packet that con-
tains the following items:
2 - Base Feet
4 - Sheet Metal Screws
1. Carefully lay heater on its back on a table
with the bottom of the heater extending
outside the table edge.
2. Attach base feet to heater using sheet
metal screws.