www.usaprocom.com
200049-02A16
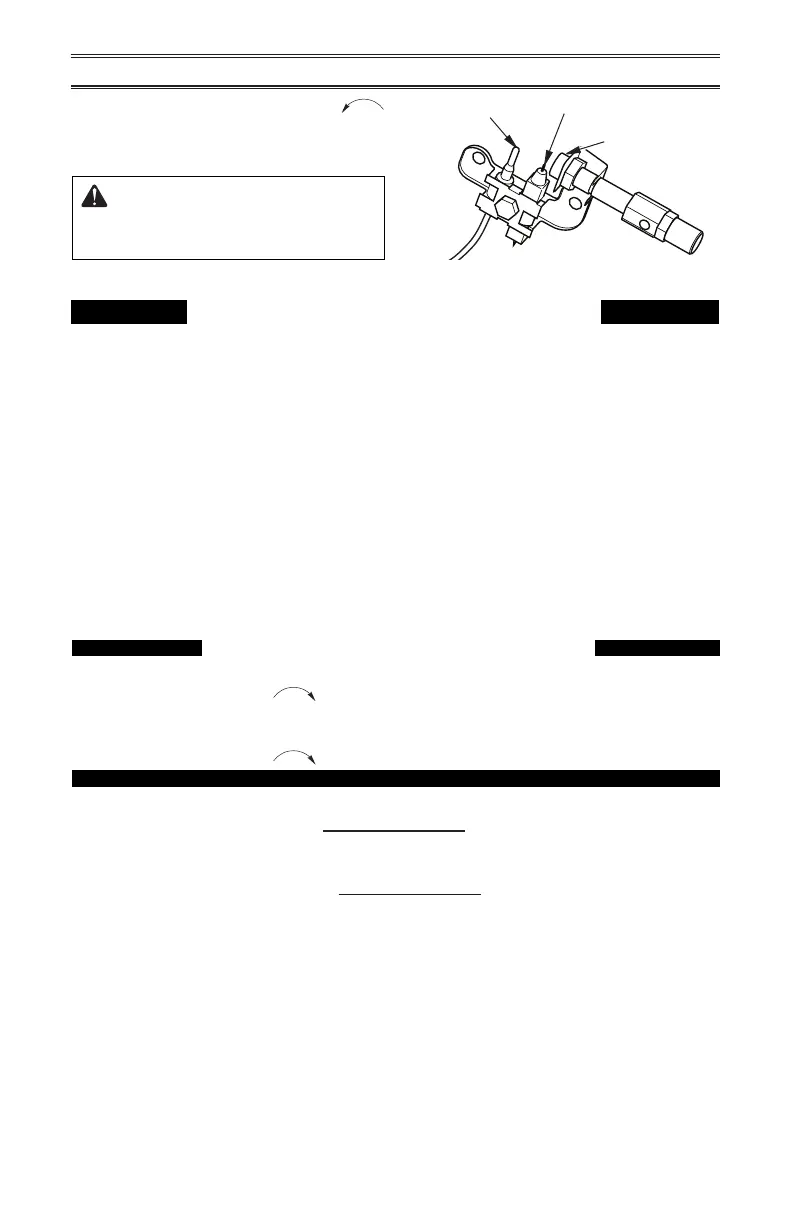
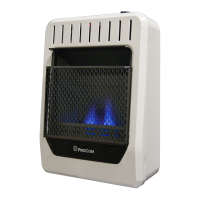
Figure 17 - Pilot
OPERATION
Pilot Burner
Ignitor Electrode
Thermocouple
The thermostatic control used on this model
diers from standard thermostats. You set
standard thermostats to a specic tempera-
ture such as 72° F. The control of this heater
establishes a "comfort level". In order for the
thermostat to operate eectively, the heater
should be the main source of heat in the
room. Follow the instructions for lighting the
heater on page 16. When the room reaches
the desired comfort level, rotate the control
knob clockwise slowly until the main burner
turns o and the pilot remains on (this position
on the knob will change depending on room
temperature).
THERMOSTAT CONTROL OPERATION
Turn the knob counter-clockwise slowly until
the main burner reignites. Note the position
of the control knob by the numbers printed
on the knob. Leave the knob in this position.
As the room temperature increases, the main
burner will turn o and the pilot will remain on.
When the room temperature cools, the heat-
er's main burner will come back on. If left at
this set point the thermostat will turn the main
burner on or o as needed to maintain the
room temperature at the desired comfort level.
Note: The thermostat sensing bulb reacts
to the temperature depending on house's
construction.
8. Turn control knob counterclockwise
to desired heating level. The main burner
should light. Set control knob to any heat
level between HI and LO.
CAUTION: Do not try to ad-
just heating levels by using the
equipment shuto valve.
TO TURN OFF GAS TO APPLIANCE
Shutting Off Heater
Turn control knob clockwise to the OFF position.
Shutting Off Burner Only
(pilot stays lit)
Turn control knob clockwise to the PILOT position.
MANUAL LIGHTING PROCEDURE
1. Remove front panel.
2. Follow steps 1 through 5 under Lighting Instructions, page 15 or 16.
3. With control knob pressed in, strike match. Hold match to pilot until pilot lights.
4. Keep control knob pressed in for 30 seconds after lighting pilot. After 30 seconds, release
control knob. Follow step 8 under Lighting Instructions, page 15 or 1.
5. Replace front panel.