PROLIGHTS - EclProfile CT+
11
DMX ADDRESSING
In order to start controlling the product via DMX, the rst step is to select a DMX address, also known
as the start channel, this is the rst channel used to receive instructions from a DMX controller. If you
wish to control the product individually, it is necessary to assign a different starting address channel to
each xture.
The number of channels occupied from the product depends on the DMX mode selected, so always
verify the DMX Mode in the MENU before start addressing.
If you assign two xtures the same address, they will be executing the same behaviour. Selecting the
same address to multiple xtures can be useful for diagnostic purposes and symmetrical control.
DMX addressing is limited to make it impossible to set the DMX address so high that you are left with-
out enough control channels for the product.
To set the xture’s DMX address:
1. Press MENU to open the main menu.
2. Reach the addressing menu, then select the DMX ADDRESS settings.
3. Select the address from 1 to 512 using the navigation arrows/buttons and conrm by pressing
ENTER.
4. Press Menu to exit and return to the Home screen.
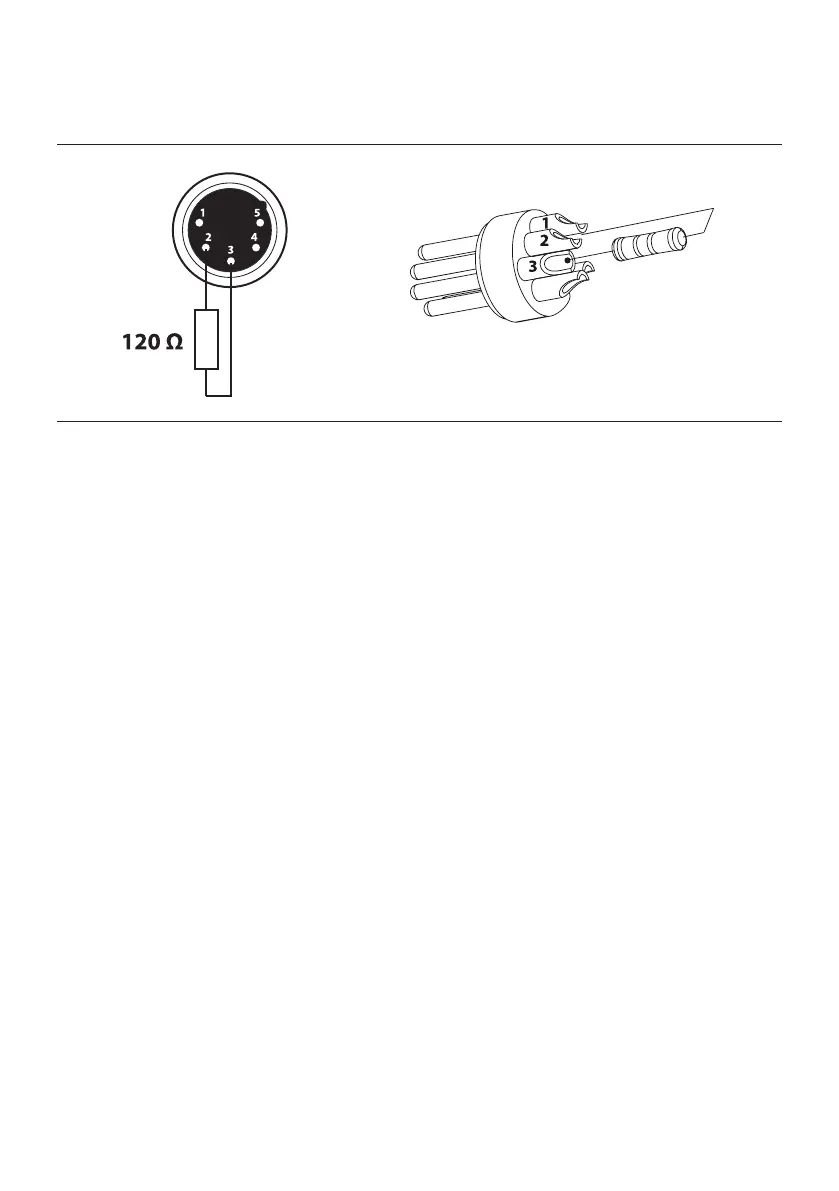
CONSTRUCTION OF THE DMX TERMINATION
The termination is prepared by soldering a 120Ω 1/4 W resistor between pins 2 and 3 of the male XLR
connector, as shown in gure.
Fig.6
Example:
5 pin XLR connector
4