1 1
2
3
R L
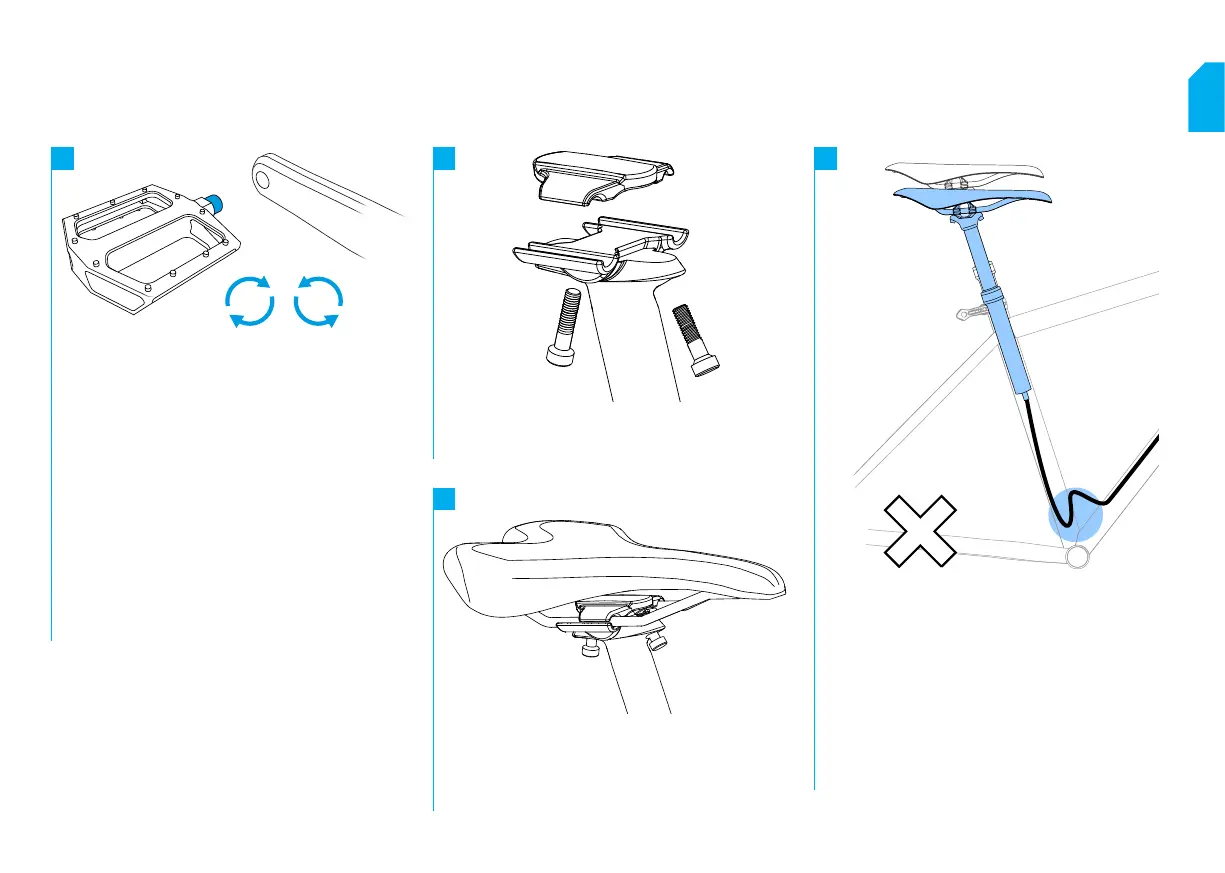
// MOUNTING THE PEDALS
One of the pedals has a right- and the other a left-hand thread.
Most pedals have the letter “L” and “R” stamped on the end of
ĴìÐĴìīÐÌȘwďĉÐĨÐÌăĮÆďĉÐœðĴìæīďďŒÐðĊĴìÐŦĊæÐďå
the left pedal.
1. Slightly grease pedal thread.
2. AåœĮìÐīĮœÐīÐĨīďŒðÌÐÌœðĴìĴìÐÆīĊāĮďåřďķīÅðāÐșťĴ
them on the pedal threads.
3. Turn the left pedal counter-clockwise to screw it into the
thread of the left crank arm and tighten the pedal to a
ĴďīĪķÐďåǢǤɁUĉȘ
4. Turn the right pedal clockwise to screw it into the thread
of the right crank arm and tighten the pedal to a torque
ďåǢǤɁUĉȘ
// MOUNTING THE SADDLE
1. Attach the upper clamp to the saddle frame.
2. Adjust the saddle to your personal preferences and
screw in the clamping bolts.
Adjust the seat height:
ķĴðďĊȚìÐĊÌþķĮĴðĊæĴìÐĮÐĴìÐðæìĴșĴìÐÆÅăÐďåĴìÐĮÐĴ
post must be pushed or pulled in or out the frame. Otherwise
the cable may get damaged!
1. Open the saddle clamp.
2. Push the seat post carefully and slowly into the frame
or pull the seat post out of the frame. At the same time
push or pull the cable in or out the frame.
3. Close the saddle clamp.
Unscrew the bolts of the saddle clamp and remove the upper
clamp.