20
O. ADJUST SCREEN AND KEEPER
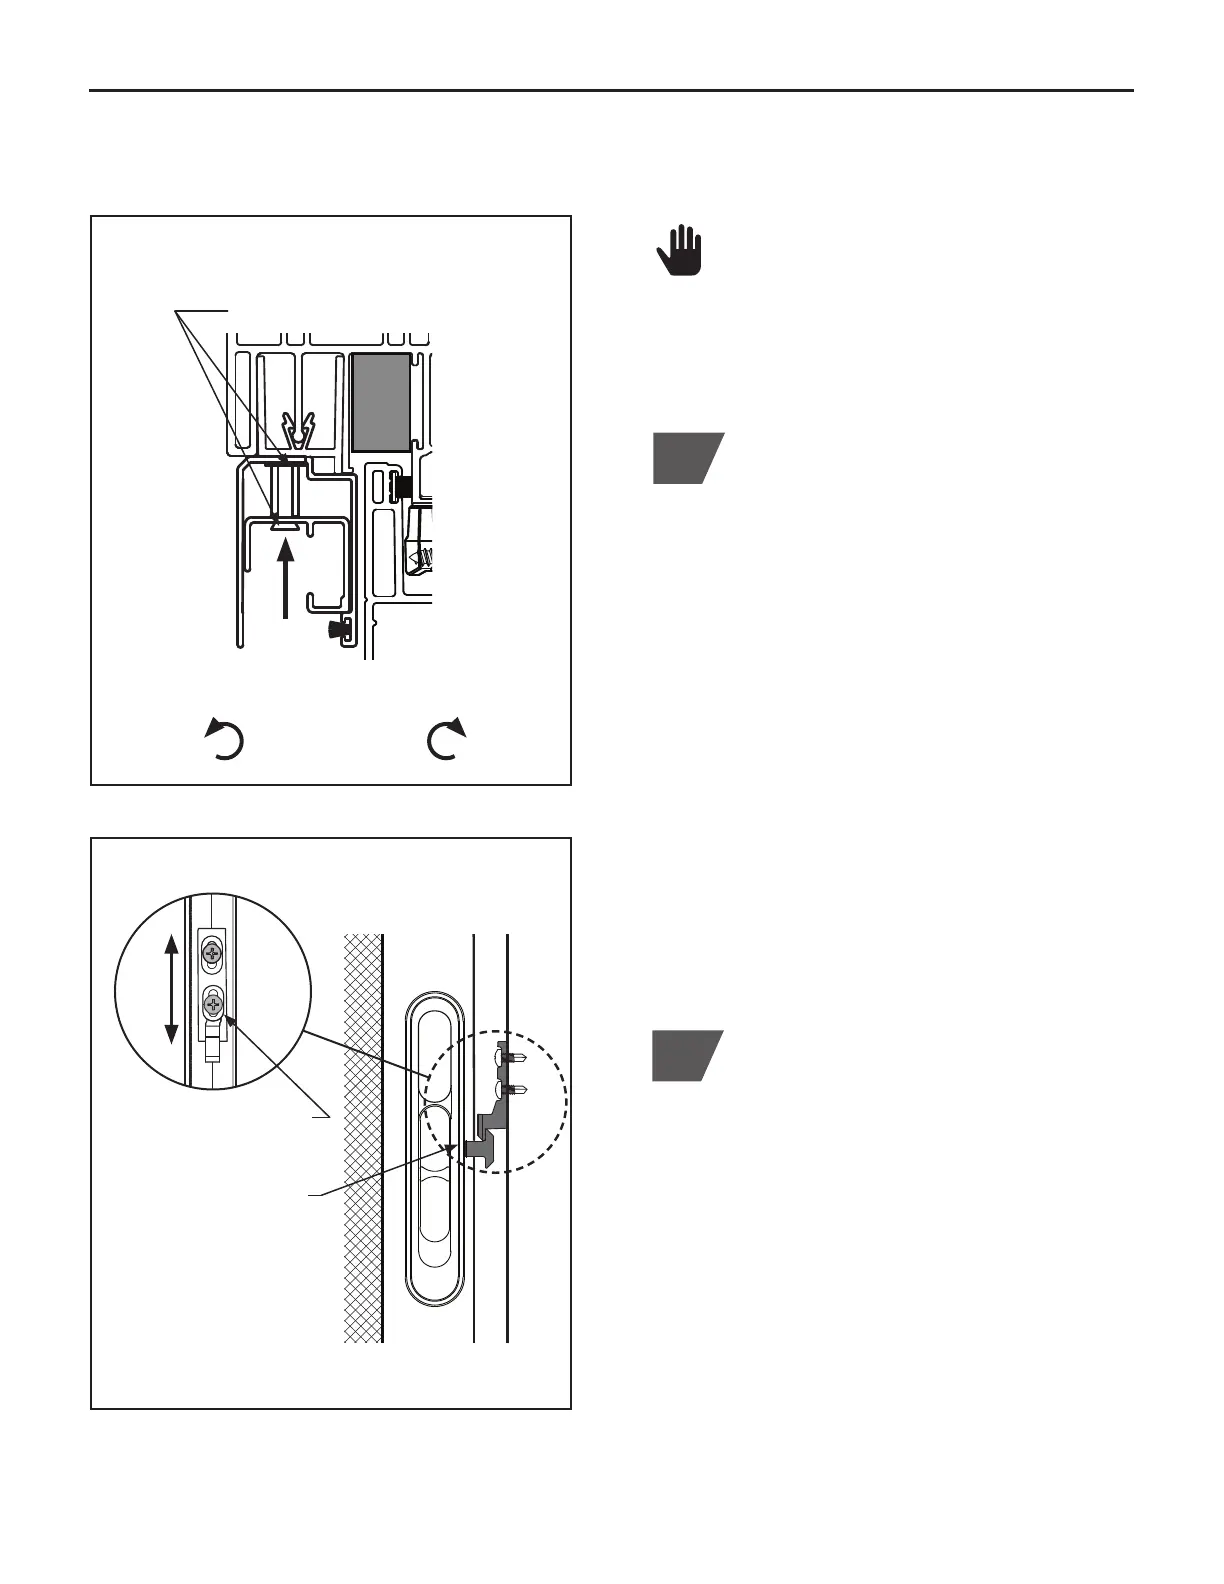
1
To adjust the height and square of the
screen, locate the (3) adjustment screws
inside the inner screen track. Adjust the left
and right screws until screen is parallel to
sash and jamb. Once screen placement is
established, align center screw to match.
NOTE: Each complete turn of the screw
will raise or lower the track by
1
⁄32". Turn
counter-clockwise to LOWER the screen
and clockwise to RAISE the screen. DO
NOT remove the adjustments screws.
(Figure O.1)
NOTE: DO NOT USE a power drill to make
adjustments. Doing so will cause excessive
torquing of adjustment screws. ONLY use
a #2 Phillips head screwdriver.
2
If the screen is not latching properly after
screen alignment has been established,
check the screen latch for proper operation.
Screen latch should hook underneath
latch keeper. Latch should always unlatch
while pushing down on keeper slide. If
adjustments are required, use a #2 Phillips
head screwdriver to loosen keeper screws
and move keeper up or down as needed.
(Figure O.2)
Screen latch and screen keeper are
factory installed.
Screen Track Section
Screen Keeper and Latch
Loosen keeper screws
to adjust as needed
Check screen latch for
operation (Screen latch
to hook underneath
latch keeper, as shown)
(Figure O.1)
(Figure O.2)
Keeper Section View
Rotate counter-clockwise
to LOWER
Rotate clockwise to
RAISE
(3) adjustment screws located inside
the inner screen track