21
Q. INSULATE
1
Insulate by using an AAMA approved ASTM C 1620 Low-Expanding Foam to fill cavities between patio
frame and opening.
Trim all shims flush with patio frame. Caulk exterior of patio unit to ensure water tightness between rough
opening and patio unit.
IMPORTANT! Over use of Low-Expanding Foam or use of any non Low-Expanding Foam may
cause vinyl frame to bow, jeopardizing operational performance of door.
2
IMPORTANT! Allowance must be given for expansion and contraction of exterior trim application.
Refer to the QR code located at the end of this instruction for gap recommendations per exterior
finish material type.
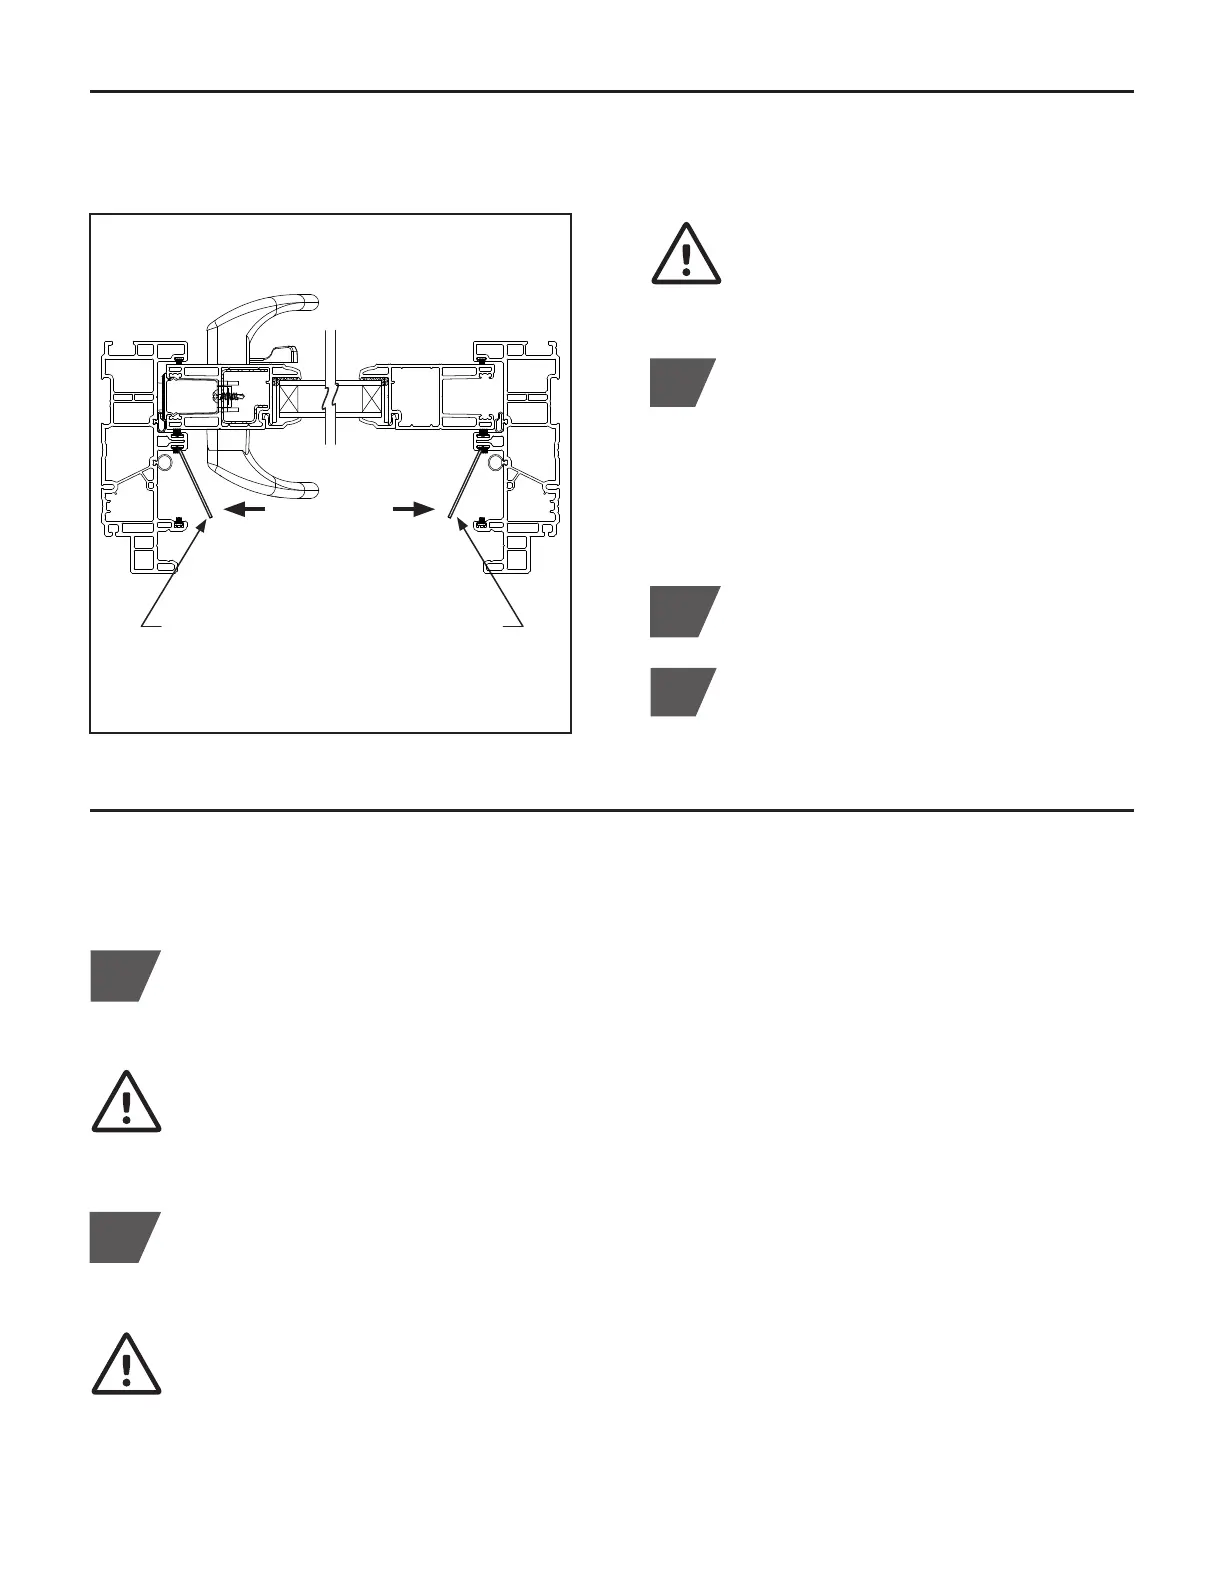
P. INSTALL JAMB COVERS, SCREW CAPS AND HOLE PLUGS
1
Install each exterior vinyl jamb cover, start at
top by first inserting inside edge. Use thumb
to guide edge into the frame pocket, located
in front of weather strip. Use opposite thumb
to apply slight pressure to top edge of cover
closest to you, snapping in place. Run thumbs
along edge from top to bottom of cover, apply
continuous pressure, zip into place. (Fig. P.1)
(Figure P.1)
3
2
Install (4) vinyl screw caps (Pack #3) in each
fixed sash screw hole.
IMPORTANT! Final check on sash and
hardware operation. ALL frame and sash
adjustments must be finalized before
proceeding to the following steps.
Install each exterior vinyl jamb cover,
starting with inside edge
Interior Jamb Covers
Install vinyl screw hole plugs into all installation
screw holes located in header and the active
side jamb pocket (if applicable). (Pack #2). For
painted vinyl, use touch-up paint (included) for
color match screw cap covers if needed.