22
R. FIELD MULLING
Units must be mulled together before
setting into the opening. Use Installation
Pack - Mulled Units, Part # S-DH-022S-CC for
required field mulling components.
Mullion block(s) will be factory installed
to patio unit. For sidelite units over 84"
in height and ALL transoms units, refer to
included document 'Installations Instructions
Vinyl Patio Sidelite or Transom Field Mulling -
Heavy Reinforcement'. Document can also be
referenced by the QR Code found at the end
of this instruction.
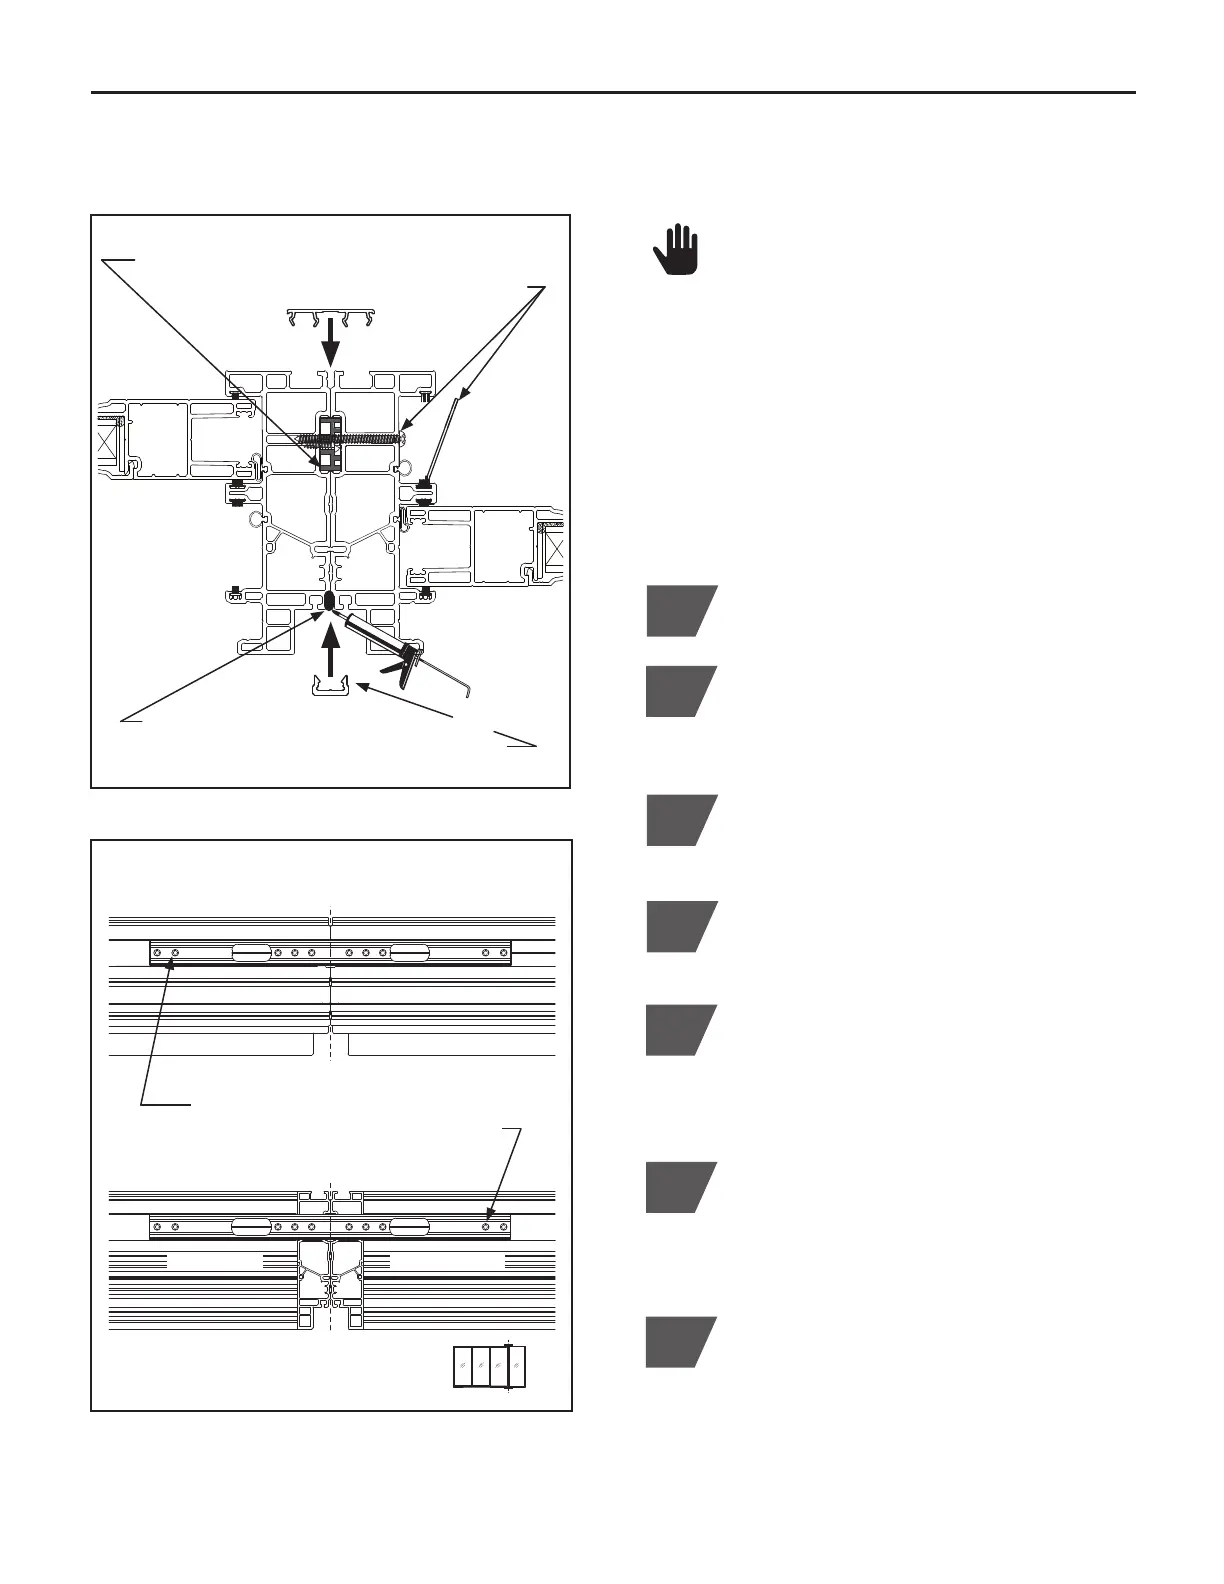
Patio to Fixed Sidelite Mull Section View
1
A
lign the fixed sidelite to patio unit. Check for
flush, even and square alignment of frames.
2
Secure fixed sidelite to patio using (6) #8 x 2"
screws, evenly spaced through the fixed sidelight
jamb pocket. Center screws on vinyl score line.
Install fixed sidelight vinyl jamb cover. (Fig. R.1)
(Figure R.1)
4
Install the vinyl exterior zero mullion cover
and interior double mullion cover into frame
accessory channels, as shown. (Figure R.1)
3
Place a bead of caulk at all exterior mull joint
locations. Be sure all voids between mulled
frames are sealed. (Figure R.1)
Patio
Side Jamb
Fixed Sidelite
Side Jamb
Mullion block factory installed to patio jamb
Install #8 x 2" screws & sidelite jamb cover
Place a bead of caulk at exterior mull joint
Install interior double mullion cover and
exterior zero mullion cover
Patio to Fixed Sidelite Stacking Plate Install
(Figure R.2)
Elevation Reference
Patio Unit Sidelite Unit
Sill View (Looking Up)
Header View (Looking Down)
Exterior Side
C
L
Exterior Side
C
L
Install (1) stacking plate using
(10) #7 x
5
⁄8" flat head quadrex screws
Patio Unit Sidelite Unit
5
Install (1) stacking plate to secure patio frame
header to sidelite frame header. Align centerline
of stacking plate with centerline of mull joint.
Secure plate using (10) #7 x
5
⁄
8
" flat head
quadrex screws (provided) as shown. (Fig. R.2)
6
Install (1) stacking plate to secure patio sill to
sidelite sill. Align centerline of stacking plate with
centerline of mull joint. Secure plate using (10)
#7 x
5
⁄
8
" flat head quadrex screws (provided) as
shown. (Figure R.2)
7
If the patio unit was ordered with an installation
accessory, install at this time. Refer to the
included document, 'Installation Instruction Vinyl
Patio Door Installation Accessories and New
Construction Flashing'. The QR code for this
instruction can also be found at the end of this
instruction document.
 Loading...