Operating Manual – Performing a Measurement
4 Performing a Measurement
4.1 General Information for
Measurements
After turning DIADOS E on, you will first see the
PTW logo and the firmware version number; then
the measurement display appears. All settings (set-
up as well as the MODE, RANGE, APPL. and
FILTER keys) of the last application are retained.
Only the measuring values are reset to zero.
4.2 Dose, Dose Rate and Dose
per Pulse Measurement
4.2.1 Preparing for a Measurement
For measurement of the dose, dose rate or dose
per pulse, DIADOS E must be set to radiological
units. If need change the unit selection in the Setup
menu.
Select application and filter/calibration factor: keys
APPL. and ALT + FILTER.
Select measuring range with RANGE: If the range
changes automatically during the measurement, the
readout changes to AUTO M or AUTO H.
Select operating mode with MODE.
Perform a zero adjustment (key ZERO, refer to
chapter 1.5.4).
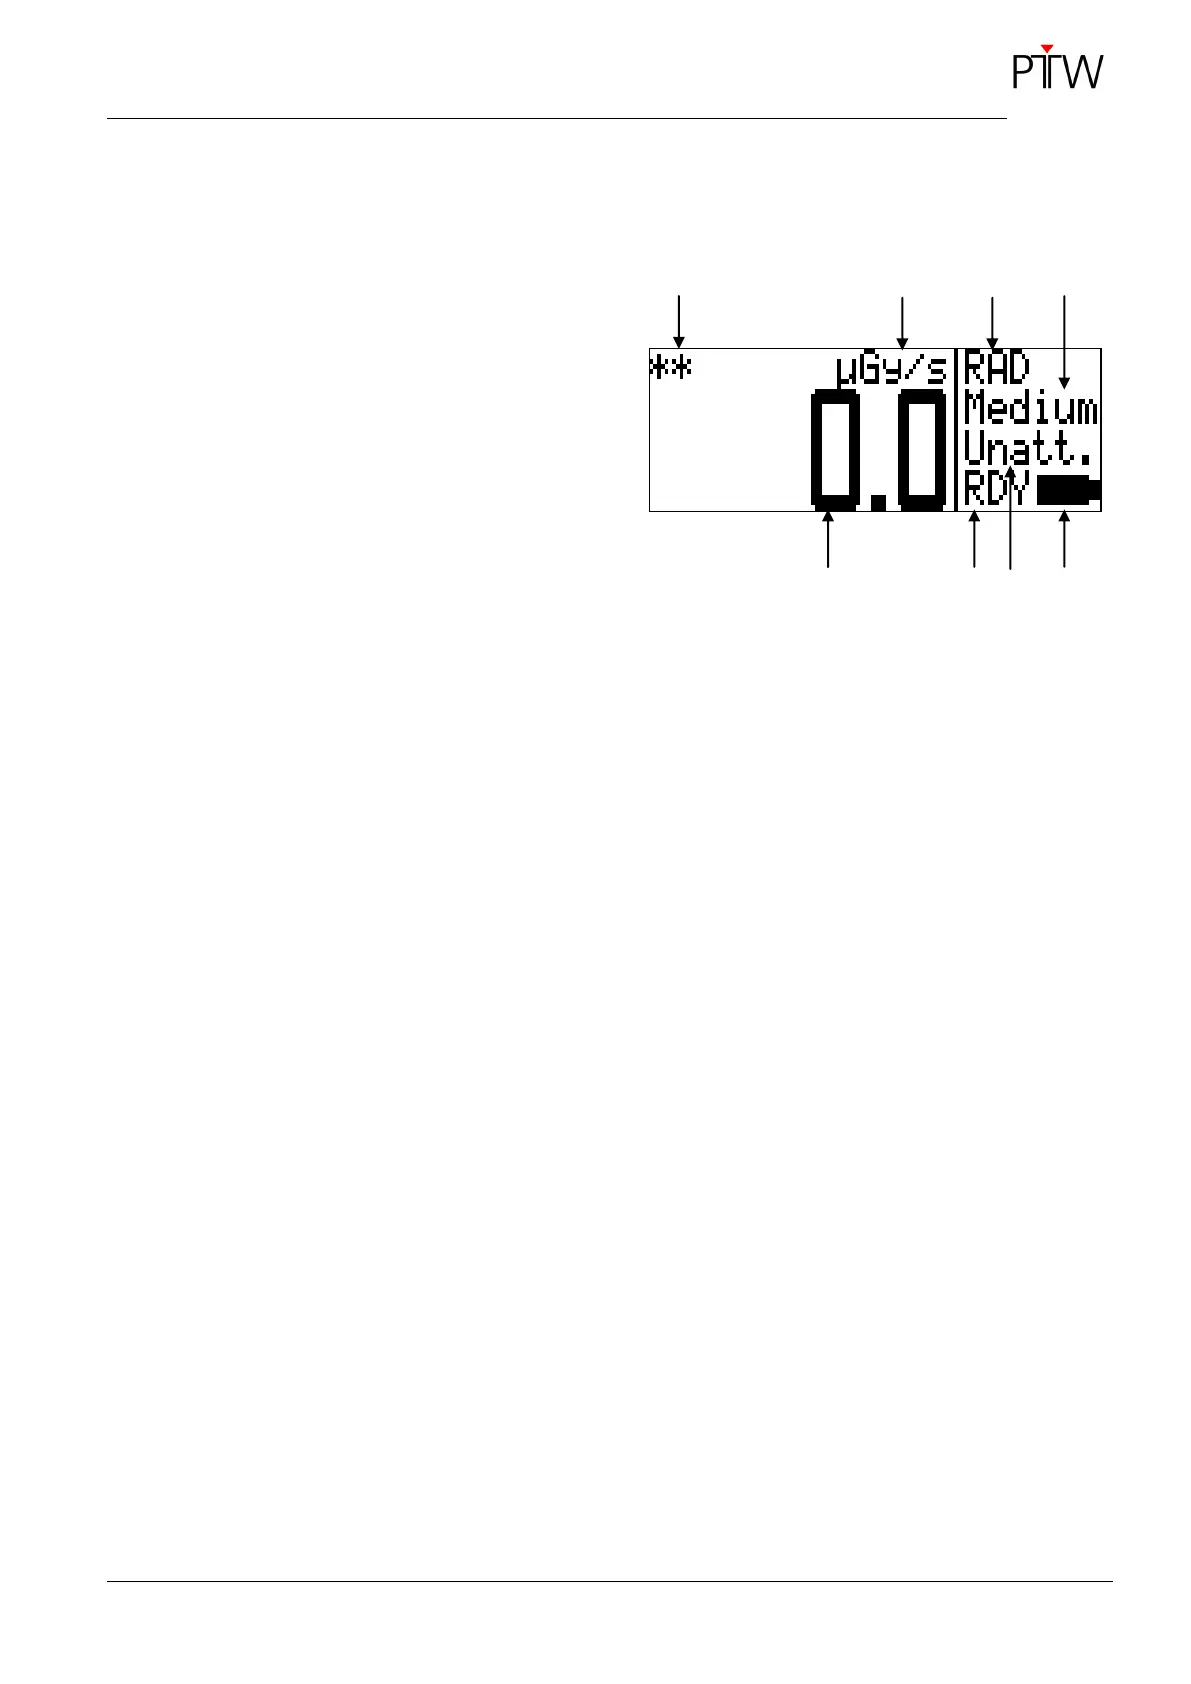
Figure 14: DIADOS E display for radiological
measurements
1 Resolution:
" " greater than 0.5 %,
"*" greater than 1 %,
"**" less than 1 %
2 Unit C, Gy or R; displayed in reverse video in
pulsed mode
3 Application:
RAD – convential radiology,
DENT – dental application,
CT – CT application or
MamX/X – mammography
(MamM/M, MamM/R, MamW/A,
MamW/R, MamR/R, MamWAg)
4 Measuring range: Low, Med, High or Auto
5 Measuring value
6 Measurement status:
RDY – ready to take a measurement,
RUN – measurement in progress,
STA – measurement started with START/STOP,
STP – measurement stopped with
START/STOP,
TST – measurement stopped by timer
7 Filter:
"Unatt." (without additional filtration) or
"Att. " (with additional filtration)
8 Battery status: full/depleted