FR
ES
EN
DE
IT
2
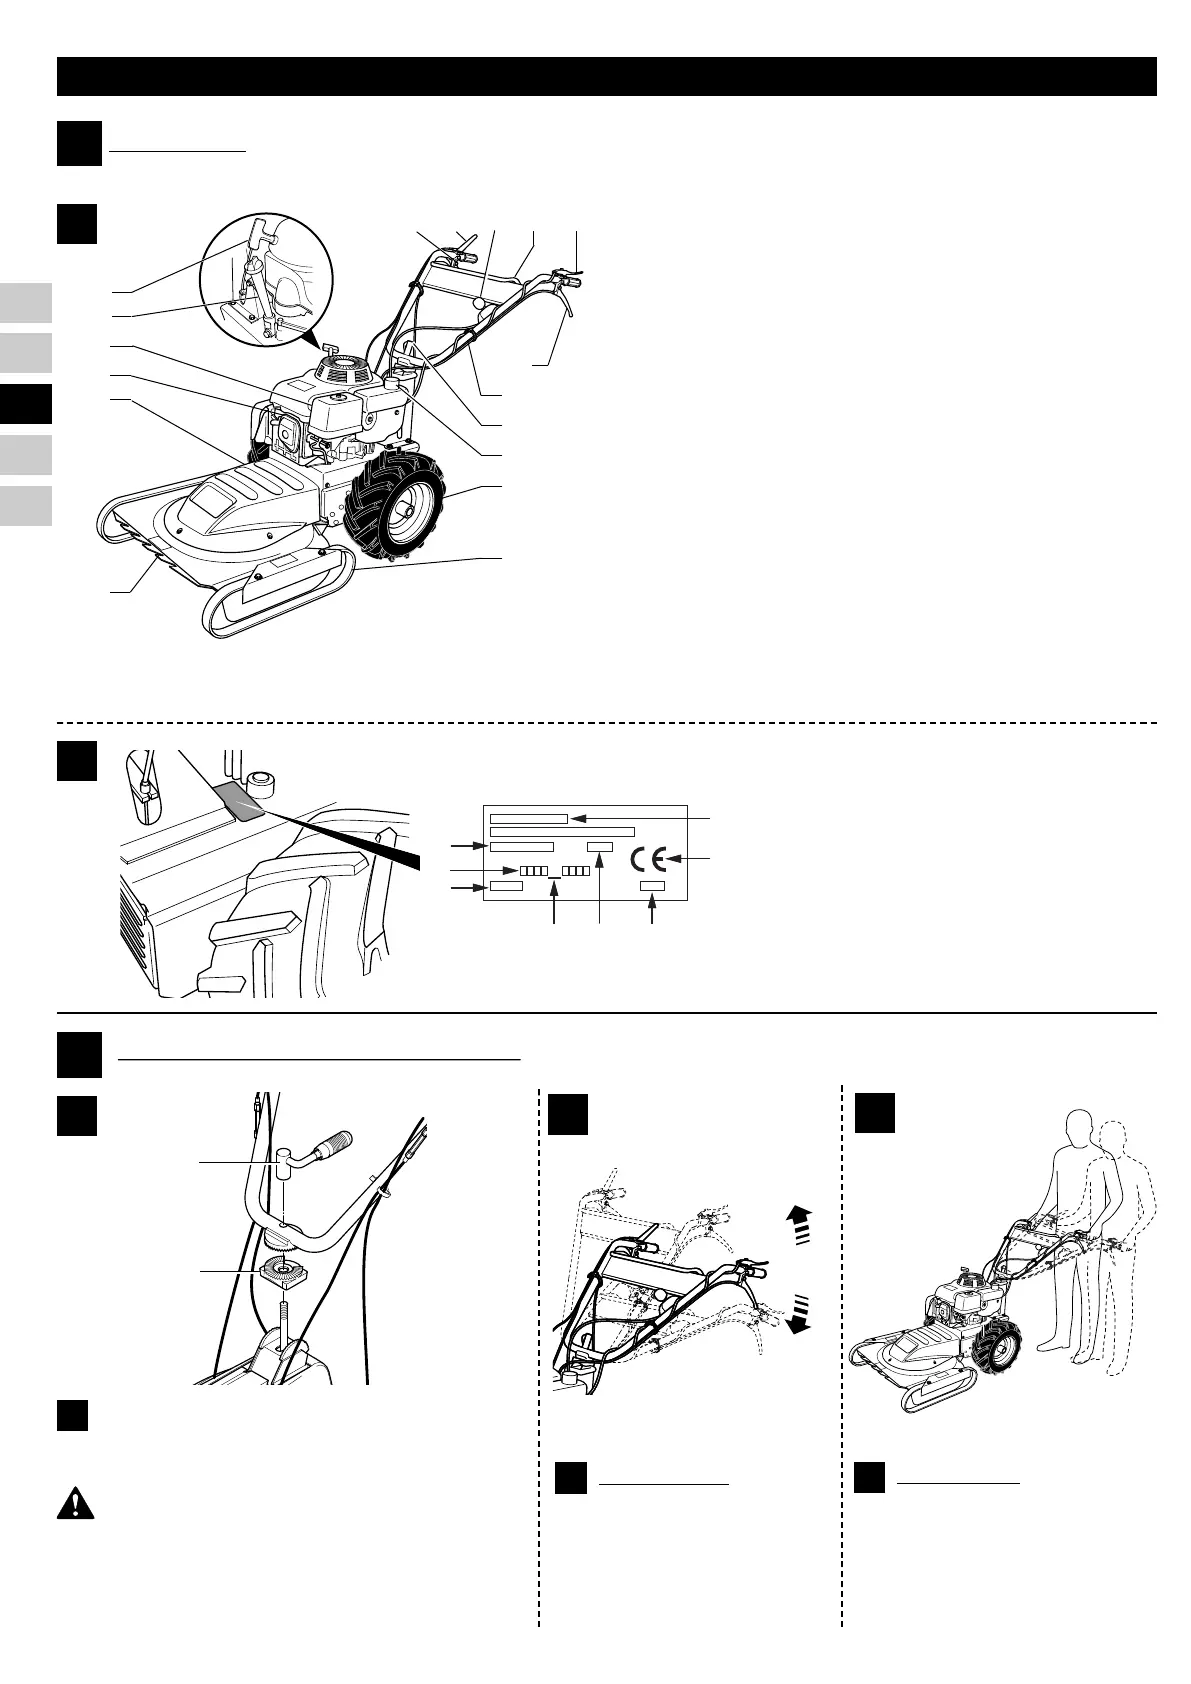
A
A1
A2
1 - Blade clutch handle
2 - Throttle
3 - Reverse gear lever
4 - Cut-off handle
5 - Forward gear handle
6 - Safety brake
7 - Handlebars
8 - Handlebar adjuster
9 - Oil gauge and filler cap
10 - Wheel
11 - Blade protection
12 - Front cover
13 - Spark plug
14 - Skids
16 - Air filter casing
17 - Petrol tank cap
18 - Automatic reeling starting cord
B
B1
B2
B3
%%1$2 #)312,$-2
B3
$(&'2 #)312,$-2
B2
2
5
4
7
3
8
1
18
9
13
12
11
17
10
14
16
6
1
2
- Replace nut (1).
-
Adjust the height and sideways position of the handlebars to suit
yourself and then tighten the nut (1).
Position part (2) with the cutaway portion to the rear.
B1
- Remove the locknut (1).
- Position the handlebars on the chassis spindle as shown
in the diagram.
MACHINE IDENTIFICATION PLATES
A - Nominal power
B - Weight in kilograms
C - Serial number
D - Year of manufacture
E - Type of cultivator
F - Manufacturer's name and address
G - EC identifier
H - 51 = Pedestrian-controlled motor mower