Tab 1 Tab 2
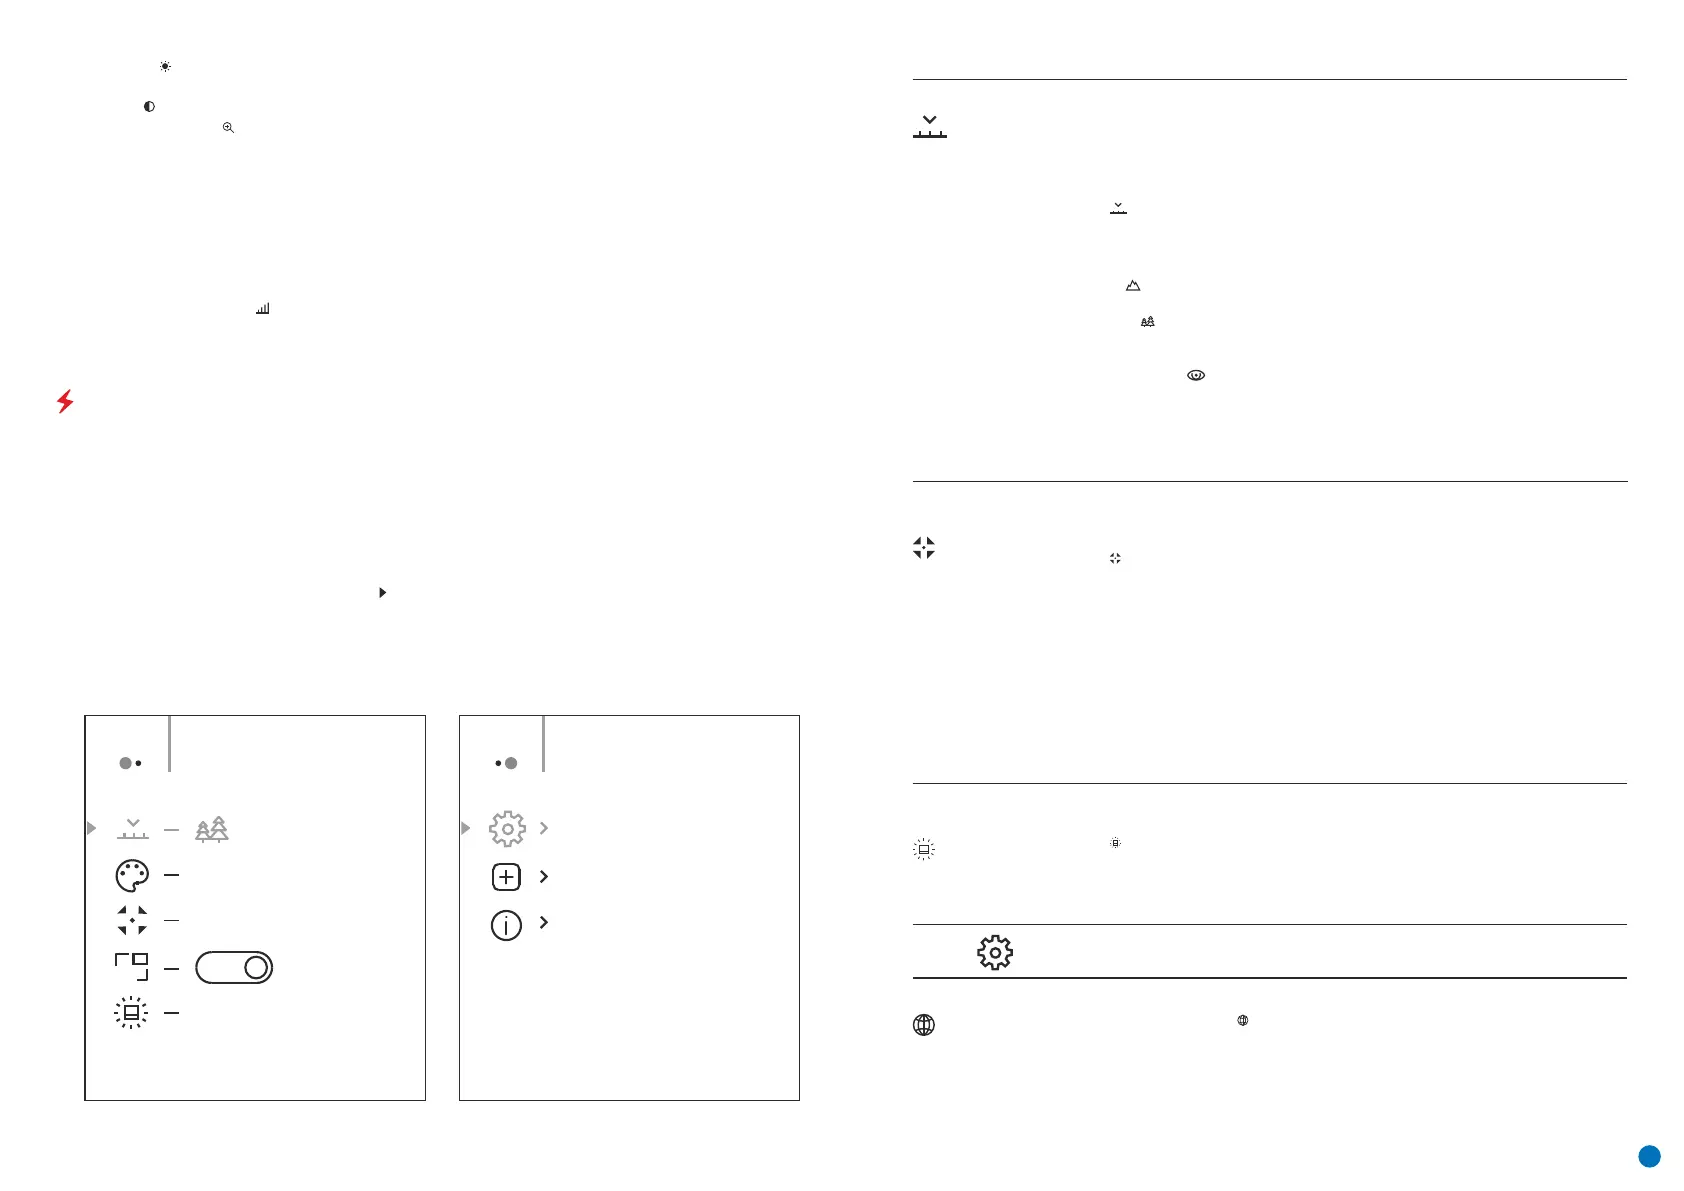
General view of the menu
Menu General SettingMenu Mode
PIP
Off
Hot White
Automatic
10
Calibration
Mode
Selection of calibration mode There are three calibration modes: manual, semi-automatic
and automatic.
џ Press and hold the Menu button (3) to enter the menu.
џ Select the 'Calibration Mode' option.
Automatic
Calibration requirements in the automatic mode are determined programmatically, with the
calibration process being started automatically.
Manual
Semi-automatic
џ A short press of the Menu button (3) confirms the selection.
џ A short press of the Menu button (3) opens the submenu.
џ Select one of the calibration modes described below with the UP (4) / DOWN (2) buttons.
Manual calibration. Close the lens cap before beginning calibration.
The user independently sets the calibration requirements (according to the image being
observed).
MAIN MENU FUNCTIONS
џ Automatic exit from the menu occurs after 10 seconds of inactivity.
џ To exit the menu, press and hold down the Menu button (3).
џ When exiting the menu, the cursor location ( ) is remembered only for the duration of the one working session
(i.e. until the device is powered off). The next time the device is powered on and the menu is accessed, the cursor
will be at the first item on the menu.
џ Press the UP (4) / DOWN (2) buttons to move through the menu functions.
џ One short press of the Menu button (3) opens a menu item.
џ Enter the menu with a long press of the Menu button (3).
џ Menu navigation is be means of scrolling. When the last item on the first tab is reached, navigation moves to
the first item of the second tab.
Brightness – by pressing the UP (4) / DOWN (2) buttons and changing the display brightness value from 00 to
20.
Contrast – by pressing the UP (4) / DOWN (2) buttons and changing the display contrast value from 00 to 20.
Stadiametric rangefinder – press the UP (4) / DOWN (2) buttons to change the position of the markings for
determining the distance of the object being observed (see Section 16 for further information on the
rangefinder).
To exit the menu, press and hold down the Menu button (3), or wait 10 seconds for automatic selection.
The initial smooth digital zoom factor displayed is equal to x1.0 if the discrete zoom is inactive, x2.0 if is 2x, and
x4.0 if 4x.
Smooth digital zoom – by pressing the UP (4) / DOWN (2) buttons and changing the digital zoom value from 1.0
to 4.0. The increment size of the digital zoom is 0.1.
Note. Current magnification is calculated as the product of the base magnification and the smooth digital zoom
ratio. Example: where the basic device magnification is 3.0x and the smooth digital zoom ratio is x1.7, the actual
magnification is 5,1х (3,0*1,7). The next time the device is turned on, the image is projected onto the display with
the brightness and contrast settings saved from the previous power off.
Mode
The devices have three operating modes: FOREST (observation mode of objects within low
thermal contrast conditions), IDENTIFICATION (high zoom mode), ROCKS (observation mode
of objects within high thermal contrast conditions). Each mode has been created to provide
the best image quality of a wild nature object being observed within various observation
conditions.
џ Select the ‘Mode’ option.
џ A short press of the Menu button (3) opens the menu.
џ Press and hold the Menu button (3) to enter the menu.
џ Select one of the settings described below with the UP (4) / DOWN (2) buttons.
FOREST MODE – This is the best mode when searching and observing within field
conditions, against the background of leaves, bushes and grass. The mode is highly
informative about an object being observed as well as landscape details.
џ Short press of the DOWN button (2) activates the switching of the operating modes.
џ A short press of the Menu button (3) confirms the selection.
ROCKS MODE – This is the best mode when observing objects after a sunny day or within
urban conditions.
IDENTIFICATION MODE – This is the best mode when observing objects within adverse
weather conditions (fog, mist, rain and snow). It allows you to recognize the characteristics of
an object being observed more clearly. Zoom increase may be accompanied by insignificant
image graininess.
џ Quick activation of the operating modes is possible by using the DOWN button (2).
Icon
brightness
џ A short press of the Menu button (3) opens the submenu.
џ Select the 'Icon Brightness' option.
Adjusting icon brightness.
џ Press and hold the Menu button (3) to enter the menu.
џ Select the brightness level of the pictograms with the UP (4) / DOWN (2) buttons.
џ A short press of the Menu button (3) confirms the selection.
General
Settings
This menu item allows you to program the following settings
Choose Language
џ To save your choice and exit the submenu, press and hold down the Menu button (3).
џ Confirm your selection with a short press of the Menu button (3).
џ Select one of the available interface languages (English, French, German, Spanish or
Russian) with the UP (4) / DOWN (2) buttons.
џ Enter the 'Language' submenu with a short press of the Menu button (3).
Language
Composition and description of the menu
4