8
USER MANUAL FOR AXION THERMAL IMAGING SCOPE
Defective Pixel
Repair
•
Select the Defective Pixel Repair option by briey pressing the MENU (3) button.
•
A marker (H) will appear on the left side of the display.
•
A magnifying glass (G) will appear on the right side of the display – a rectangle with an
enlarged view of the marker for precise pixel selection – and the coordinates (I) of the
marker under the magnifying glass.
•
Press the UP (4) and DOWN (2) buttons briey to align a defective pixel with the center of
the enlarged marker in the magnifying glass – the pixel should be removed. Press the MENU
(3) button briey to switch the marker direction between the horizontal to the vertical.
•
Press the ON (5) button briey to delete the dead pixel.
•
Once the pixel has been successfully deleted, an OK message will briey appear on the
screen.
•
You can then delete the next defective pixel if required by moving the marker across the
display.
•
Press and hold the MENU (3) button to exit the function.
•
•
•
•
•
•
•
•
Restore Default
Pixel Map
This option allows the user to return all previously disabled defective pixels to their original
state.
•
Use the UP (4) / DOWN (2) buttons to select the Restore Default Pixel Map icon .
•
Activate the function by briey pressing the MENU (3) button.
•
Using the UP (4) / DOWN (2) buttons, select Yes if you want to return to the factory pixel
map and select No if you do not.
•
Conrm your selection with a short press of the MENU (3) button.
Attention! One or two pixels on the display of the device in the form of bright white, black or
colored (blue, red or green) points may appear. These points cannot be removed and are not
a defect.
Device
Information
This menu item allows the user to view the following information about the device:
SKU Number
Firmware Version
Device Name
Hardware Version
Device Serial Number
Service Information
•
To display information, do the following:
•
Press and hold the MENU (3) button to enter the main menu.
•
Use the UP (4) / DOWN (2) buttons to select the Device Information icon .
•
Press the MENU (3) button briey to view / exit the information.
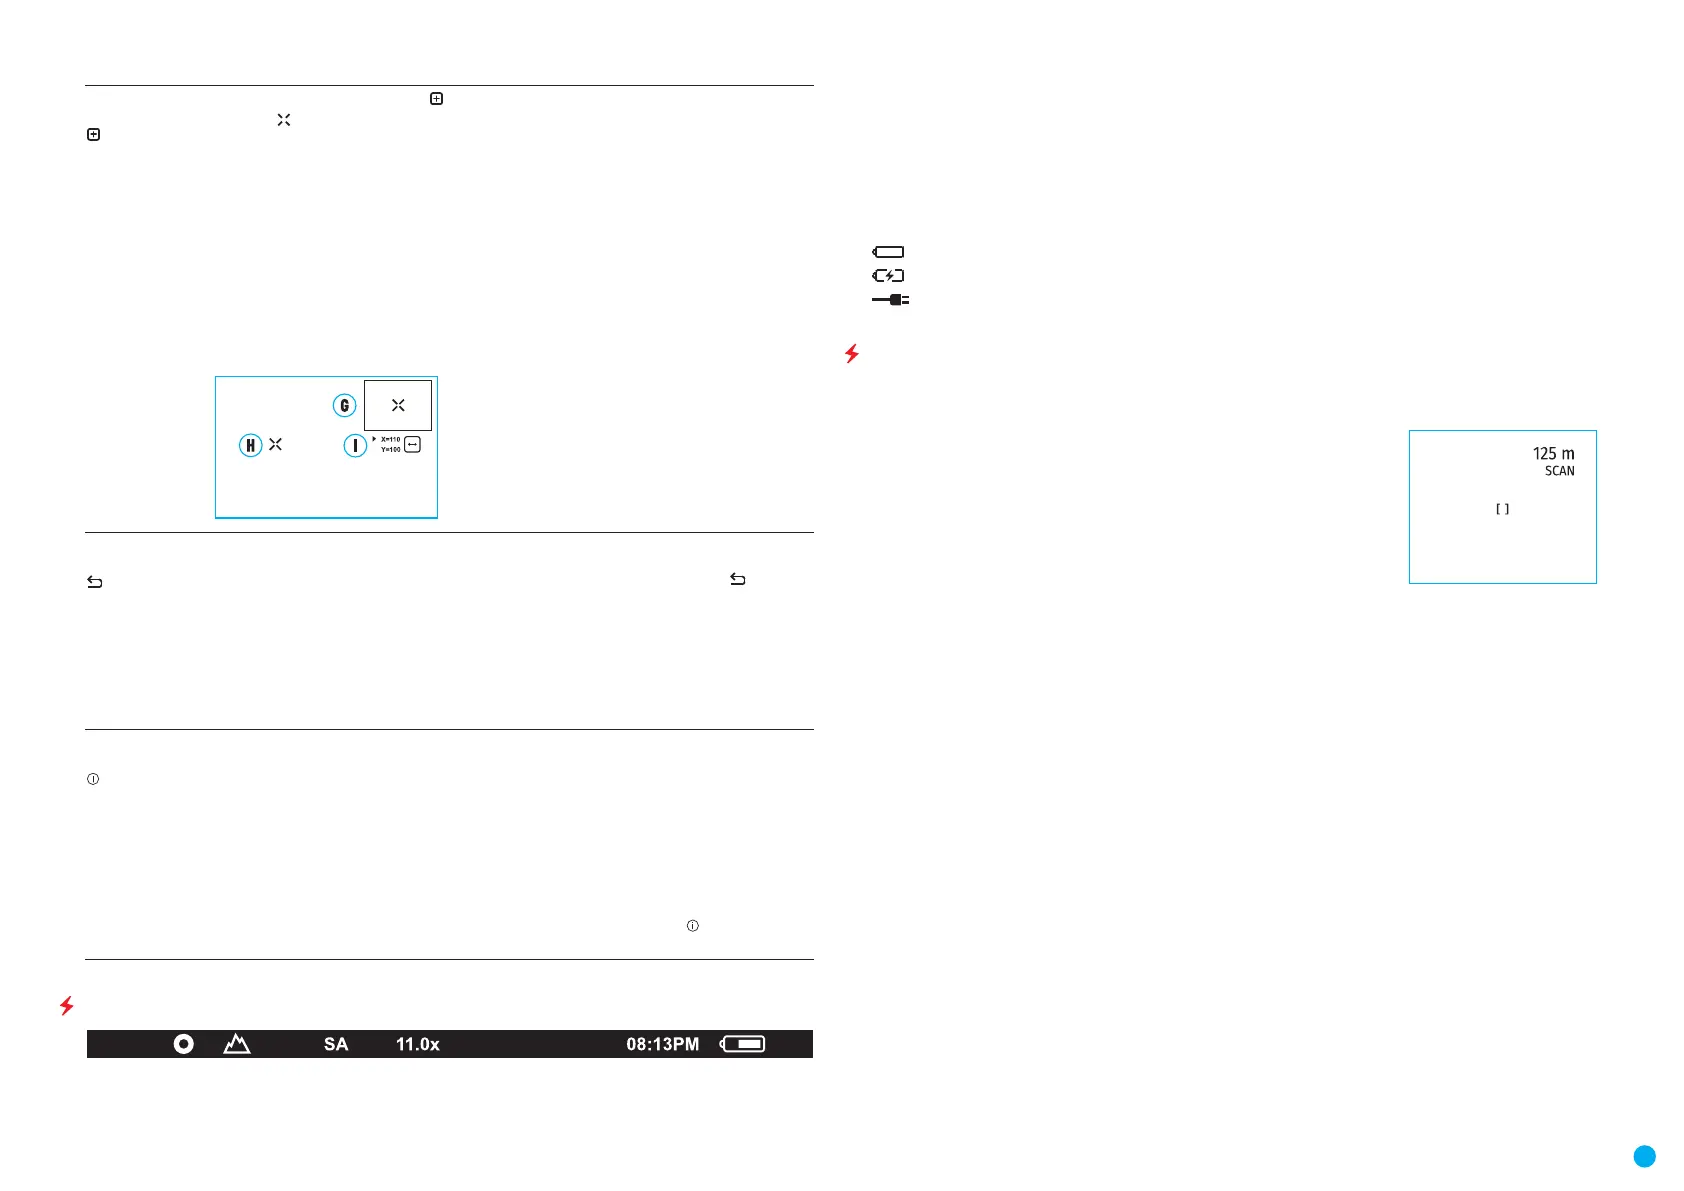
STATUS BAR
The status bar is at the bottom of the display and displays information on the actual operating status of the
device, including:
•
Color Mode (shown only when the Black Hot color mode is selected)
•
Observation Mode
•
Calibration Mode (in Automatic calibration mode a countdown timer will appear instead of the calibration
mode icon 3 seconds before automatic calibration begins).
•
Magnication
•
Time
•
Power Indication:
- charge level if the device is powered by a battery
- charge level if the device is charging and powered by a battery
- no battery, the device is connected to an external power supply
USING A BUILT-IN LASER RANGEFINDER
The AXION LRF XQ thermal imager is equipped with an integrated laser rangender.
SINGLE MEASUREMENT MODE
•
Press the ON/OFF (5) button briey to power the device on.
•
Activate the rangender by pressing the DOWN (2) button briey. A red mark
appears on the display.
•
Place the rangender’s reticle on the target. Press the DOWN (2) button briey
to measure the distance to the object once.
•
The measurement results are displayed in the upper right corner.
•
The rangender shuts down after 3 seconds of inactivity.
SCAN MODE
•
Press the ON/OFF (5) button briey to power the device on.
•
Activate the rangender by pressing the DOWN (2) button briey. A red mark appears on the display.
•
Activate the scan mode by long pressing the DOWN (2) button to continuously measure the distance to
objects.
•
The measurement results are displayed in the upper right corner.
•
Deactivate the rangender by long pressing the DOWN (2) button.
Notes:
Additional rangender settings are available in the "Rangender" section of the main menu.
To select either Meters or Yards as the unit of measure please see the corresponding menu item.
When you turn on the rangender, the PiP window turns off.
OPERATING FEATURES:
•
The accuracy and distance of the measurement depends on the reection coefcient of the object surface
and weather conditions. The reection coefcient depends on the texture, color, size and shape of the object.
Generally, lighter colored objects and those with a shiny surface will have a higher reection coefcient.
•
Measurement accuracy can be inuenced by the light conditions, fog, haze, rain, snow, etc. The results may be
less accurate when operating in sunny weather or if the rangender is directed towards the sun.
•
It is easier and more reliable to measure the distance to large objects than to small ones.
•
 Loading...