24 25
IMPORTANT! Both your mobile device and your EasyView camera
must be on the same network during setup, otherwise the camera
status will show “Unknown” or “Offline.”
STEP 8. Click Submit when the
Status icon turns green. Once
the camera has connected suc-
cessfully, you will get a pop-up
Success message and then return
to the Management screen where
you will see your camera ready for
viewing. Later, after you’ve logged
into your camera, the generic
icon will be replaced by a thumb-
nail screenshot from the last video
streamed.
If you want to operate this camera wirelessly, then proceed with the steps below.
Otherwise, camera operation is covered in Chapter
5
.
PICTURE 4-33
PICTURE 4-32
PICTURE 4-27
PICTURE 4-28
PICTURE 4-29
PICTURE 4-30
PICTURE 4-31
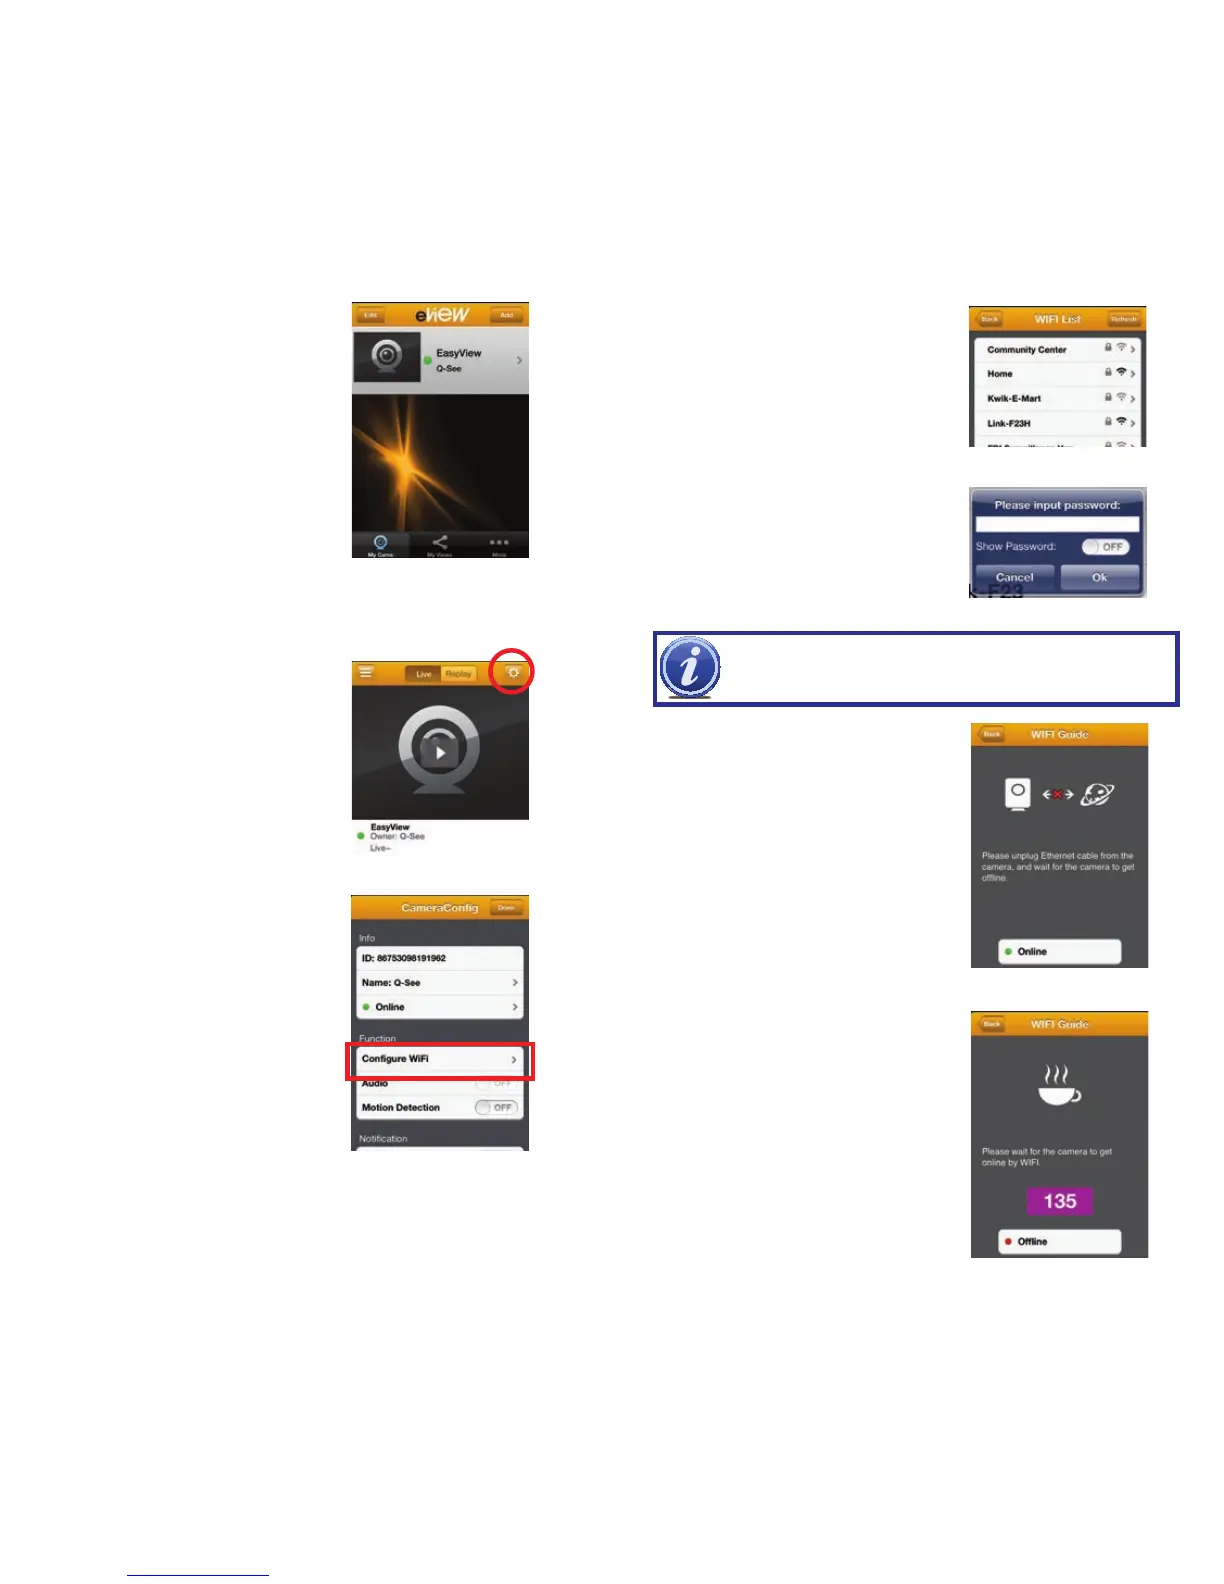
Setting WiFi Connection
Now that you’ve added your camera
to your eView account, you’ll need to
make the settings needed for it to work
without the need for a network cable.
STEP 9. Configure settings. Tap on
your camera’s name to open it.
Tap on the gear icon in the upper
right corner of the screen to enter
into the Camera Configuration
window.
This window will allow you to con-
trol how your camera performs.
The settings and features will
be covered in greater detail in
Chapter
5
For the moment,
however, we will concentrate on
the WiFi connection.
Click on the Configure WiFi button
to begin setting up the camera to
wirelessly connect to your network.
STEP 10. Choose your WiFi network.
Select your preferred network from
the WiFi List. If you own more than
one network, be sure to use the con-
nection that is stronger in the area
where the camera will be placed.
Secured networks (those with a pad-
lock icon next to them) will require
you to enter the password. If needed,
you can have the input window show
you the password as you enter it
so you can make sure that you’ve
entered all the characters.
The camera will now attempt to find
the network’s wireless signal. When
it has done so, it will instruct you to
unplug the Ethernet cable that con-
nects it to the router.
After the cable is disconnected, the
camera may take several minutes to
reconnect to the router using the WiFi.
It will show an estimated countdown
(in seconds). During this process, the
camera will be offline.
The green network light on the back
will also flash as this takes place.
Once the camera has connected to the
router using WiFi, the app will return to
the Camera Config window. You may
move the camera to its new location at
this time. The camera will again attempt
to reconnect wirelessly once you’ve
plugged its power cord back in.
Operating instructions are in
Chapter 5.
 Loading...