50 51
CHAPTER 7 REMOTE SURVEILLANCE
PICTURE 7-16
PICTURE 7-17
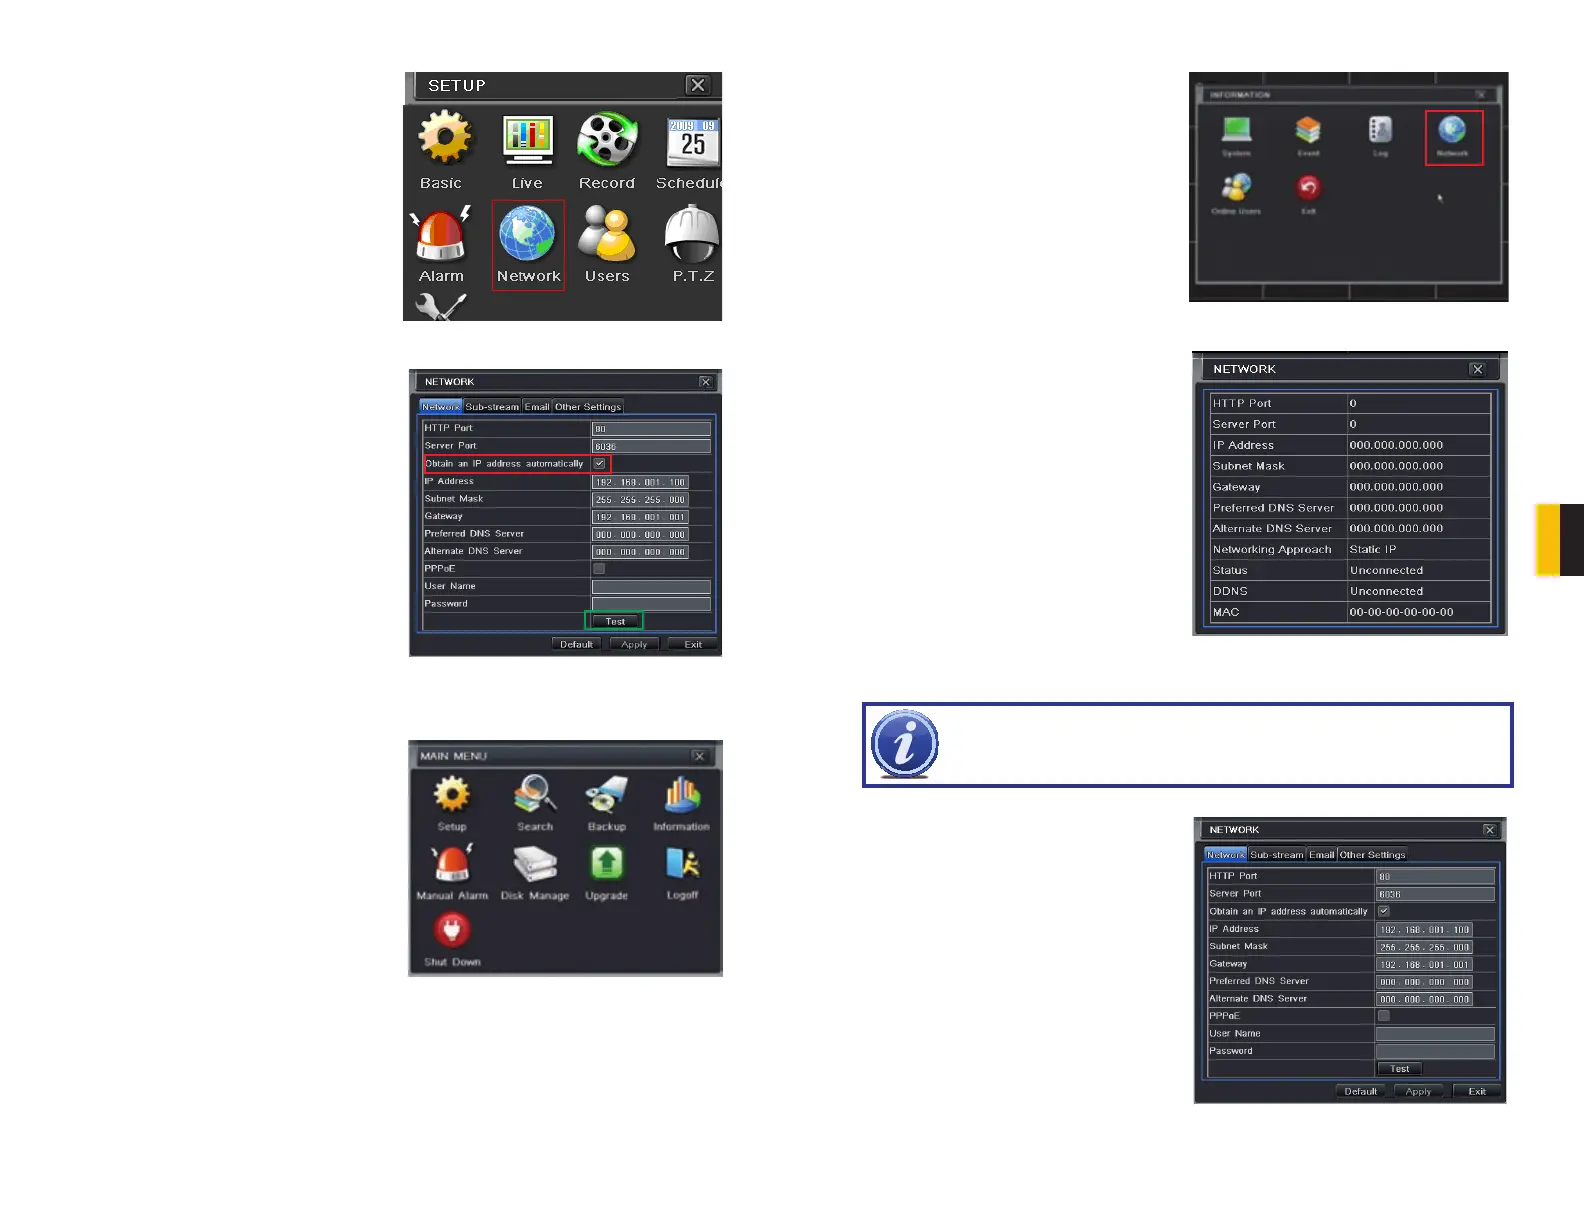
STEP 3. Select Network (Red box in
Picture 7-15) in the Setup Menu
window.
STEP 4. In the Network Settings
menu, check the box after Obtain
an IP address automatically (Red
Box in Picture 7-16). Click the
Test button (Green Box in Picture
7-16). If you receive an OK message
in the lower left of the window, click
Apply and then Exit.
STEP 5. To view the IP address, you will
need to return to the main menu and
select the Information icon (Red box
in Picture 7-17)
PICTURE 7-15
STEP 6. Click on the Network icon (Red
box in Picture 7-18).
STEP 7. This window will show the:
1) IP Address
2) Subnet Mask, and
3) Gateway assigned to the DVR by
the router.
Write down this information and then
close the window.
STEP 8. To ensure a more reliable
connection, we recommend that
you return to the Network Settings
menu (See Step 4) and uncheck
the box after Obtain an IP address
automatically. Manually input the:
1) IP Address
2) Subnet Mask, and
3) Gateway values that you wrote
down in Step 7.
Click on Apply and then Exit.
PICTURE 7-18
PICTURE 7-19
PICTURE 7-20
1
2
3
NOTE! If you have a 2Wire brand router, you may now skip to the next
section and determine the numbers of routers in your network.
1
2
3
 Loading...