34
K
INSTALLATION
L
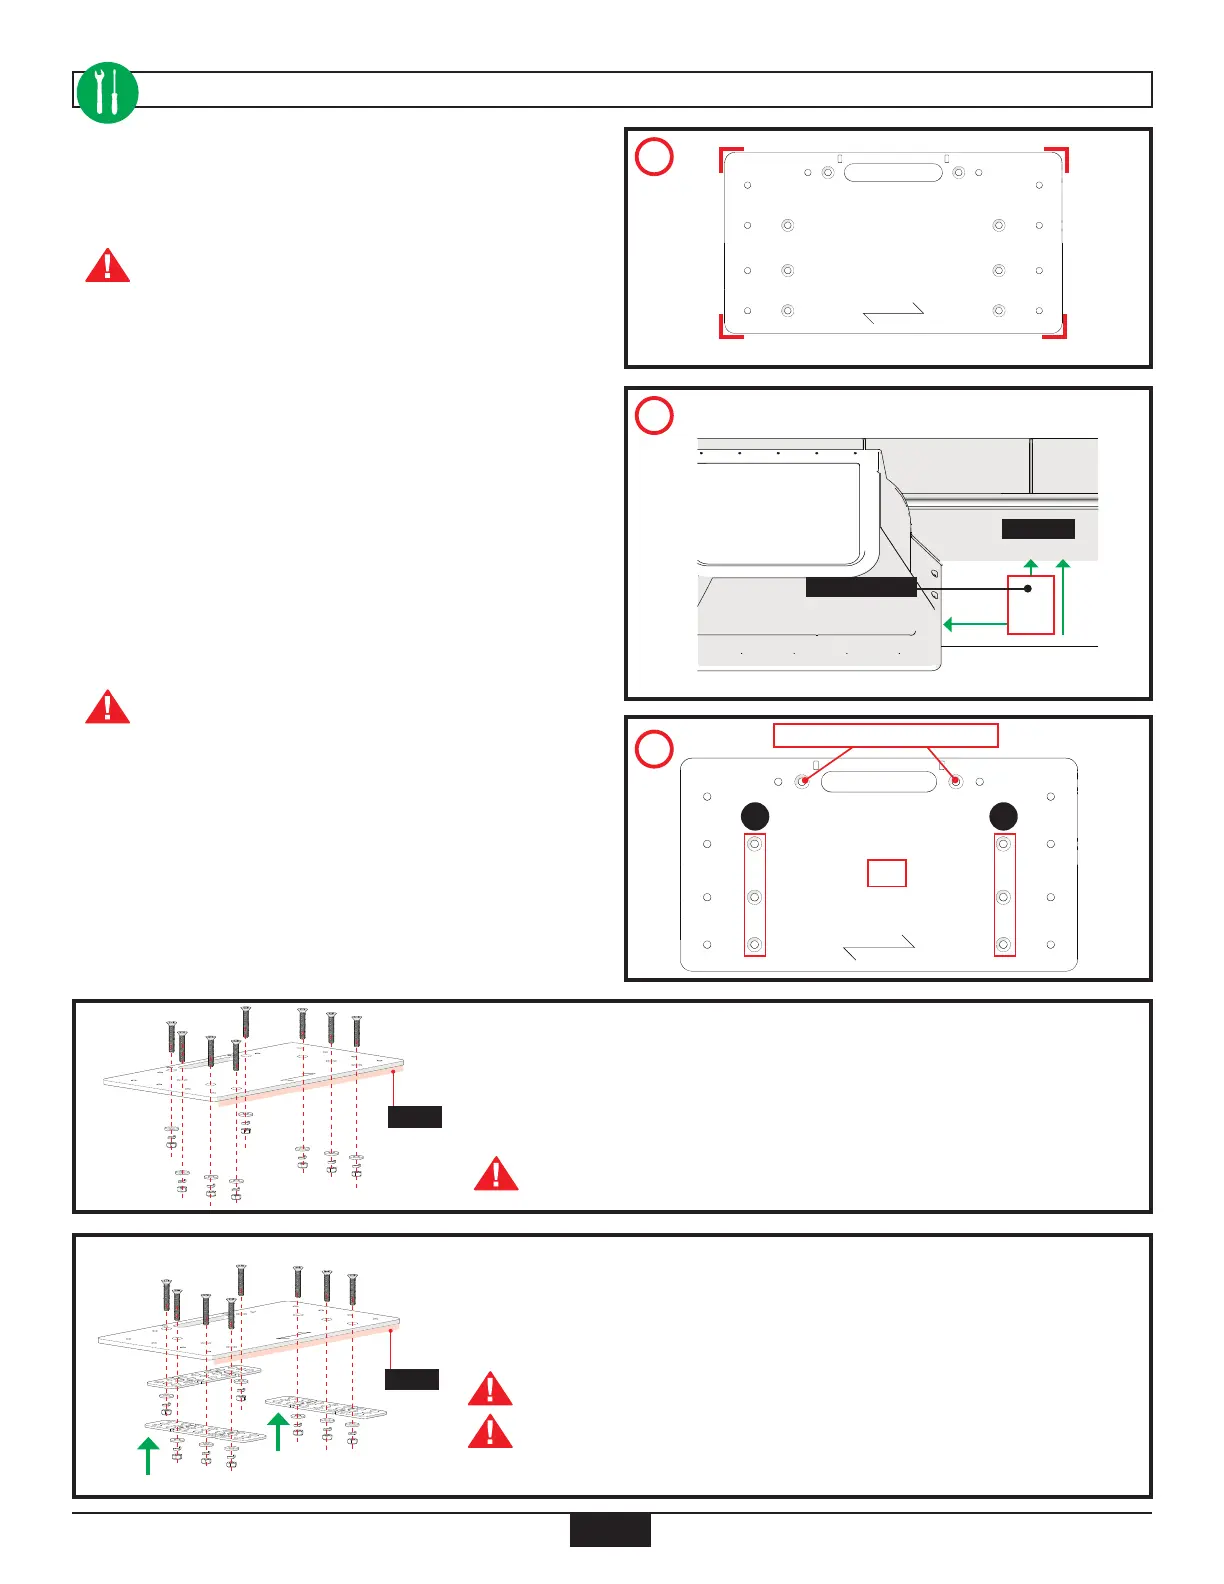
16. Place Mounting Plate over the 4 marked corners on the
floor (K).
The images of the Mounting Plate and Supporting
Plates illustrated in this manual are a
representation of the Basic Plates. The Plates will
vary depending on the Bus Configuration.
17. Measure the position of the Mounting Plate in order
to check those measurements underneath the bus for
obstructions. Measure from the outsides of the Mounting
Plate to the bus wall, and from the Mounting Plate to the
wheelbarrow (L).
18. Mark the 8 holes (minimum) to be drilled with an erasable
grease pencil. Mark the top 2 holes (mandatory). Then
mark the 3 holes from column Y and the 3 holes from
column Z (M).
Before drilling inspect the underside of the vehicle
for any obstructions.
19. Remove Mounting Plate, drill holes through the marked
holes on the floor and clean debris.
20. Choose either Option N or Option P for the Mounting
Plate installation and follow the steps listed with the
chosen option.
Bus Wall
Mounting Plate
OPTION N
Installing Mounting Plate With Tapping Plate
1. Place Mounting Plate over the drilled holes on the floor and permanently
install it by placing Bolts through Mounting Plate, floor and secure Bolts with
washers and locknuts.
Recommended torque, 7 FT/LB (9.5 Nm).
OPTION P
Installing Mounting Plate Without Tapping Plate
1. Place Mounting Plate over the drilled holes on the floor and permanently install
it by placing Bolts through Mounting Plate, floor, Supporting Plates and secure
Bolts with washers and locknuts.
Recommended torque, 7 FT/LB (9.5 Nm).
The Supporting Plates are divided into 3 sections so that 1 section
can be broken off in order to accommodate any obstructions
underneath the vehicle; but we recommend installing them as shown.
M
Y Z
MUST - Drill Holes and Install Bolts
AND
Floor
Floor