Version: 13. Sepe,mer 2004
26
Section 8 PLL
In this section we will once more use a Neosid Bobin core.
1 = can, 2 = plastic cover 3 = covering core 4 = coil body 5 = socket.
[ ] Grasp the base of the bobin core, put a small drop of super glue
between the edges and push the ferrite spool into the base. Let the glue
dry before proceeding with the coil. You can mount other parts while wai-
ting.
Mounting the ICs first will help in orientatation for the other parts.
Be careful with IC2 to IC4, they are static sensitive. Remember
to discharge your hands to ground. Use a potential free solde-
ring station.
The ICs should be rolled gently before mounting.
[ ] IC2 4060 DIL16 D/E6
[ ] IC3 4046 DIL16 D/E6
[ ] IC4 4060 DIL16 B/C6
[ ] IC1 NE612 DIL8 D7
[ ] T1 BF199 D7
[ ] R1 1,5K E7
[ ] R2 1,5K E7
[ ] R3 47K E6/7
[ ] R4 4,7K E6/7
[ ] R6 1,5K C/D 6/7
[ ] R7 1M D6/7
[ ] R8 1M C6
[ ] R5 100K D7
[ ] C1 0,22µF Film E6
[ ] C2 10nF 103 D/E7
[ ] C3 22nF 223 D7
[ ] C4 47nF 473 D7
[ ] C5 220pF 221 D7
[ ] C6 1nF 102 D/E7
[ ] C7 10nF 103 C/D7
[ ] C8 1nF 102 D6/7
[ ] C9 100nF 104 C/D6
[ ] C10 100nF 104 E5/6
[ ] C11 100nF 104 B6
[ ] C12 220µF/16V rad. B6
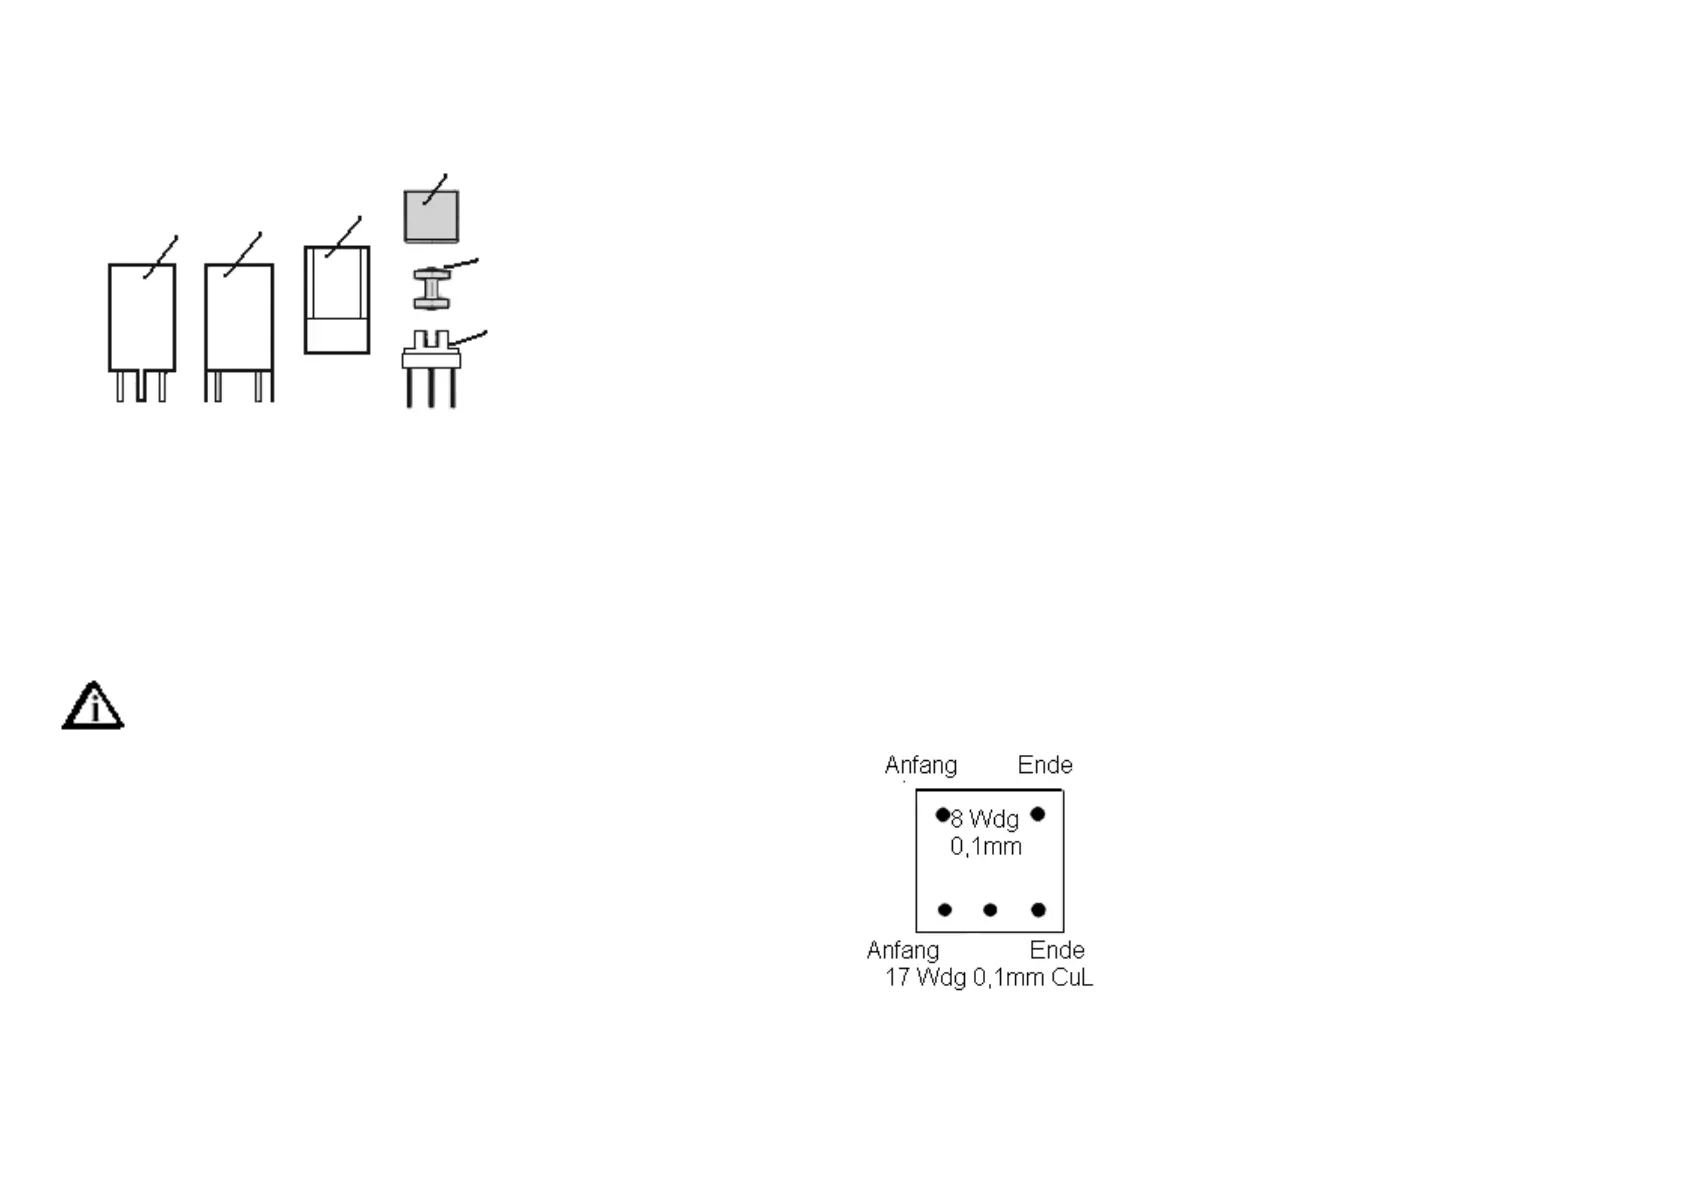
Now the coil form should be dry, and you can wind the coil.
The picture on the left shows the base of the coil from below. Begin at pin
„anfang“ by winding the 0.1 mm wire around the pin 3 times, continuing
up the notch. Now put on 17 turns, and return through the proper notch to
pin „ende“. Three turns around the pin,
and you‘re done. For the secondary, with a
new piece of wire, go to pin „anfang“, up
through the notch, put on 8 turns, return
through the proper notch, put 3 turns
around pin „ende“, and DONE.
Mount the coil carefully in a vice and
solder pins and wires at the same time.
This is easy: touch the wire and the solder
(LITTLE solder) at the same time. Don‘t
push too hard: The lead will be hot, and the plastic softens. Test for shorts
with an ohm meter.
Everything OK? Then put the ferrite core gently into the plastic body, be
1
1
2
3
4
5