1st Letter
No services
01/20/22
Mem: None
Acct. 00000
$000.000
00 lb
00.0 oz
1st Letter
No services
01/20/22
Mem: None
Acct. 00000
$000.000
00 lb
00.0 oz
1st Letter
No services
01/20/22
Mem: None
Acct. 00000
$000.000
00 lb
00.0 oz
1st Letter
No services
01/20/22
Mem: None
Acct. 00000
$000.000
00 lb
00.0 oz
Need help? Contact us at: www.myquadient.com or call 1.800.636.7678
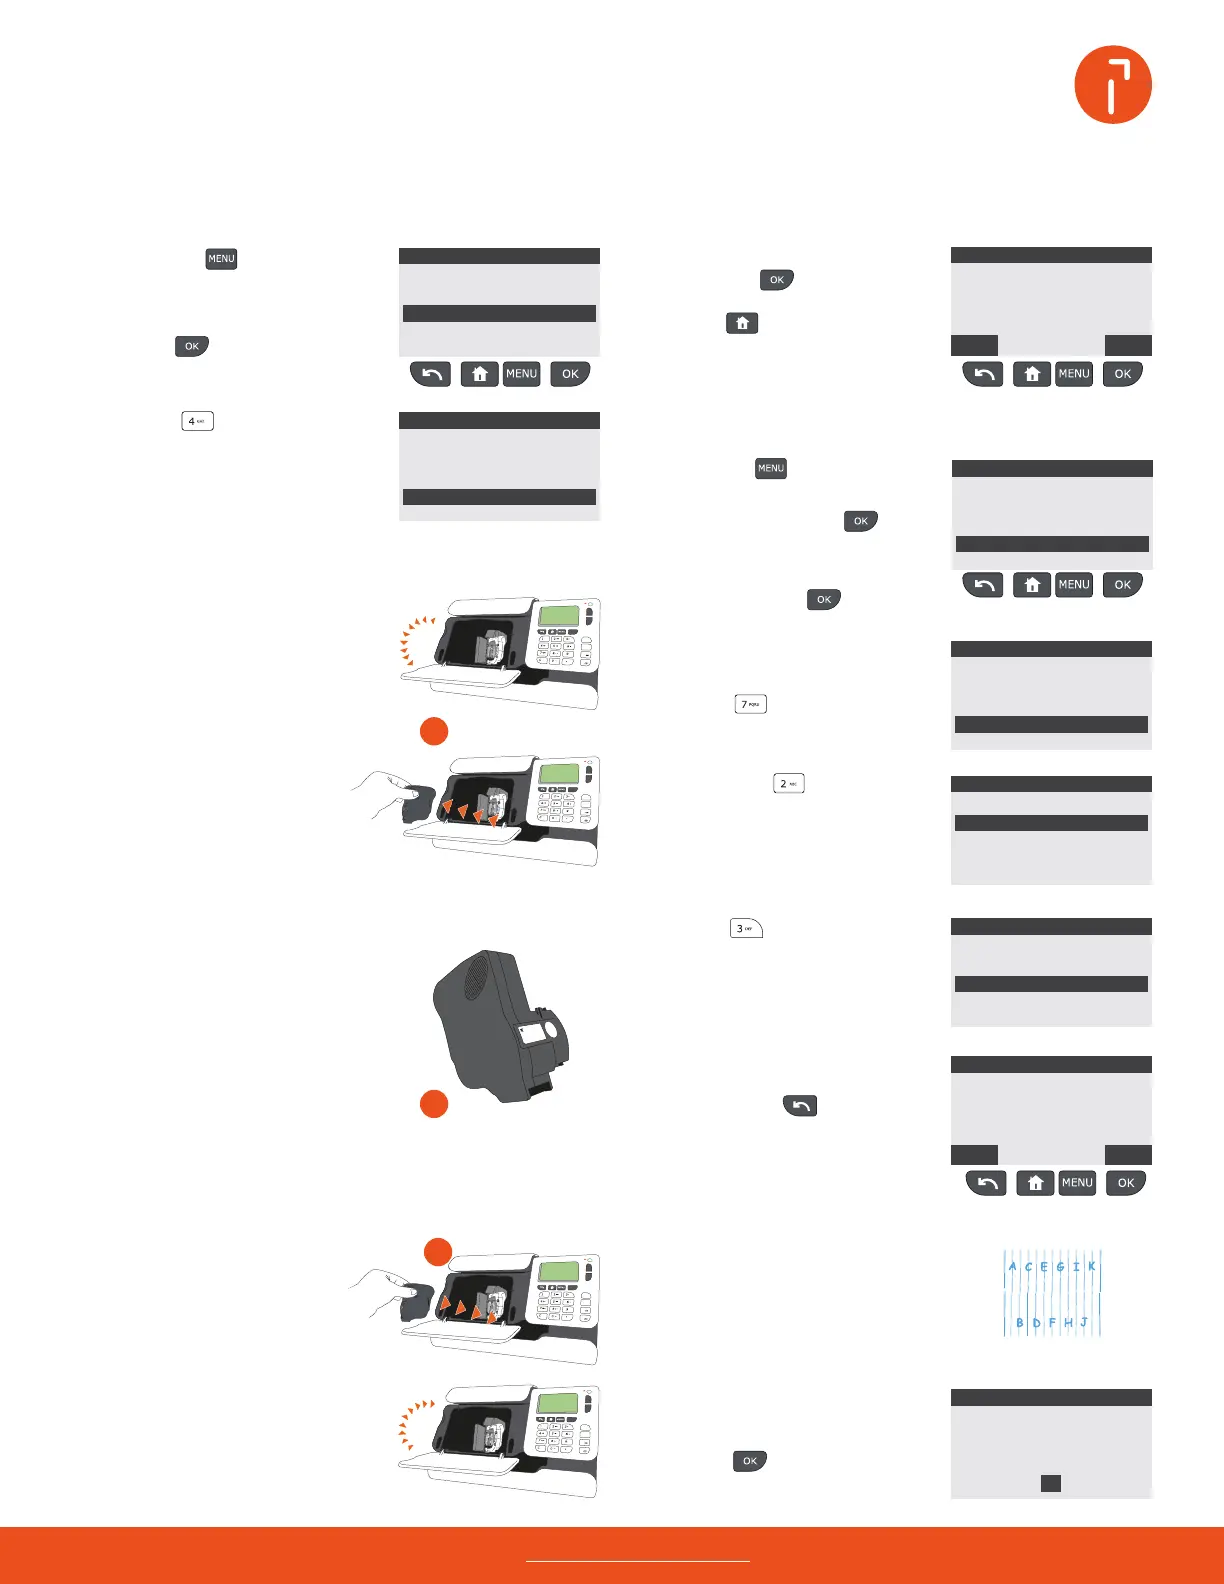
Insert an envelope into the
printing path to complete a test
print or press to quit.
Press to return to the
home screen.
Press , the maintenance
screen will appear.
Enter the supervisor PIN code
09430 and press .
The supervisor main menu will
appear.
Press to move the
current ink cartridge into the
replacement position.
Next, press the scroll up button
to select ink cartridge, then
press .
4 7
6
1 5
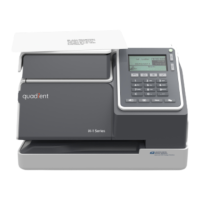
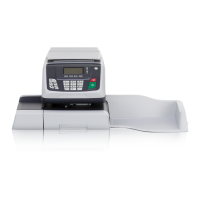
How to replace the ink cartridge
Activate ink cartridge replacement Conrm ink cartridge installation
Test ink cartridge alignment
Align the ink cartridge
2
Remove the old ink cartridge
Open the front cover, then open
the ink cartridge slot by pulling
the blue lever toward you and
pushing it to the right.
Press the key.
Return to the iX-1 control panel
and press .
From the pattern printed, choose
the letter where the top and
bottom lines are most closely
aligned.
In this example, F would be
selected, but it may be a dierent
letter for your iX-1.
Install new the ink cartridge
3
Unpack the new ink cartridge
Remove the cartridge from
the packaging and remove the
protective lm from the print
head.
Using the up and down arrow
buttons, select the letter and
press to complete the
alignment process.
p
Press the key.
Press the scroll up button to select
supervisor, then press .
Insert the ink cartridge, then
turn the blue lever back to
the left until the cartridge is
secured and close the cover.
Press to initiate ink
cartridge alignment process.
Insert the old cartridge into the
replacement cartridge packaging.
Pull the cartridge towards
you to disengage it.
Apply the recycling label and
postage to the outside of the box
and return to Quadient.
Next, press .
c
c
c
To get the most out of your iX-1, visit our how to video hub at kb.quadient.us/iX-1_videos
or login to Myquadient to access the iX-1 user guide.
 Loading...