EasyManua.ls Logo

quadient IS-400 Series - User Manual

quadient IS-400 Series
5 pages
Print Icon
To Next Page IconTo Next Page
Loading...
Because connections matter.
IS/IM/IN-400 Mailing System
Series LAN Conversion
Question and Answer IconNeed help?

Do you have a question about the quadient IS-400 Series and is the answer not in the manual?

Summary

Introduction to Mailer LAN Conversion

Introduction Instructions

Step-by-step guide for converting the mailing system to LAN connectivity.

Manual Mailer LAN Configuration

Manual LAN Configuration Steps

Detailed steps for manually configuring LAN settings using required network information.

Mailer LAN Configuration with Proxy

LAN Proxy Setup (DHCP ON)

Configure LAN with proxy when DHCP is automatically enabled.

LAN Proxy Setup (DHCP OFF)

Configure LAN with proxy when DHCP is manually disabled.

Overview

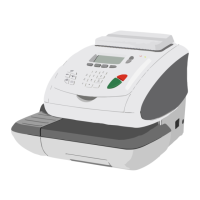
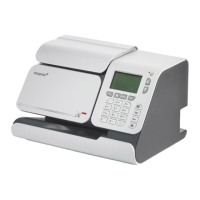
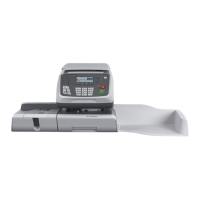
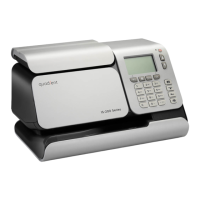
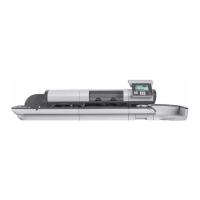
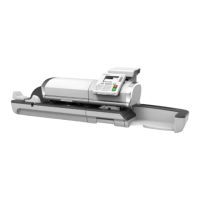
This document outlines the process for converting an IS/IM/IN-400 series Mailing System from modem connectivity to a Local Area Network (LAN) connection. The primary function of this guide is to provide step-by-step instructions for users to establish a stable and functional LAN connection for their mailing system, enabling online services and communication through their network.

The conversion process is divided into several key stages, starting with the initial setup and progressing to more advanced configurations, such as manual IP address settings and proxy configurations. The document emphasizes the importance of a LAN cable for the conversion and provides clear visual aids, such as an image of the LAN cable and the relevant ports on the mailing system, to assist users.

Initial LAN Conversion (Automatic Configuration):

The first set of instructions details the standard procedure for converting to a LAN connection when automatic IP address assignment (DHCP) is enabled. This process begins with powering off the mailing system base and unplugging the existing modem device. Users are then instructed to connect the LAN cable to the designated LAN port on the system. Following this, the system is powered back on, and users navigate through the menu options to configure the communication settings.

Key steps in this initial conversion include:

  • Accessing System Menus: Users are guided to select the "Menu" button, then "Supervisor," and enter a specific PIN code (09430) to access administrative settings.
  • Communication Settings: Within the supervisor menu, users select "Communication Settings," then "Internet (LAN)," and subsequently "Internet LAN Settings."
  • Automatic Configuration: The system is set to "Auto" by pressing "OK" twice, indicating that it will attempt to obtain an IP address automatically.
  • MAC Address Confirmation: Users confirm the MAC address display by pressing "OK."
  • Proxy Setting: The system prompts for "Proxy OFF," which is confirmed by pressing "OK."
  • Power Cycle: A crucial step involves performing a power cycle of the base unit to apply the new settings.
  • Online Services Test: After the power cycle, users are instructed to navigate to "Online Services" and perform a "Generic Call" to verify the connection. This step ensures that the mailing system can successfully communicate through the newly configured LAN.

Manual Configuration of LAN:

For situations where the mailing system cannot connect using default LAN settings, the document provides detailed instructions for manual configuration. This scenario often requires specific network information from a network administrator. The document lists the necessary information, including:

  • Machine IP Address
  • Subnet Mask
  • Default Gateway IP Address
  • Preferred DNS IP Address
  • Alternate DNS IP Address
  • Proxy URL
  • Proxy Port Number
  • Proxy Login Name
  • Proxy Login Password

The manual configuration process largely mirrors the initial steps but diverges when setting the "Internet LAN Settings." Instead of selecting "Auto," users choose "Manual" and are then prompted to enter each piece of network information sequentially.

  • Entering Network Details: Users manually input the IP address, Subnet Mask, Gateway, 1st DNS, and 2nd DNS, pressing "OK" after each entry.
  • MAC Address and Proxy Confirmation: Similar to the automatic configuration, users confirm the MAC address display and the "Proxy OFF" setting.
  • Power Button Depress: A unique step in manual configuration involves depressing the power button twice, with a one-second interval, to finalize the settings.

LAN with Proxy Configuration:

The document also addresses scenarios where the network requires a proxy server for internet access. This section is divided into two parts: one for systems with auto IP address (DHCP) ON and another for systems with manual IP address (DHCP) OFF. Both scenarios assume that the initial LAN conversion steps have been completed up to a certain point (step 15 on page 3 for auto IP, and step 15 on page 4 for manual IP).

For both auto and manual IP configurations with a proxy, the steps involve:

  • Enabling Proxy: Users select "Proxy ON" and press "OK."
  • Entering Proxy Details: Users are guided to enter the Proxy URL, Proxy Port, Proxy domain name, proxy user name, and Proxy Password, pressing "OK" after each entry.
  • Power Cycle: After entering all proxy details, users perform a power cycle of the base unit to apply the changes.

Usage Features:

The mailing system, once connected to the LAN, gains access to various online services. While the document doesn't explicitly list all services, the "Generic Call" step implies functionalities such as:

  • Adding Funds: The concluding statement, "With a successful connection, you are now able to add funds and communicate through your network," highlights a primary benefit of LAN connectivity. This allows users to replenish postage funds directly through the system, eliminating the need for manual updates or external processes.
  • Communication through Network: This broadly refers to any data exchange required for the mailing system's operation, such as software updates, rate changes, or diagnostic information.
  • Enhanced Connectivity: Moving from modem to LAN provides a faster and more reliable connection, improving the efficiency of online transactions and services.

Maintenance Features (Implied):

While the document focuses on conversion, the underlying purpose of establishing a LAN connection contributes to the system's maintenance and operational efficiency:

  • Remote Diagnostics: A stable LAN connection can facilitate remote diagnostics and support from Quadient, allowing technicians to troubleshoot issues more effectively without requiring on-site visits.
  • Software Updates: LAN connectivity enables the mailing system to receive and install software updates automatically or on demand, ensuring the system remains current with the latest features, security patches, and postal regulations.
  • Rate Updates: Postal rates frequently change. A LAN connection allows for seamless and timely updates to postage rates, ensuring accurate postage calculations and preventing over or under-stamping.
  • Improved Reliability: LAN connections are generally more reliable and faster than traditional modem connections, reducing downtime and improving the overall user experience when accessing online services.
  • Network Integration: Integrating the mailing system into the existing office network simplifies IT management and reduces the need for dedicated phone lines for the mailing system.

The document concludes with a congratulatory message, affirming that the mailing system is ready to connect through LAN and encourages users to visit a provided URL for more information, indicating ongoing support and resources for the device. The overall tone is instructional and supportive, guiding users through a potentially complex technical process with clear, actionable steps.

quadient IS-400 Series Specifications

General IconGeneral
TypeDigital Mailing System
ConnectivityEthernet
User InterfaceTouchscreen
Print SpeedUp to 150 envelopes per hour
Supported Media TypesEnvelopes, postcards
Envelope SizeMinimum: 90 x 140 mm, Maximum: 229 x 324 mm

Related product manuals