August 1, 2018 7014-285C 21
CB1200 Pellet Insert
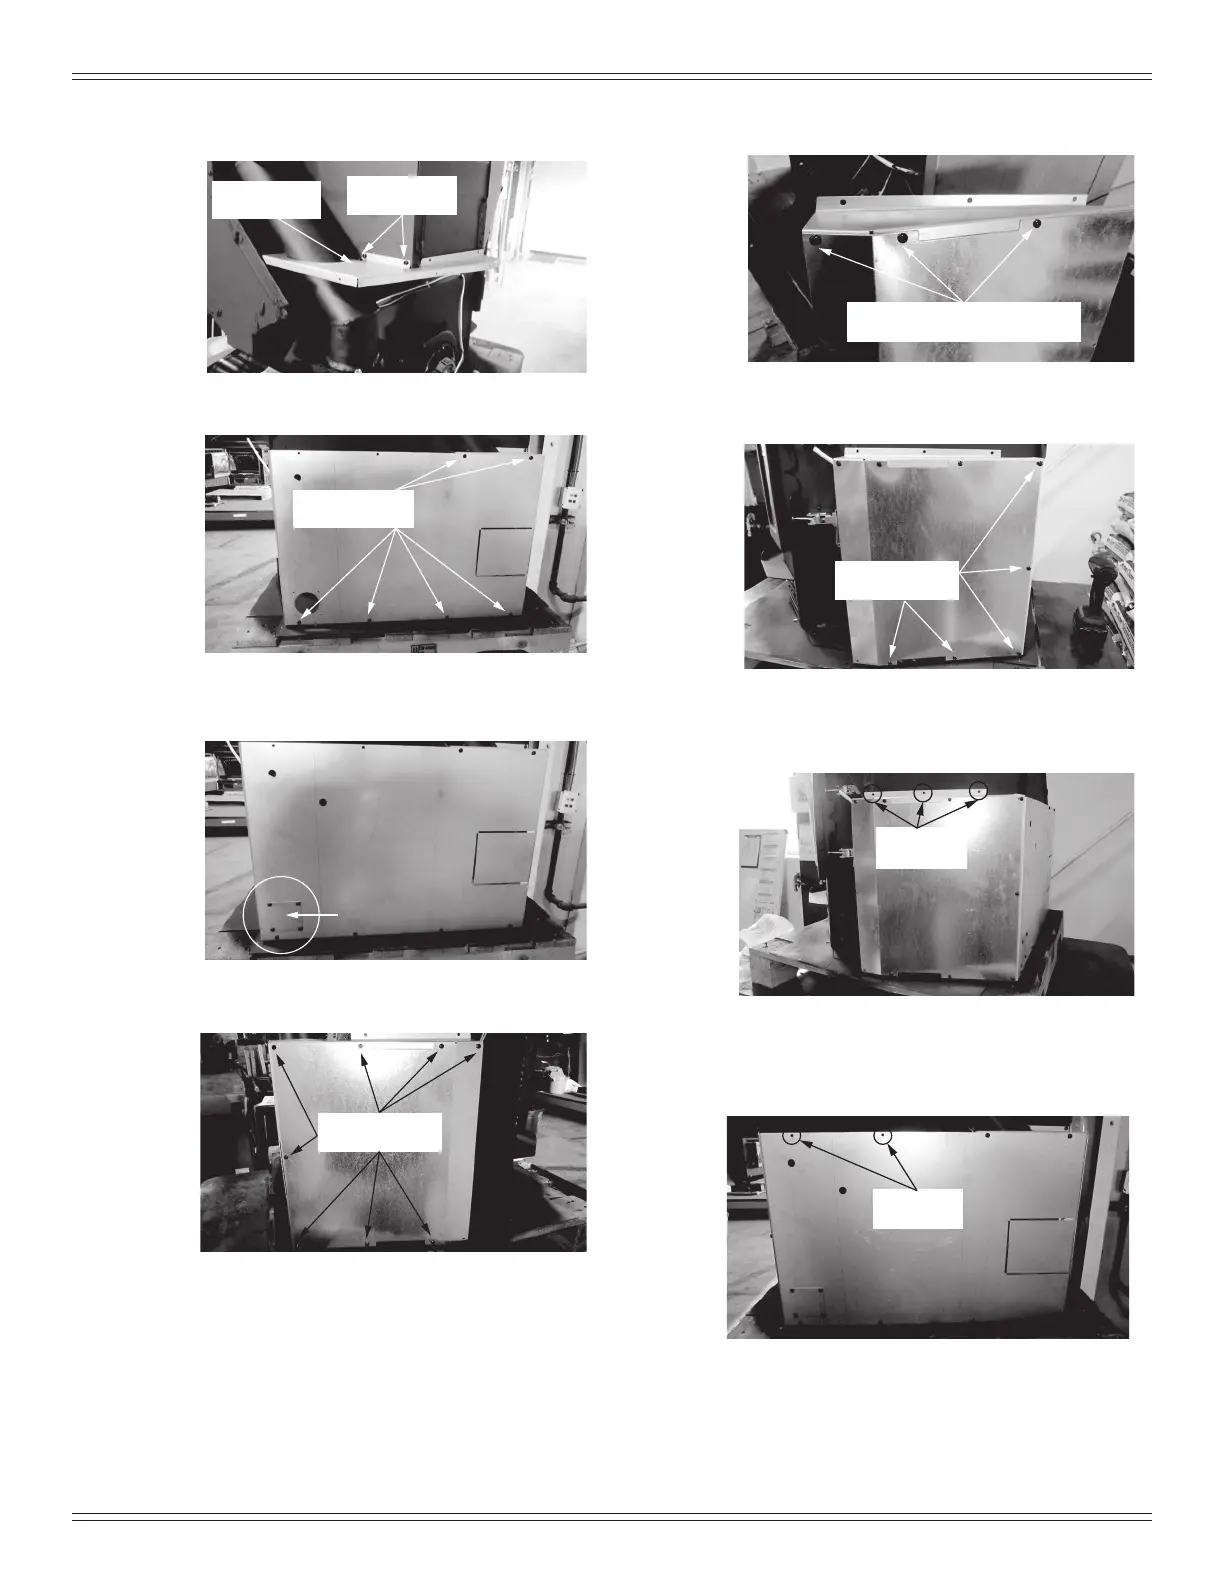
2 screws into
back of hopper
1 screw down
into filler piece
Figure 21.1
Figure 21.2
Figure 21.3
Figure 21.4
6 screws to attach
rear panel
8 screws to attach
left shroud panel
Figure 21.5
Figure 21.6
3 screws to attach right shroud
panel to right shroud corner piece
5 screws to attach
right shroud panel
Figure 21.8
Figure 21.7
4. Install the left shroud panel corner; 2 screws into back
of hopper and 1 screw down into the ller piece (Figure
21.1).
5. Install the Rear Panel using six screws (Figure 21.2).
6. Install the cover plate over the top vent opening using 4
screws (Figure 21.3).
7. Attach the left shroud panel using eight screws (Figure
21.4).
8. Assemble the right shroud panel corner and the right
shroud panel using 3 screws (Figure 21.5).
9. Attach the right panel assembly using 4 screws to
appliance (Figure 21.6).
10. Using the electric drill with #26 drill; bit drill 3 holes
into the hopper. Add three screws to secure shroud
assembly to the appliance (Figure 21.7).
11. Using the electric drill with #26 drill; bit drill 2 holes
into the back of the hopper. Add two screws to secure
shroud assembly to the appliance (Figure 21.8).



 To Next Page