GARNET DIRECT VENT ROOM HEATER
250-6443B October 7, 2003 Page 9
GARNET DIRECT VENT ROOM HEATER
250-6443B October 7, 2003 Page 10
REMOTE CONTROL
A remote control or a wall switch may be wired to the thermostat terminals. Contact your Dealer for details.
Manual Thermostat Part Number 812-3760
Anticipator Setting 1.2
Programmable Thermostat Part Number 811-0520
Recommended Maximum Lead Length (2 wire) when using wall thermostat/switch:
THERMOSTAT INSTALLATION
A thermostat may be installed to regulate the Garnet. It is important
to use a thermostat designed for millivolt operation. Do not connect
the heater to a thermostat serving any other appliance. Bedroom
installation in Canada requires this heater to be connected to a
thermostat.
Connect the thermostat wires to the outside valve terminals labeled
"TH" and "TPTH". Turn the manual switch on the control panel to
"OFF".
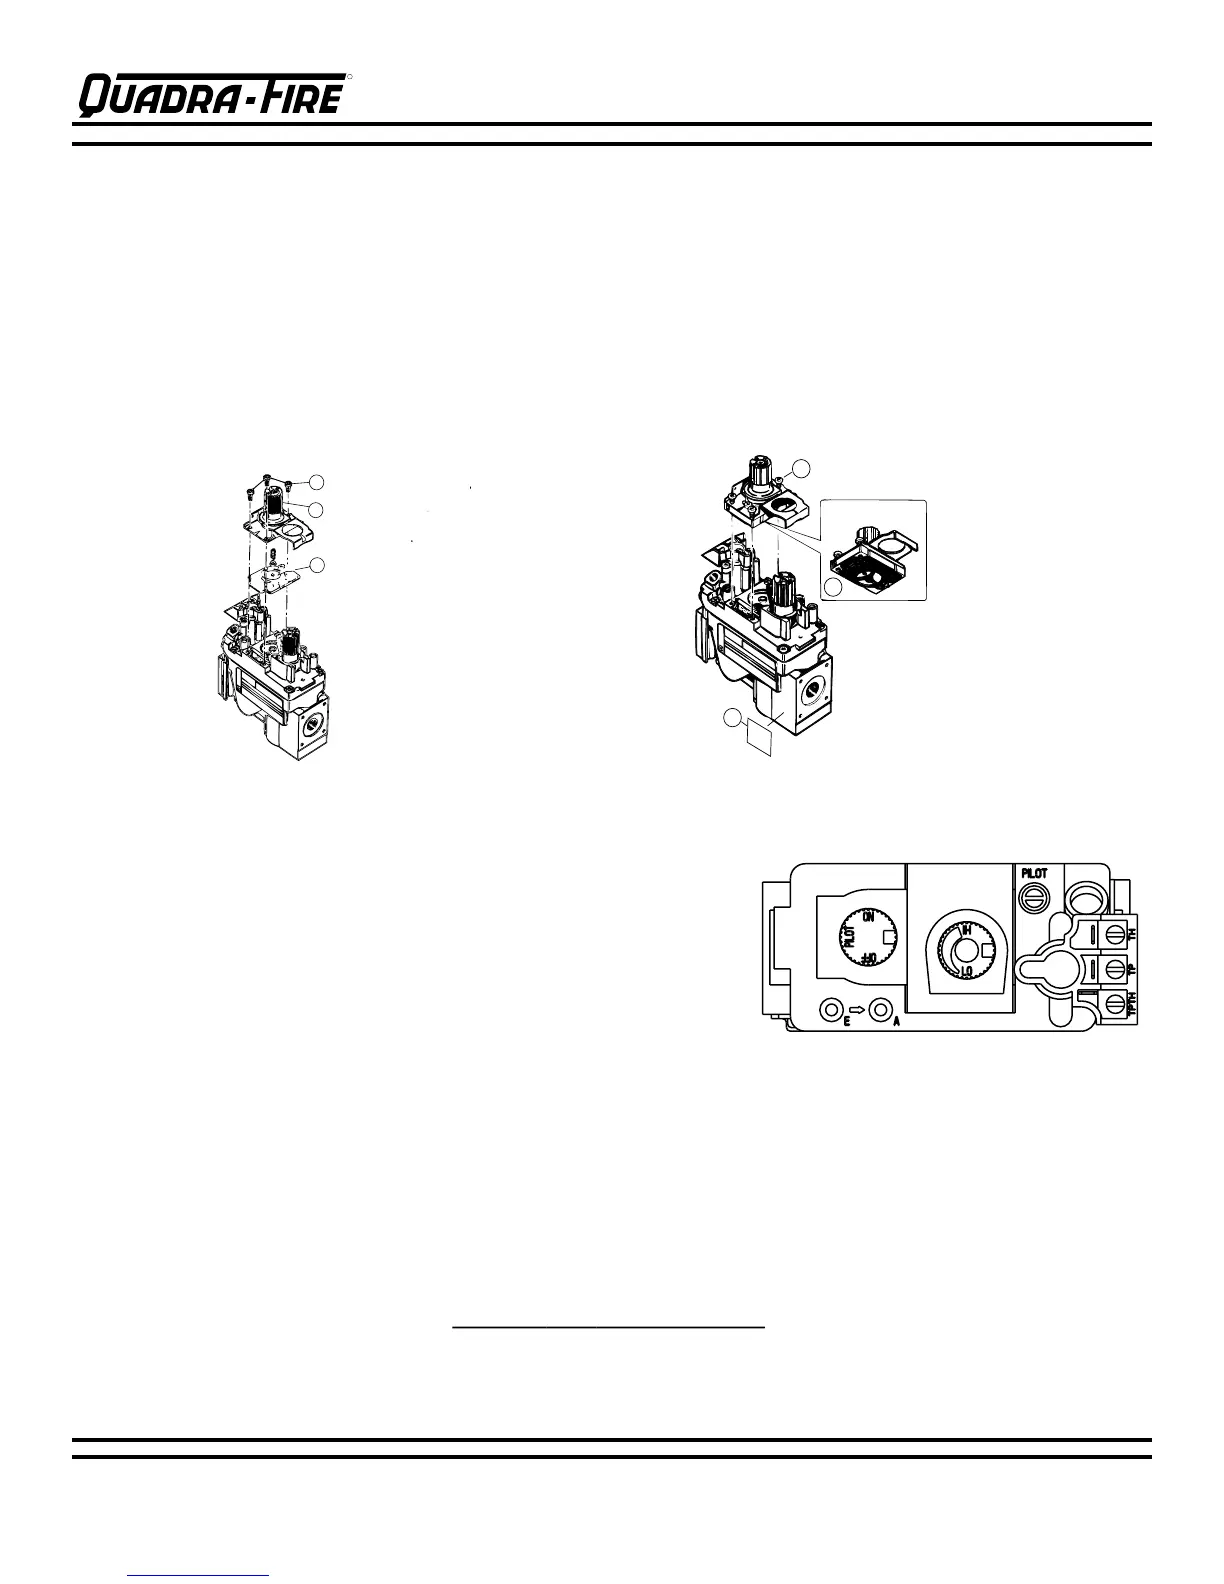
LP CONVERSION (cont'd.)
Valve Regulator Replacement
1. Turn control knob to the OFF position, ensure that gas supply to the valve has been turned off.
2. Using a Torx TH20, or slotted screwdriver, remove the (A) three pressure regulator mounting screws, (B)
pressure regulator tower, and (C) diaphragm.
3. Ensure that the (D) rubber gasket is properly positioned and install the new HI/LO pressure regulator
assembly to the valve using the (E) new screws supplied with the kit. Tighten screws securely. (Reference
torque = 25 in/lb)
4. Install the enclosed (F) identication label to the valve body where it can be seen.
5. Fill out the Conversion Label and attach to the valve cover.
Mounting Screws
Pressure Regulator Tower
Diaphragm
New Screws provided with kit
Rubber Gasket
Identification Label
Wire Size Maximum Length
16 gauge 65 Feet
18 gauge 40 feet
20 gauge 25 feet
22 gauge 18 feet