34 7036-187M August 13, 2018
MT. VERNON AE INSERT
D. Combustion Blower Replacement
1. Follow the Proper Shutdown Procedure as outline on
page 22, Section 4.A.
2. Follow the Removal of Cast Side for Insert Appliance
as outlined on page 30.
Remove Combustion Blower Assembly from
Existing Housing On Appliance
It is not necessary or recommended to remove the
housing to replace or service the combustion blower. You
only need to remove the motor and impeller.
3. Disconnect the wire from the control board connection
points #1 and #8. Depress the tab on the connector to
disconnect the wire (similar to a telephone connector).
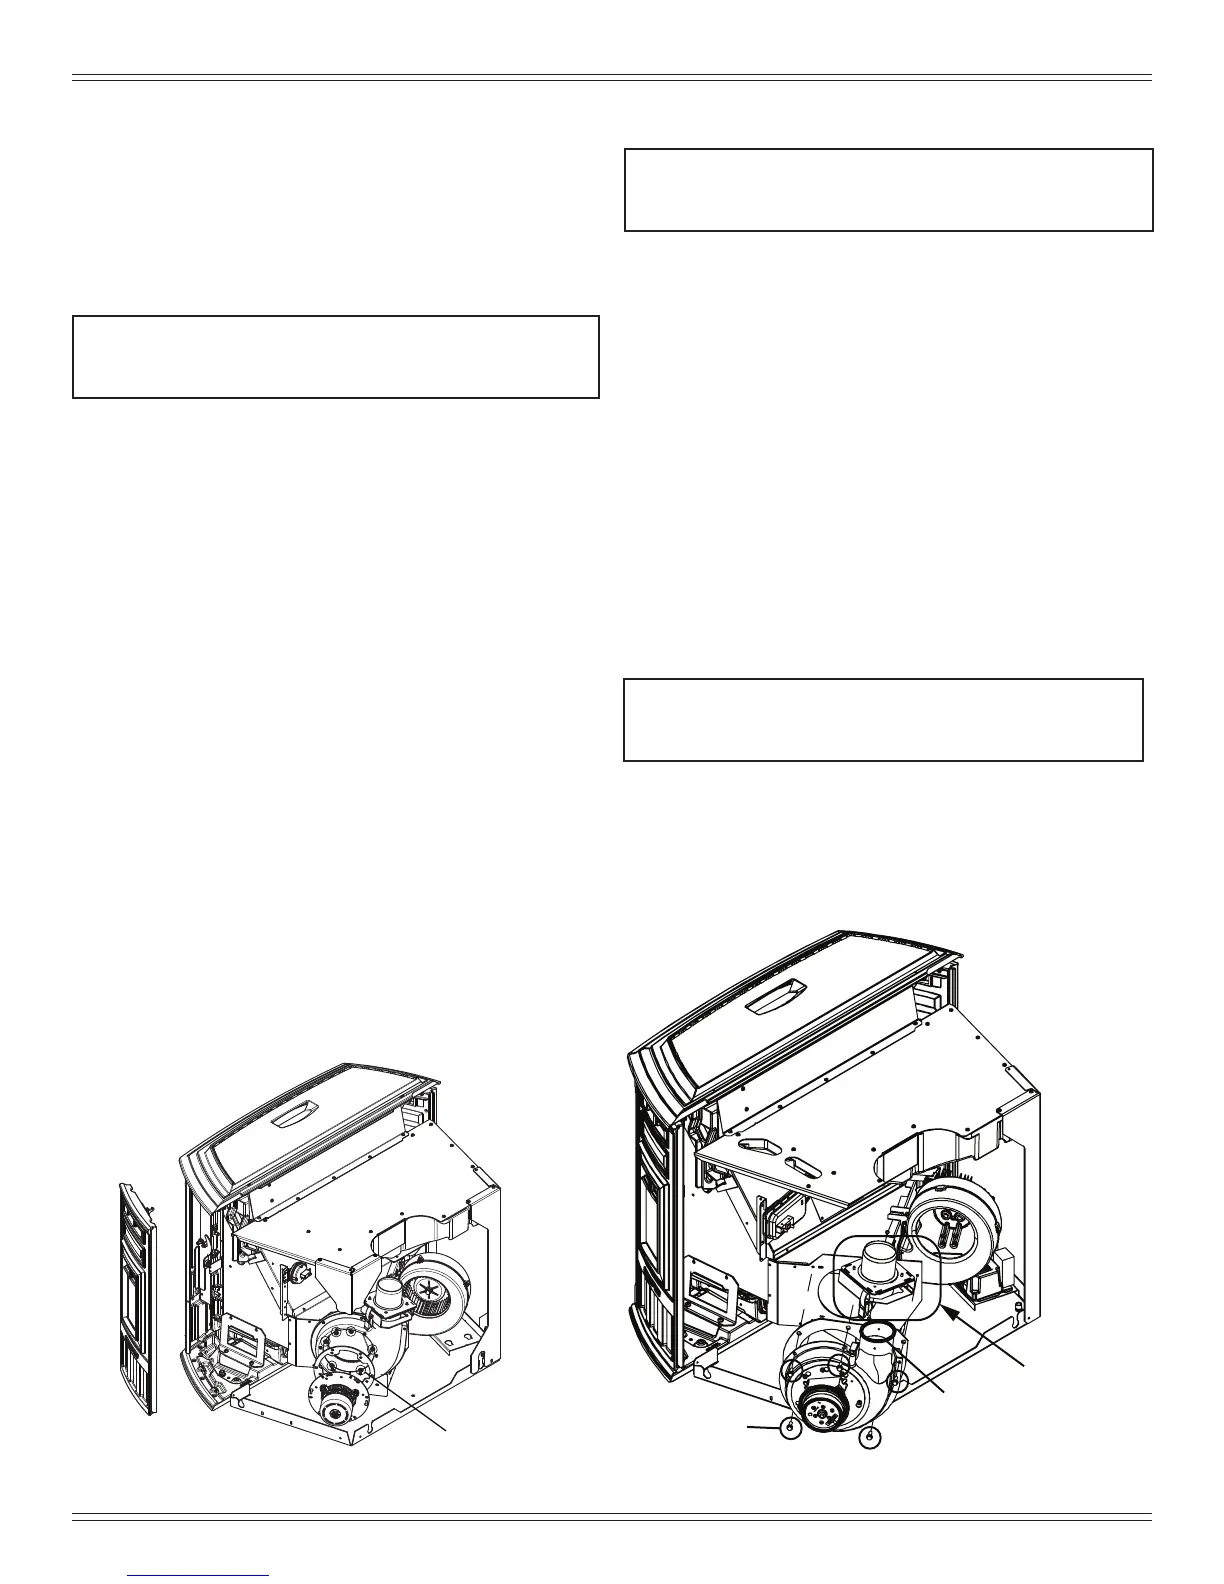
4. Loosen fasteners of blower motor and impeller (Figure
34.1):
5. Holding the body of the motor, rotate the impeller
counter-clockwise until the blades line up with the
opening in the housing and remove the motor and
impeller (Figure 34.1).
6. If the gasket between housing and motor is damaged
it will have to be replaced. A gasket is included with the
replacement blower.
Remove Combustion Blower Assembly from
New Housing from New Service Kit
7. Using a Phillips head screwdriver, loosen the (6)
screws securing the motor and impeller to the housing.
8. Holding the body of the motor, rotate the impeller
counter-clockwise until the blades line up with the
opening in the housing and remove the motor and
impeller.
9. Add this motor and impeller in the place of the old
inside the housing on the appliance.
10. Secure motor and impeller with (6) screws.
11. Reconnect wires to control board and plug in appliance.
(5) bolts
Exhaust
transition
Silicone
Figure 34.2
Figure 34.1
Replacing Combustion Blower and Housing
Assembly
This procedure is not recommend due the difculty that
is involved. Use this method only if your housing to your
blower is damaged.
1. Follow the Proper Shutdown Procedure as outline on
page 22, Section 4.A.
2. Follow the Removal of Cast Side for Insert Appliance
as outlined on page 30.
3. Remove stove pipe from appliance. You will need to
pull appliance out away from wall. Remove stove pipe
from appliance.
4. Disconnect the wire from the control board connection
points #1 and #8. Depress the tab on the connector to
disconnect the wire (similar to a telephone connector).
5. Using a utility knife cut silicone around joint of exhaust
transition at the seem; set exhaust transition aside
(Figure 34.2).
6. Using a 3/8 socket, remove the (5) bolts securing the
blower to the appliance; set bolts aside and discard old
blower (Figure 34.2).
7. Using high temperature silicone, seal seam between
new blower and exhaust transition (Figure 34.2).
NOTE: If exhaust transition and blower are not sealed
properly; room may ll with smoke or soot,
which may cause property damage.
8. With new blower in hand line up gasket with hole and
secure with bolts from step 6 (Figure 34.2).
9. Reconnect wires to control board,install stove pipe, and
plug in appliance.
 Loading...