INSTALLATION
Harmony Ball Return Manual – 400-254-022 13 Rev. Date 3/16
9. Install the access
door latch bracket
to the top-center
of the rack-bezel
support using one
cap screw (809-
849-100).
10. If purchased, install
the reset buttons
(612-300-266)
before securing the
bezel to the rack-
bezel support.
Refer to the Reset
Button Installation
Instructions (400-
254-003)
11. Install the bezel to
the rack-bezel
support using four
cap screws (809-
849-125), four lock
washers (951-148-
008), and four flat
washers (948-753-101). Secure the ball stops (254-001-018) to both sides of the opening in
the bezel with screws (822-626-081).
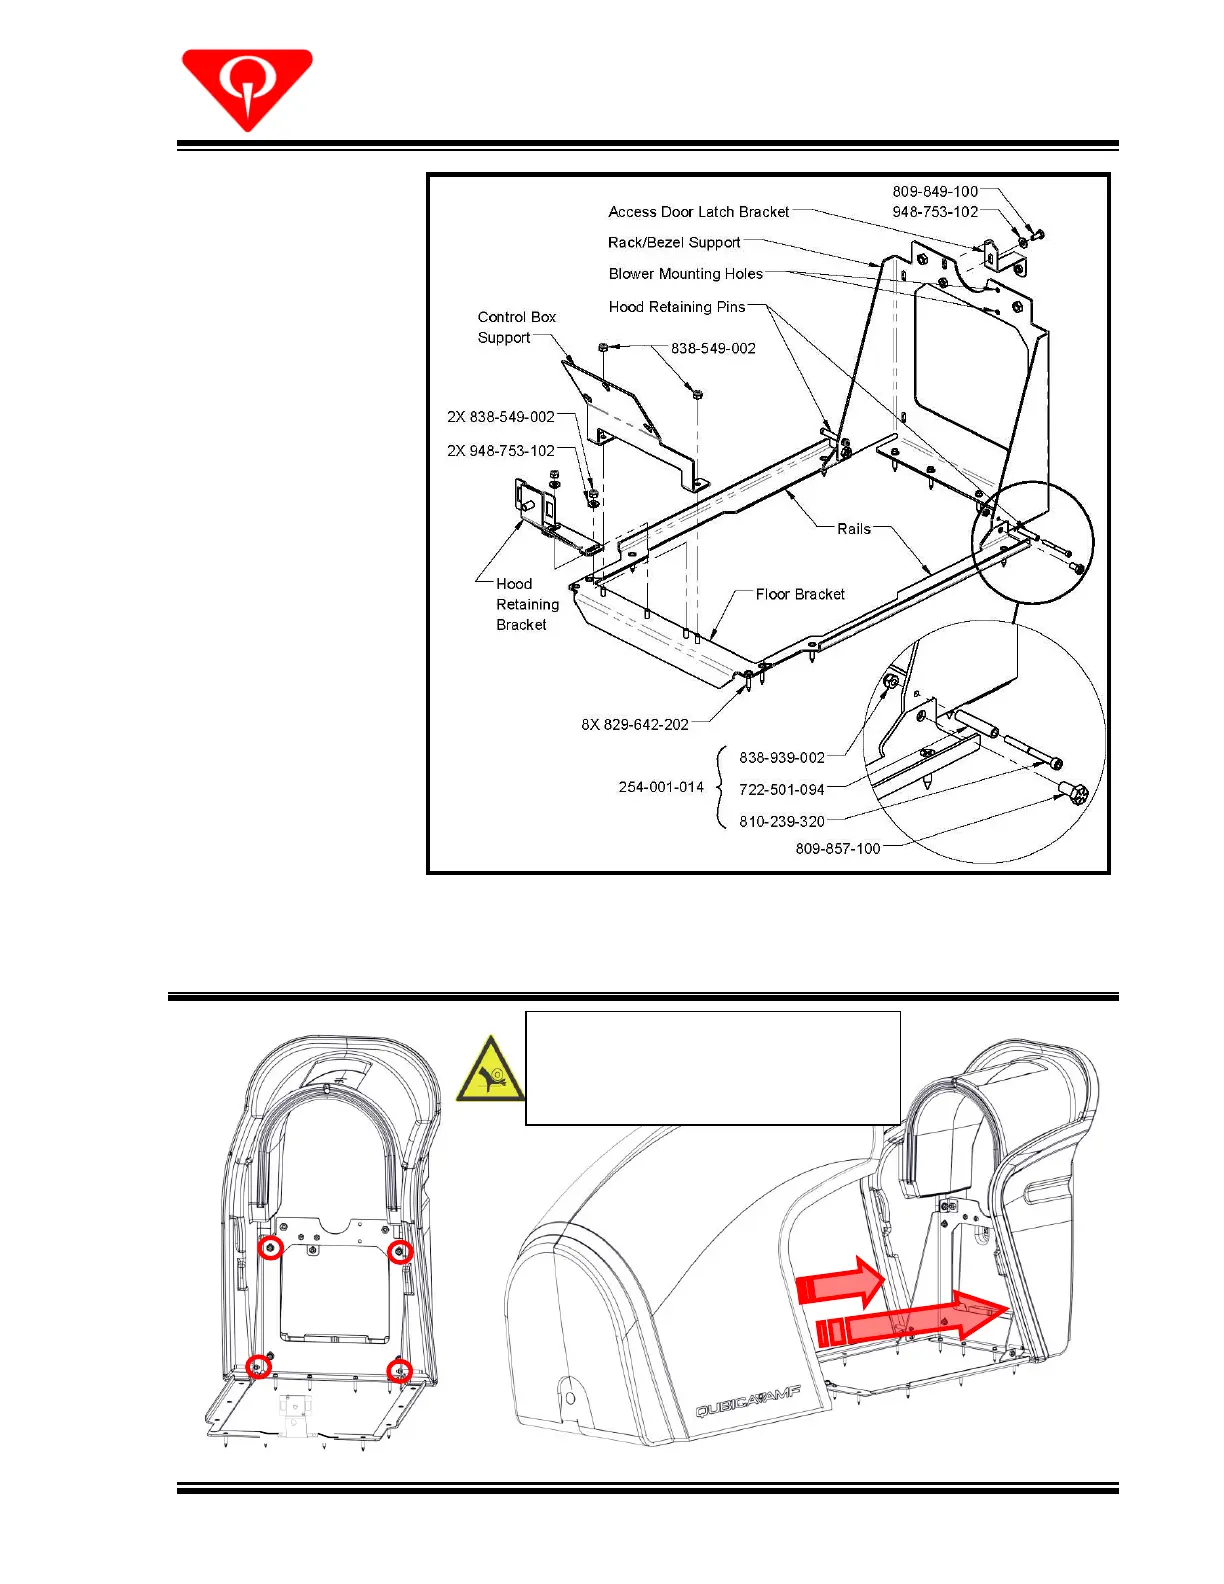
Figure 9, Hood to Base Connection
A pinch hazard exists between the hood
and bezel! Ensure that the two items fit
snugly together and do not allow room
for fingertips to be pinched!
 Loading...