15
1145094-W2-D
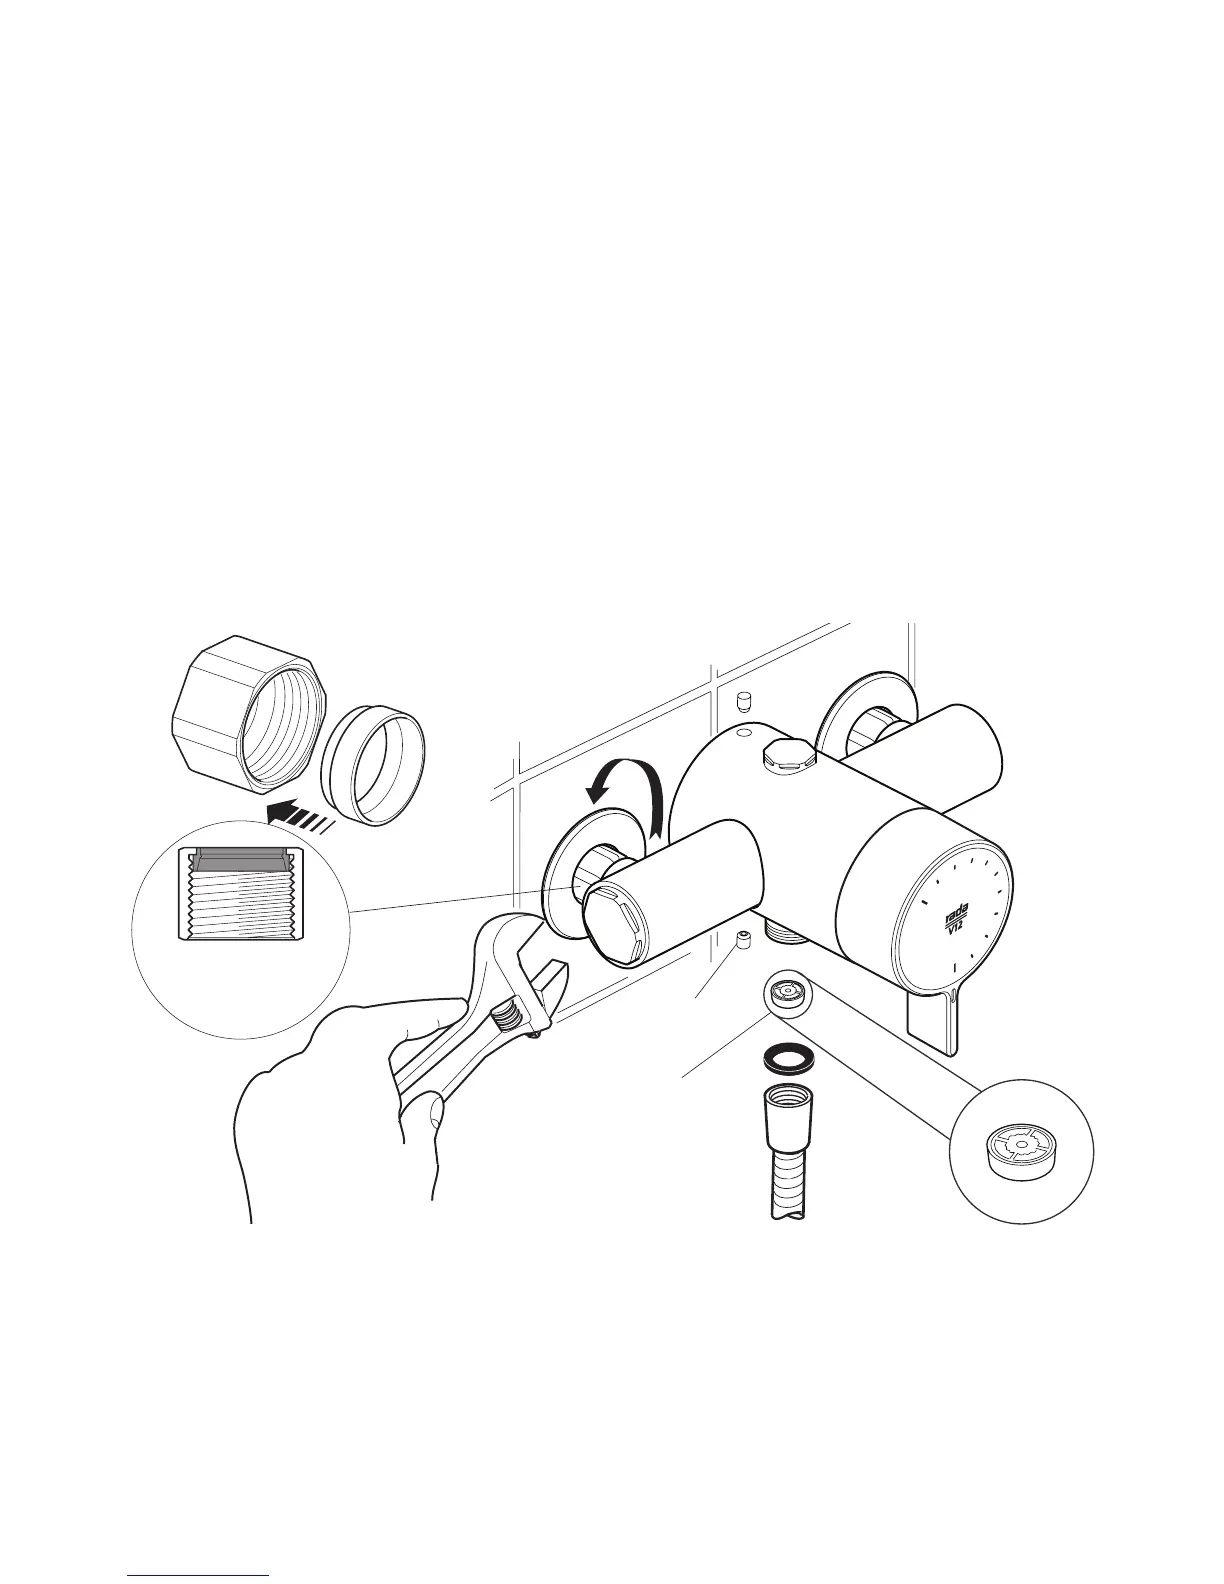
6. Loosen the grubscrews with the 2.5 mm hexagon key (supplied) and remove
the backplate from the mixer.
7. Secure the backplate to the wall using the screws (supplied).
8. Fit the concealing plates.
Note! Apply silicone sealant to the back face of the ange.
Caution! It is essential at this point that the supply pipework is thoroughly
ushed through before connection to the mixer. Failure to do so may result in
product malfunction.
9. Fit the compression nuts and olives onto the pipework.
Note! Make sure that the nuts and olives supplied are used to ensure
correct function of the ‘Insutech Technology’.
10. Align the mixer with the pipework and t onto the backplate.
11. Tighten the compression nuts onto the mixer with a suitable spanner.
Caution! Take care not to damage the chrome surfaces.
Note! Make sure the compression nuts are fully tightened (approx 1 1/2 turns
from nger tight).
12. Tighten the grubscrews to secure the mixer to the backplate.
13. Fit the Shower Fittings, refer to your Shower Fittings Product Manual for
Instructions.
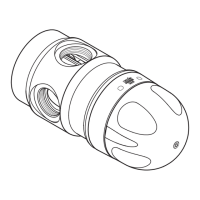
Note! For high pressure systems, a 6 (Black) or 9 (Orange) litre/minute ow
regulator (supplied) can be tted in the outlet connector (refer to illustration).
14. Turn on the hot and cold water supplies and check for leaks.
15. Before using the shower, refer to section: ‘Commissioning’.
Flow Regulator
(for high pressure
systems)
Grubscrew
Hot
Cold
Make sure the plastic
insert is fitted correctly
inside the nut