16
1145094-W2-D
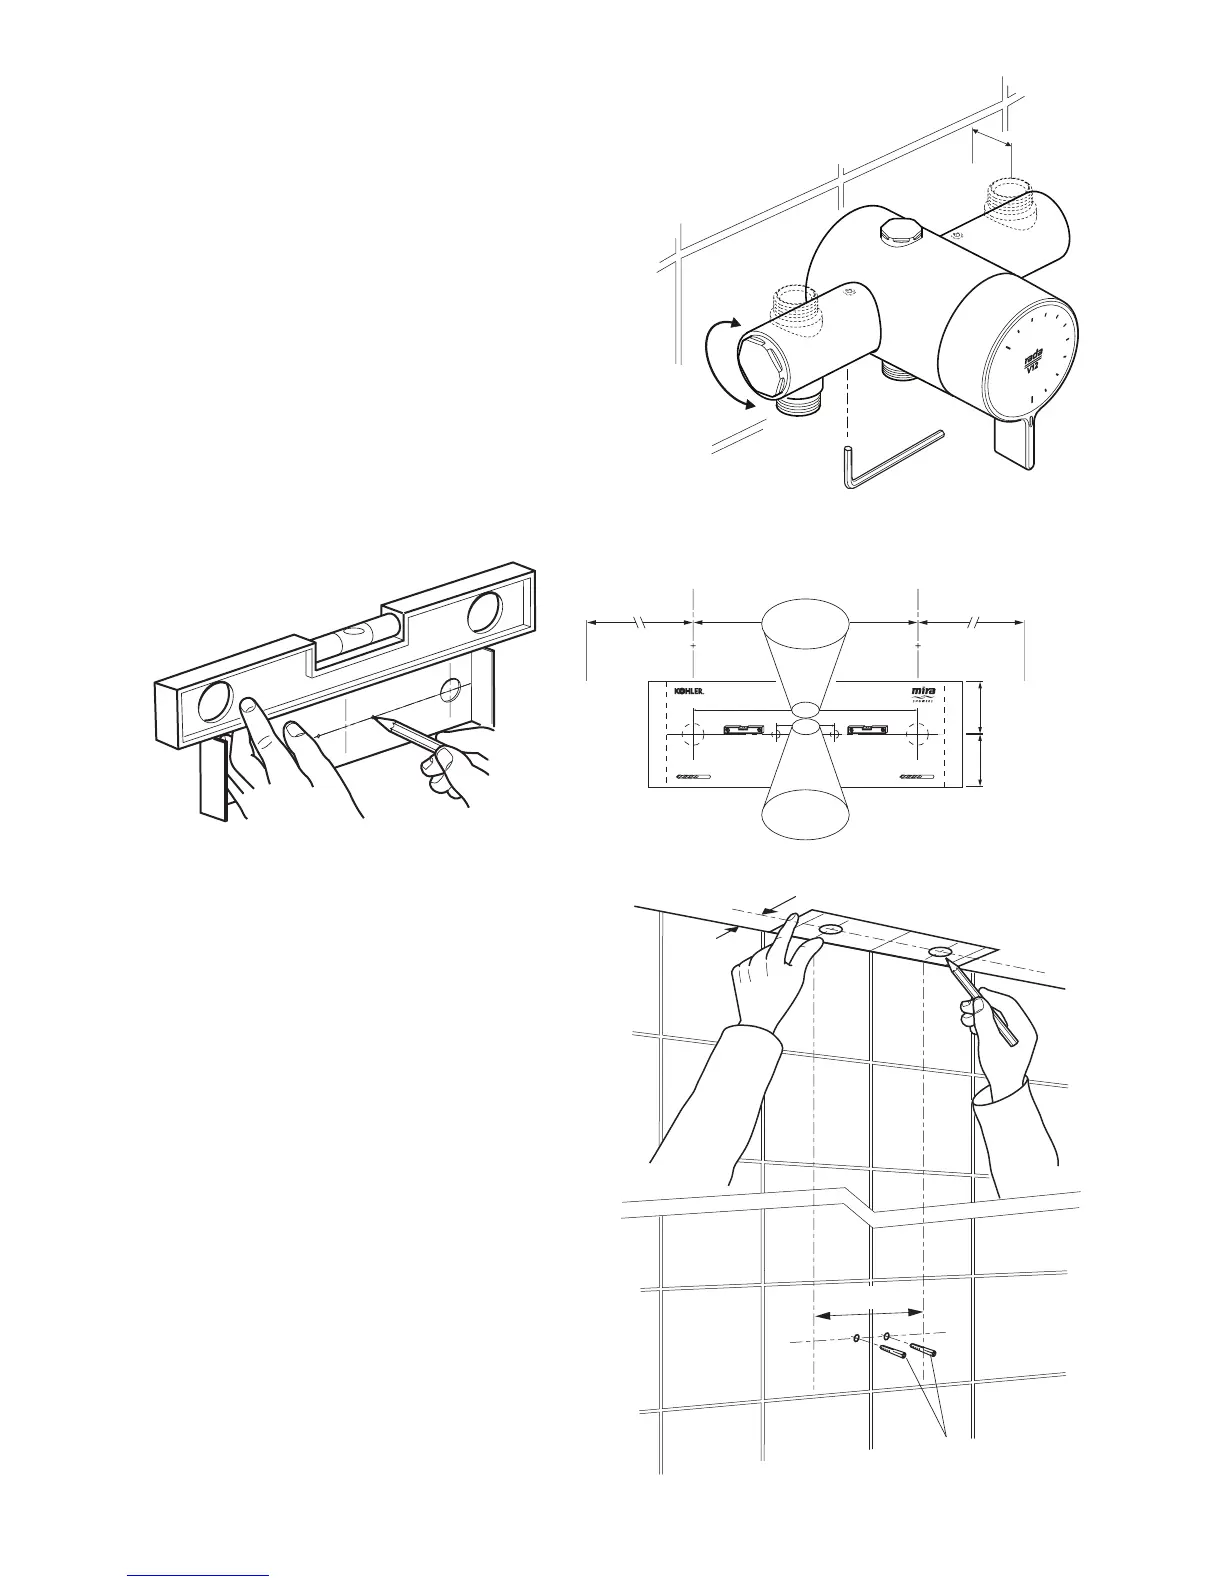
Rising or Falling Supplies
35 mm
1. Loosen the grubscrew on each
elbow using the 2.5 mm hexagon key
(supplied) and rotate the elbow 90° as
required. Retighten the grubscrews.
2. Use the Installation Template to mark
the positions of the xing holes for the
backplate.
Note! Allow a minimum of 150 mm
either side of the mixer, to allow
access to the hot and cold Inlet lters
for servicing.
Wall Plugs
40 mm
153 mm
Shower Control
Backplate Fixing Points
(Ø6 mm)
Bend tabs inwards
Use as a support for the spirit level
Bend tabs inwards
Use as a support for the spirit level
Hot Supply Inlet
(Ø15 mm)
Make sure that supply pipes are thoroughly flushed through
before connection to the shower control
Cold Supply Inlet
(Ø15 mm)
153 mm
150 mm 150 mm
40 mm
35 mm
35 mm
35 mm
3. For solid walls drill the holes for
the backplate with a 6 mm drill and
insert the wall plugs (supplied).
For other types of wall structure
alternative xings may be required
(not supplied).
4. For Falling Supplies: Using the
Installation Template as a guide,
mark the pipe positions on the ceiling
and set the centres 35 mm from the
nished wall (refer to illustration).
For Rising Supplies: Using the
Installation Template as a guide,
mark the pipe positions and set the
centres 35 mm from the nished wall.
153 mm