22
8. Adjustment of Georadar
Before you start sounding, be sure to correctly adjust Georadar operation modes. With some
practice, this procedure will take you no more than a minute.
8.1. Connect an appropriate antenna (antennas), battery (if needed) and computer with installed
“Prism2” to the Georadar (see Georadar User’s Manual). Warning! Do not connect or
disconnect cables while Georadar is switched ON! Set the antenna (antennas) in its
working position.
8.2. Switch Georadar and computer ON. If you use wireless connection please make sure your
computer has established wireless connection with corresponding georadar (Zond-12e or
Python) wireless network and only then launch Prism2 software. Enter option Radar/Start
or use Ctrl+A buttons combination. From this instant and up to returning back to the Main
Menu, all control shall be made from the keyboard only (if Tablet Controls are not
enabled see 7.4). This is made specifically for convenient use of the computer in the field
condition. In the Data Acquisition dialog box, use keys
and
to select Setup and press
Enter or Space.
Note: When Georadar is being switched ON, all of its parameters are in random positions.
When the Georadar Adjustment dialog box is entered, "
Prism2
" sets all Georadar parameters
in some definite stored position. Therefore, to avoid confusion, first switch Georadar ON, and
then enter the Georadar Adjustment dialog box, and not vice versa. Otherwise, the software pop-
ups the Error message.
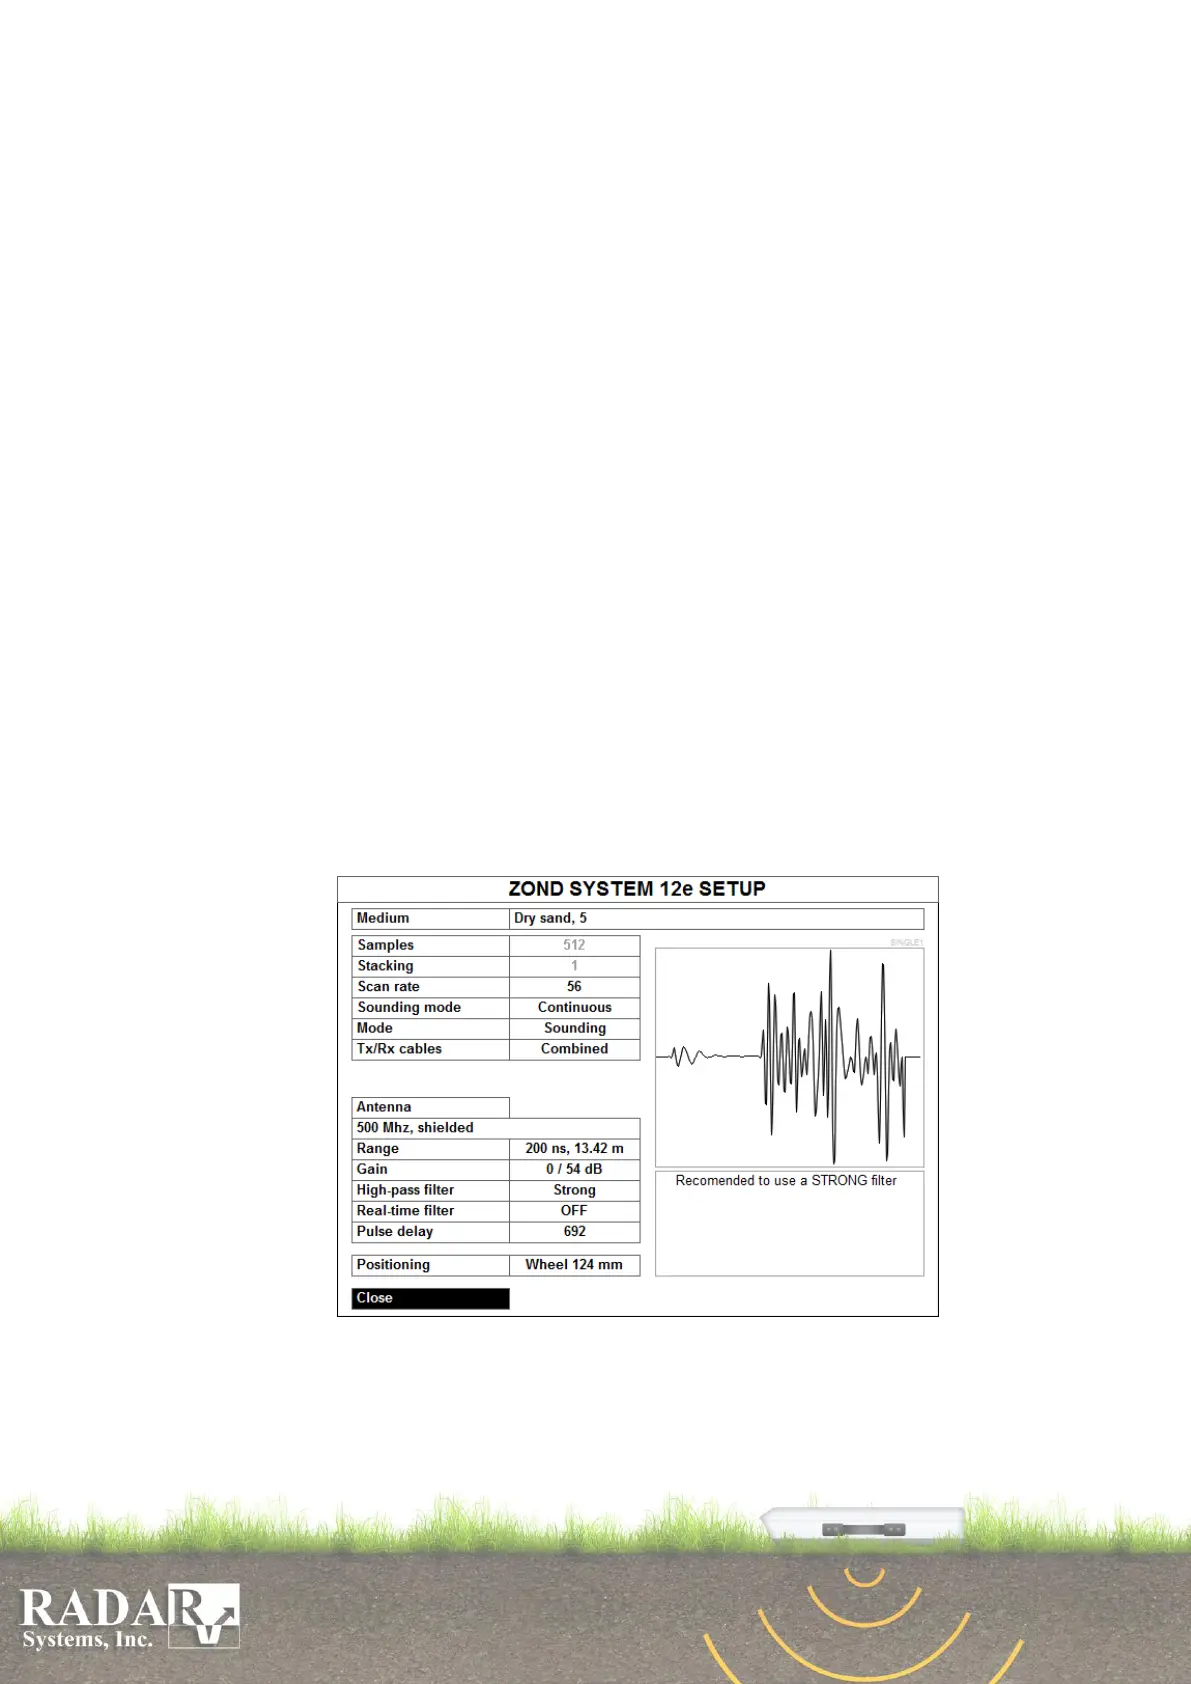
8.3. Once Radar/Start/Setup is activated, the screen shows ZOND SYSTEM 12e SETUP
Georadar Adjustment dialog box. An example of single channel georadar setup window is
shown on fig. 8.1a, but double channel – on fig. 8.1b.
Fig. 8.1a. Single channel georadar adjustment dialog box.
The left-hand window contains the Georadar Control Menu, and the small right-hand
window accommodates permanently alternating traces being received. Below, under the
signal window, auxiliary information and some recommendations are displayed. Please