P1520 User Guide
Version 1.2 17 04/02/07
the application to the operating system and shut down gracefully through the operating system (see #2
below)
2. Properly shut down your operating system. For Windows operating systems (XP-Embedded and XP-
Professional), you can do this by selecting Shut Down from the Start menu.
NOTE: The above steps may vary depending on your installed operating system and software application.
3. If proper shutdown through the software application or operating system is not achievable. Then, press the
“On/Off” button located on the I/O connectivity panel at the bottom P1520. This will create an operating
system shutdown.
4. If none of the options above are responding or simple not available, then unplug the terminal from the
outlet. Note: This should be avoided at all times to avoided operating system corruption due to hard power
loss.
Optional Mylar Overlay on the P1520 Resistive Touchscreens
Resistive touch screens wear over time, as do other input devices such as keypads and keyboards. To preserve
the touch screen, Radiant offers a thin, mylar overlay affixed over the touch screen for protection. This overlay
is similar to those used on Personal Digital Assistants (PDA) found in the consumer market for touch screen
protection. The overlay is easily field replaceable and provides an effective way to extend the touch screen life.
The part number is P770F001 for a pack of 4 replacement overlays when the overlay becomes worn or needs
replacement.
Benefits
• Protects touch screen from wear and prolongs touch screen life
• Protects touch screen from indentions of sharp objects such as pens
• Reduces terminal returns and increases uptime at site
• Field replaceable when touch screen shows cosmetic degradation
• Installation instructions printed on each overlay
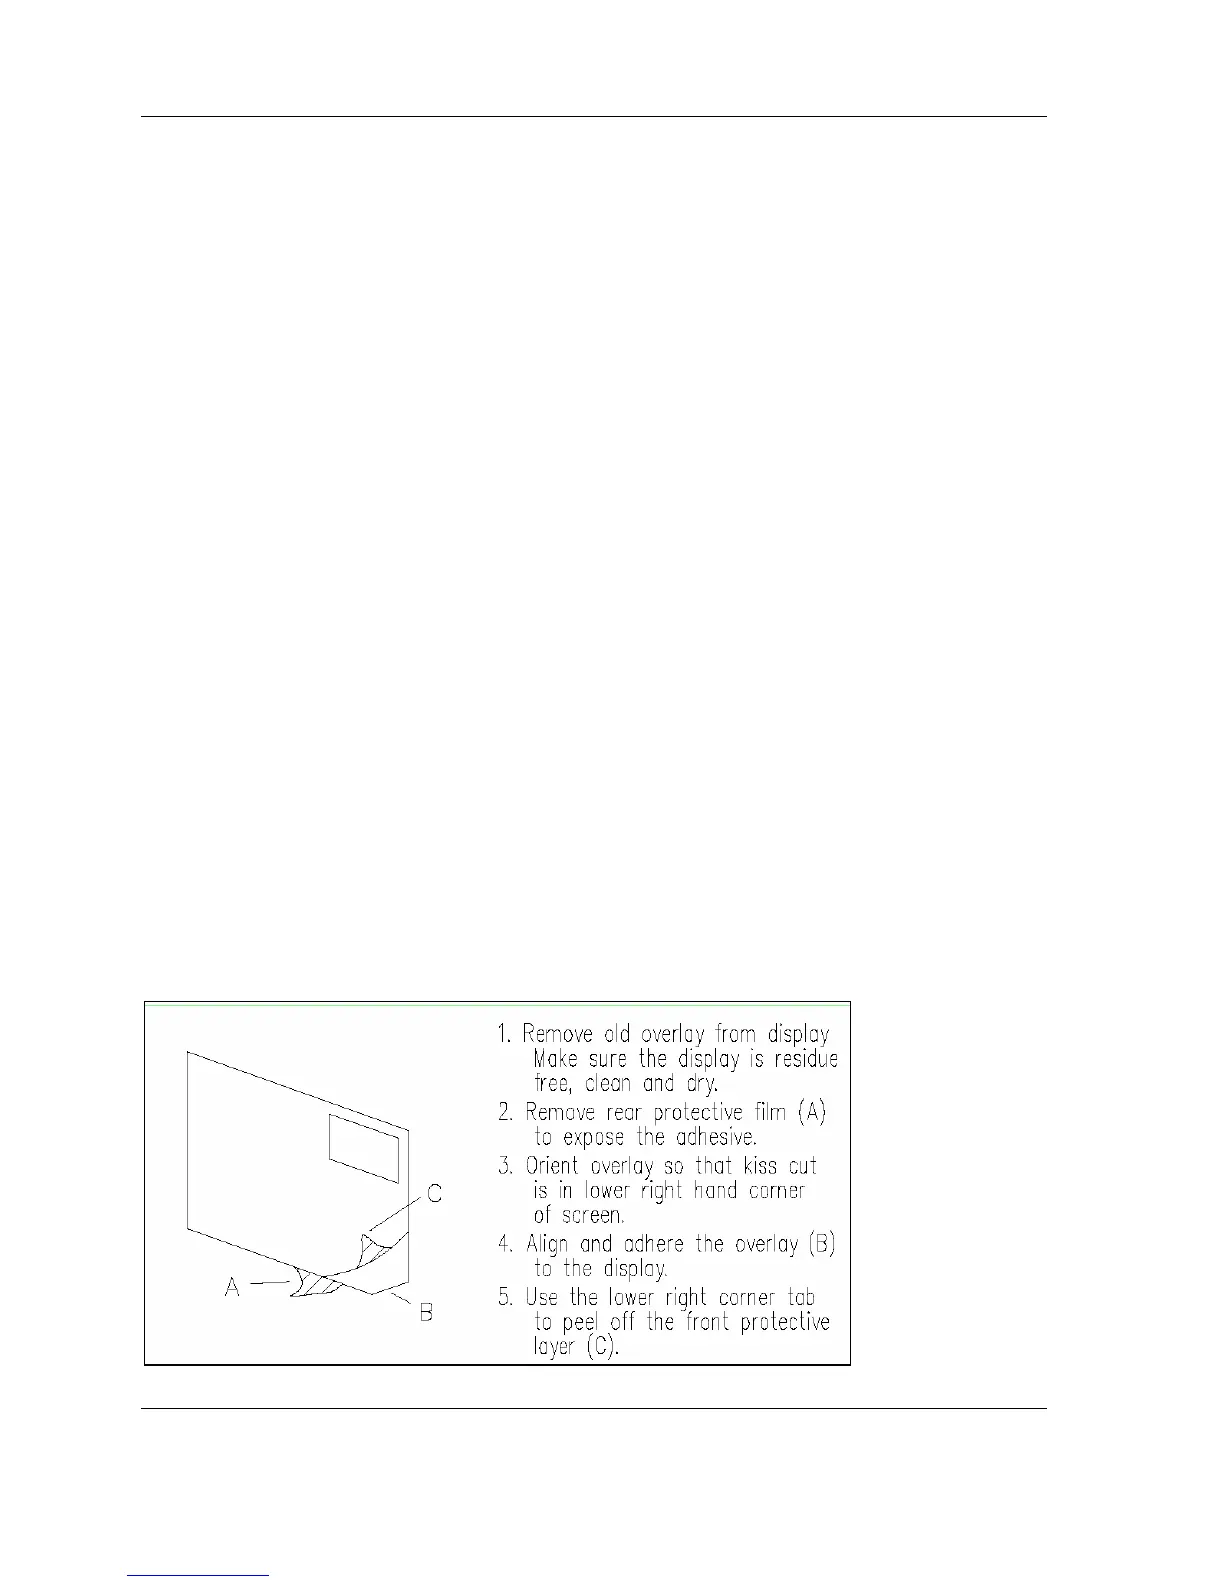
Installation Instructions
Below are the installation instructions which are printed on the label attached to each replacement overlay.